HOW TO CAPTURE LONG-EXPOSURE OUTDOOR LIGHT PAINTING
Capturing an outdoor light painting can prove to be an interesting challenge that yields amazing results. The window of opportunity you have to capture your image is fleeting and you need to be ready. Outdoor light painting is best captured during blue hour (just after sunset / before sunrise) which only gives you between 20-30 minutes. While you may be stressed for time, the results can be breathtaking.
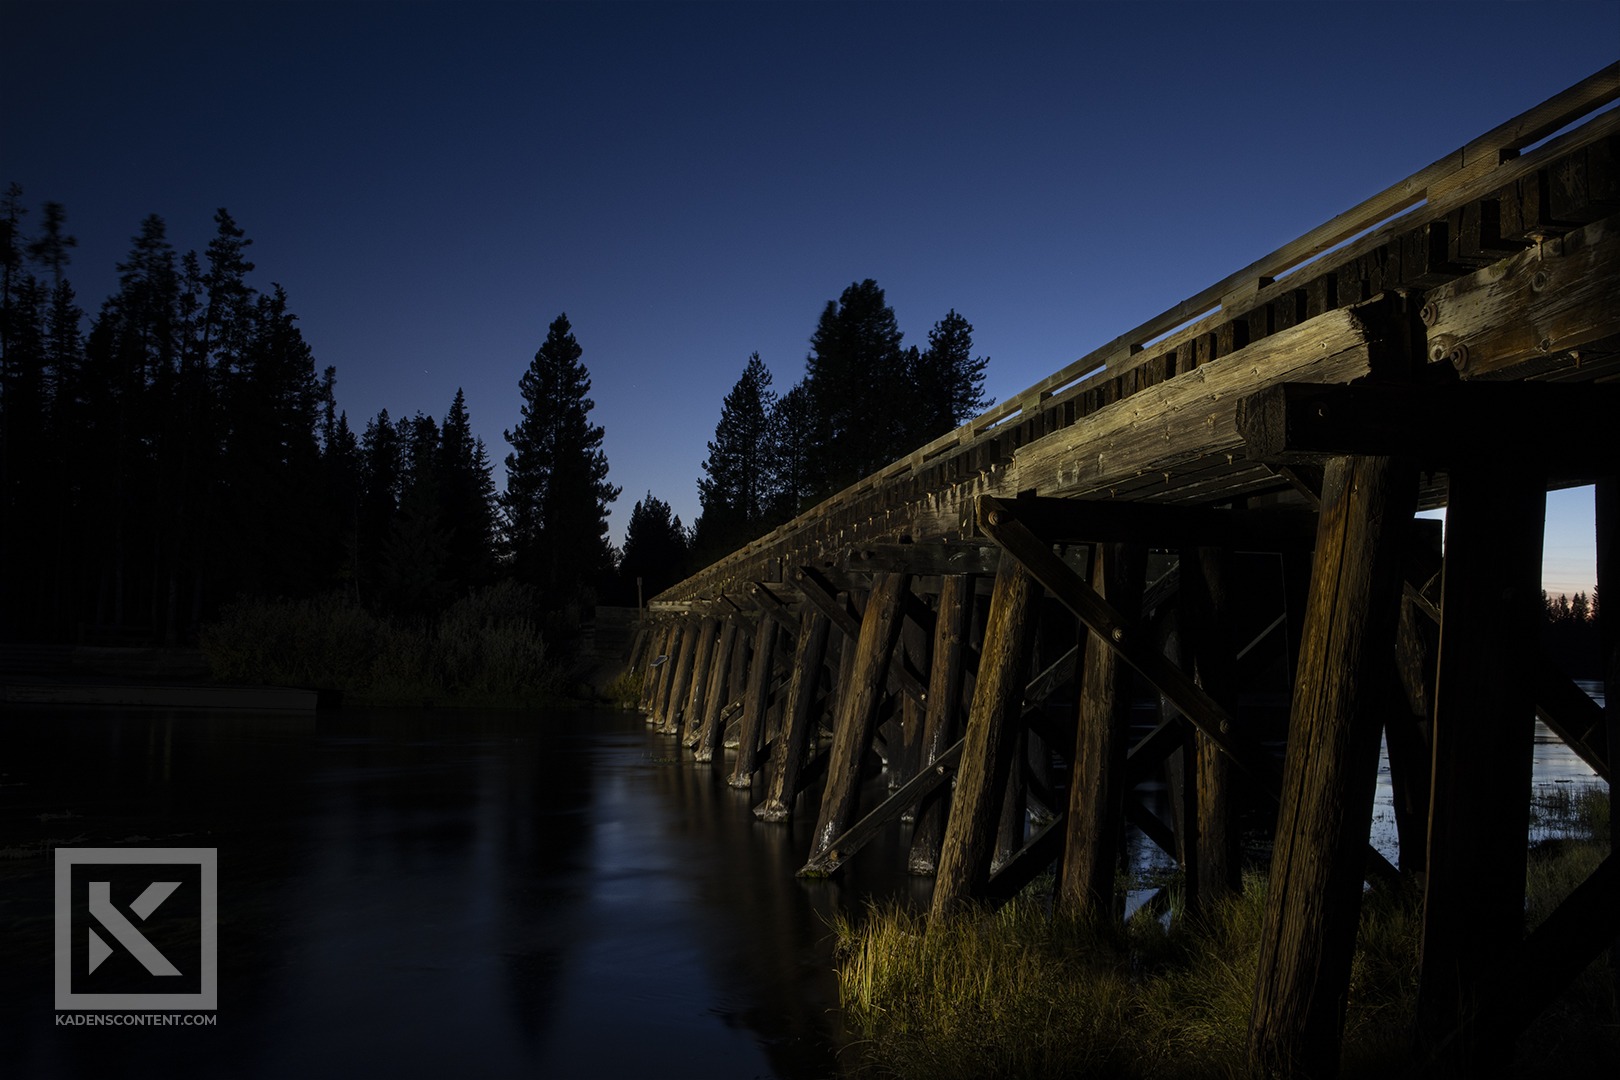
PAINTING BLUE HOUR
Capturing the above outdoor light painting was a real adventure. I waited in the freezing moments after sunset when the sky turned a deep blue. Once the sky turned a perfect color, another photographer waited out into the water with a high-powered flashlight. Similar to indoor light painting, once I opened the shutters of my camera, we shined the flashlight on the trusses supporting the bridge. With the right settings, in one shot I managed to capture both the rich blue sky and the amazing details of the bridge.
PAINTING CREATIVELY
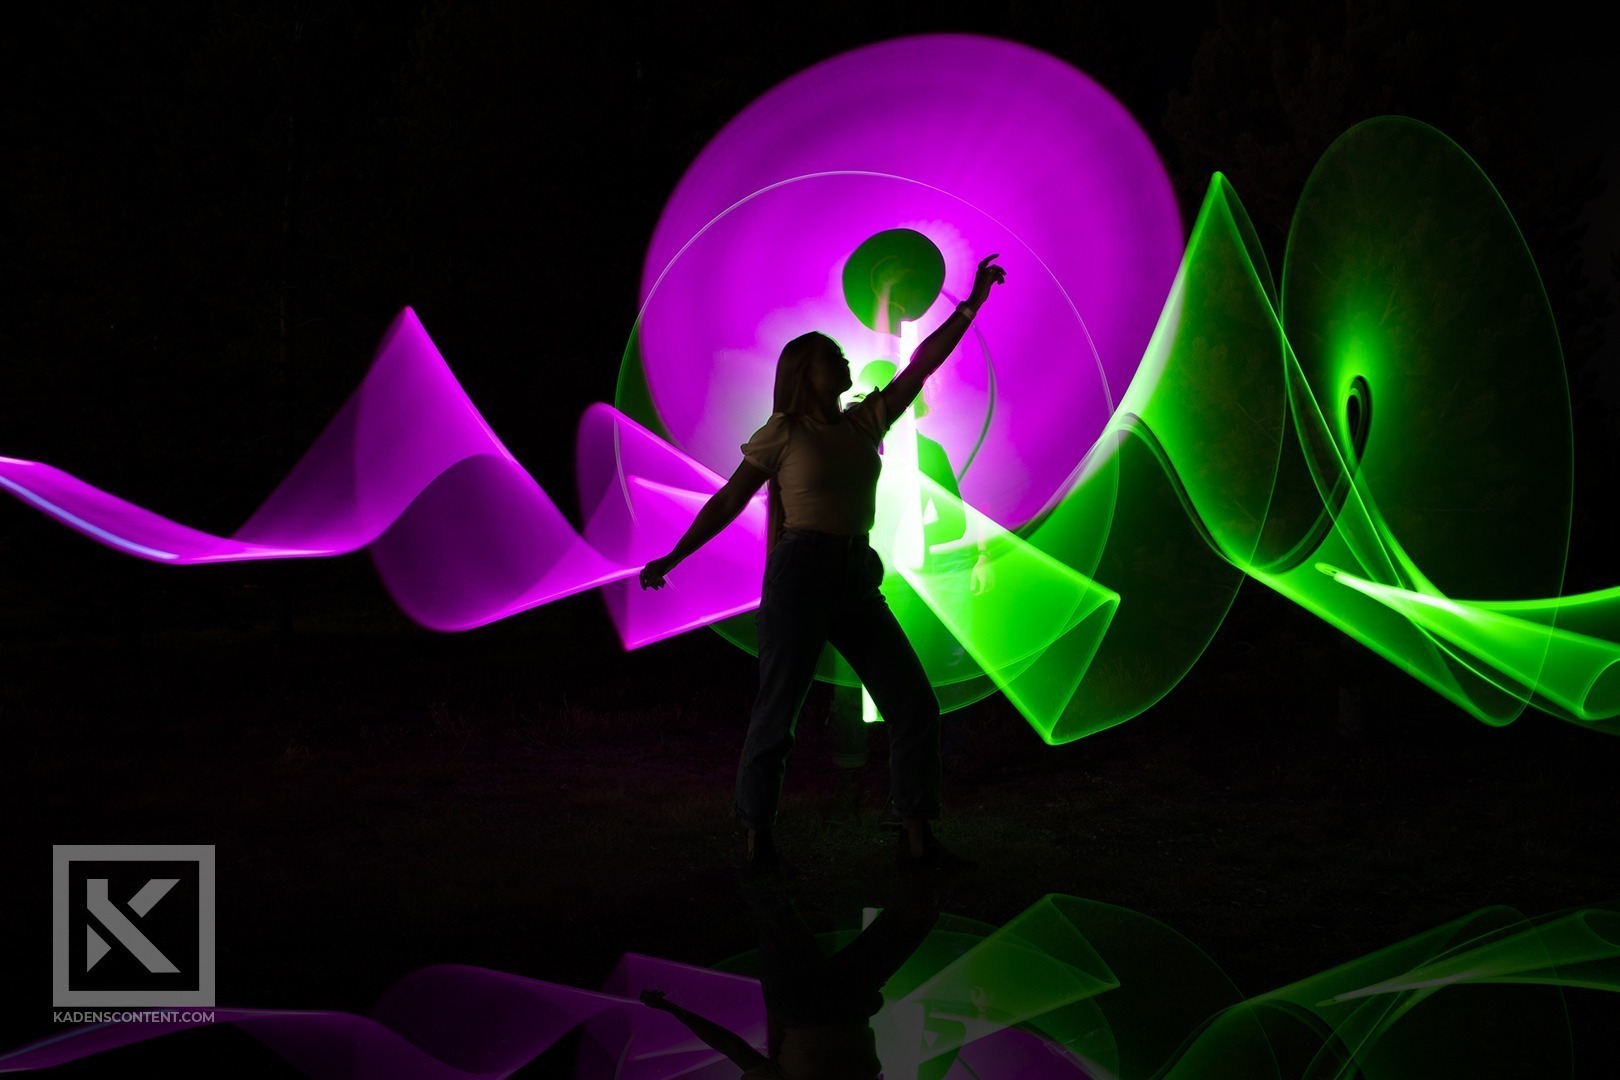
Outdoor light painting doesn’t just have to be of blue hour. With light tubes, you can capture the same cool effects as shown above.
For the above shot, a model stood in place as two separate light tubes were moved around her. The model had to stand completely still to refrain from capturing too much motion blur. As the light tubes were being moved, they would leave light trails in the image. By moving them in an interesting way, you can get endless creative results.
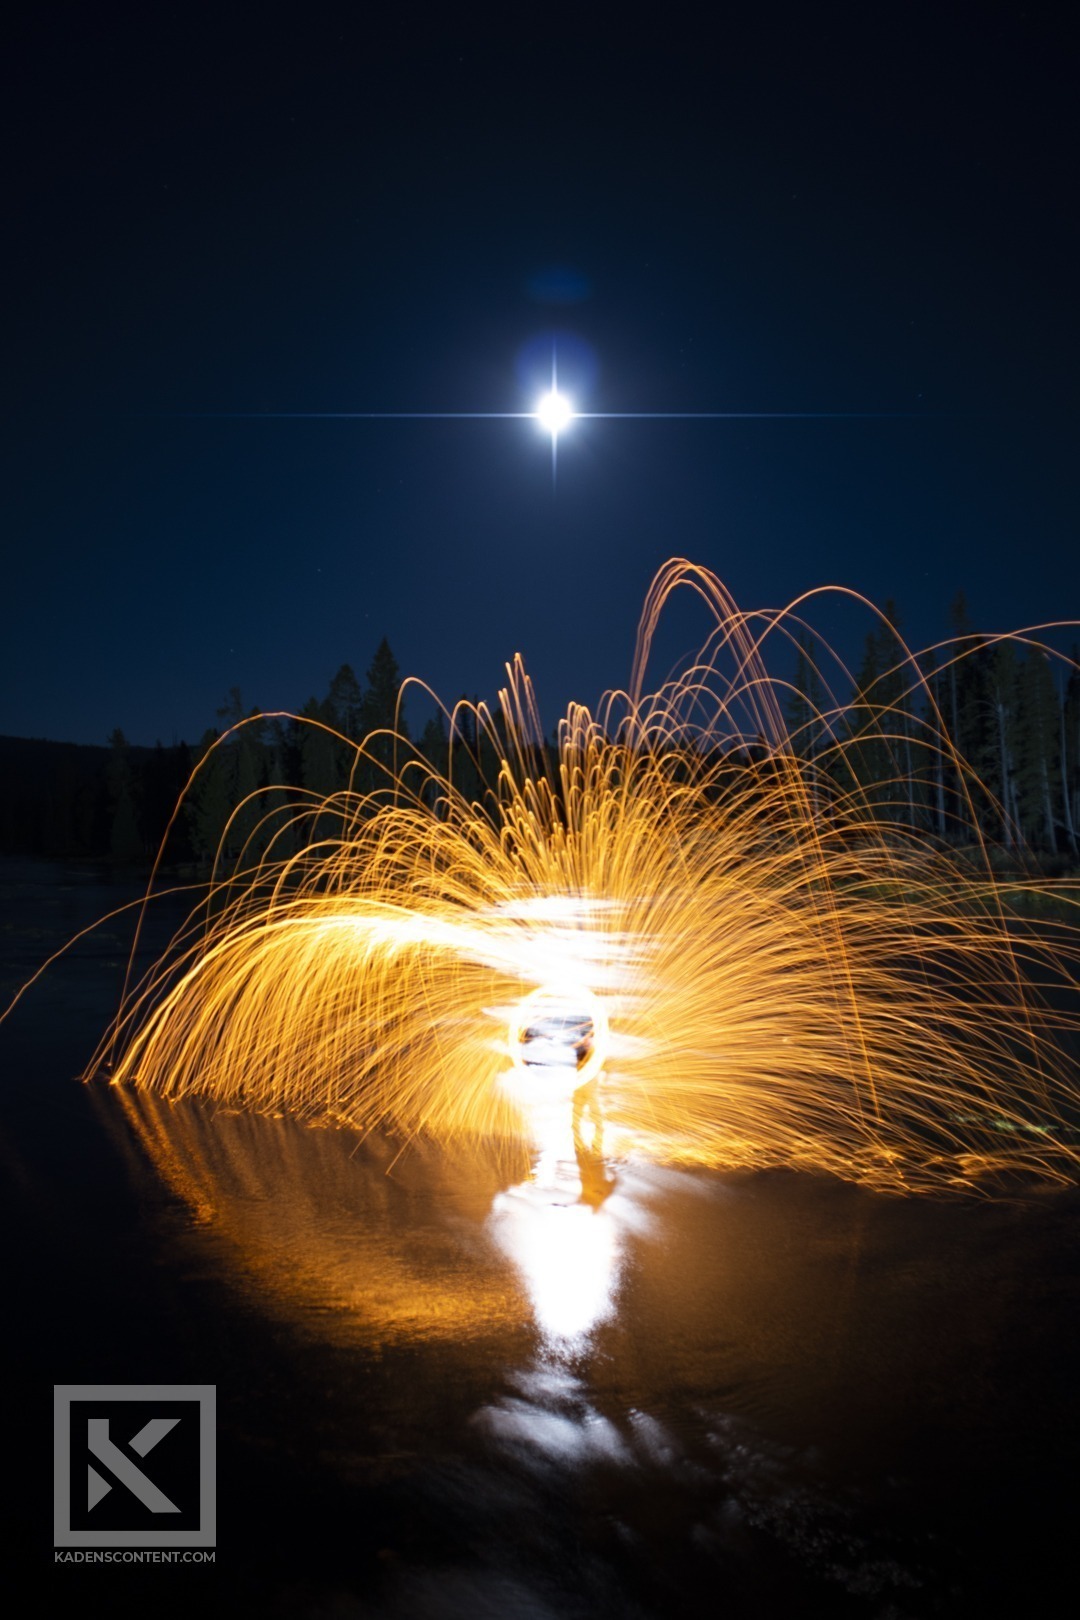
Another interesting way to capture light trails is to try spinning steel wool. By igniting steel wool and spinning it on a rope, you can get some crazy light trails that go off in every direction. I was super happy with what I was able to capture.
Interested in learning more about outdoor light painting? Learn more tips from MasterClass.

Love the flair you got in the in the steal wool picture, love the work!
here’s my post
https://enochjustice.wordpress.com/category/fine-art/
Also check out
https://masonjphoto.wordpress.com/2022/10/21/outdoor-light-painting/comment-page-1/#comment-9
he talks about adding a different scene to make steal wool a lot more interesting
and https://www.youtube.com/watch?v=wTMLkSNMBUo
he talks about light painting with everyday things
I love all of your outdoor light painting images, The last one is probably my favorite. I love the colors, and the moon with the steel wool aligned together. Great job. You can take a look at some of my outdoor light painting images, as well as Alices outdoor light painting post. there is also some cool outdoor light painting images from The Dream Within.
Mine: https://www.night-nd-day.com/outdoor-light-painting/
Alice: https://www.alicedurenphoto.com/outdoor-light-painting/#comment-11
The Dream Within: https://thedreamwithinpictures.com/blog/beginner-light-painting-photography
Excellent job on the light painting! I loved how you went above and beyond to really capture amazing images. Here’s a link to my blog post(https://lightlenzphotos.com/outdoorlightpainting/) where I fulfilled the requirements and that’s about it. Have you seen this post (https://www.alicedurenphoto.com/outdoor-light-painting/) about light painting photography? I also really liked this post about how to do light painting photography on a budget. (https://www.wexphotovideo.com/blog/tips-and-technique/light-painting-tips-and-tricks-on-a-budget/)
Hey Kaden, These photos are so cool, I never knew that you would be able to catch light trails on your camera and not catch the people that might be in the shot. Check out my attempt at https://cenneidighphotography.com/outdoor-light-painting/ Also Brayden did an amazing job accomplishing the same style of photography at https://braydenweiss.com/idaho-light-painting/I was also able to see some amazing photos at https://www.shutterbug.com/content/imaginative-illumination-outdoor-night-light-painting