BLOG
Log Home Photography
LOG HOME INDOOR PHOTOGRAPHY
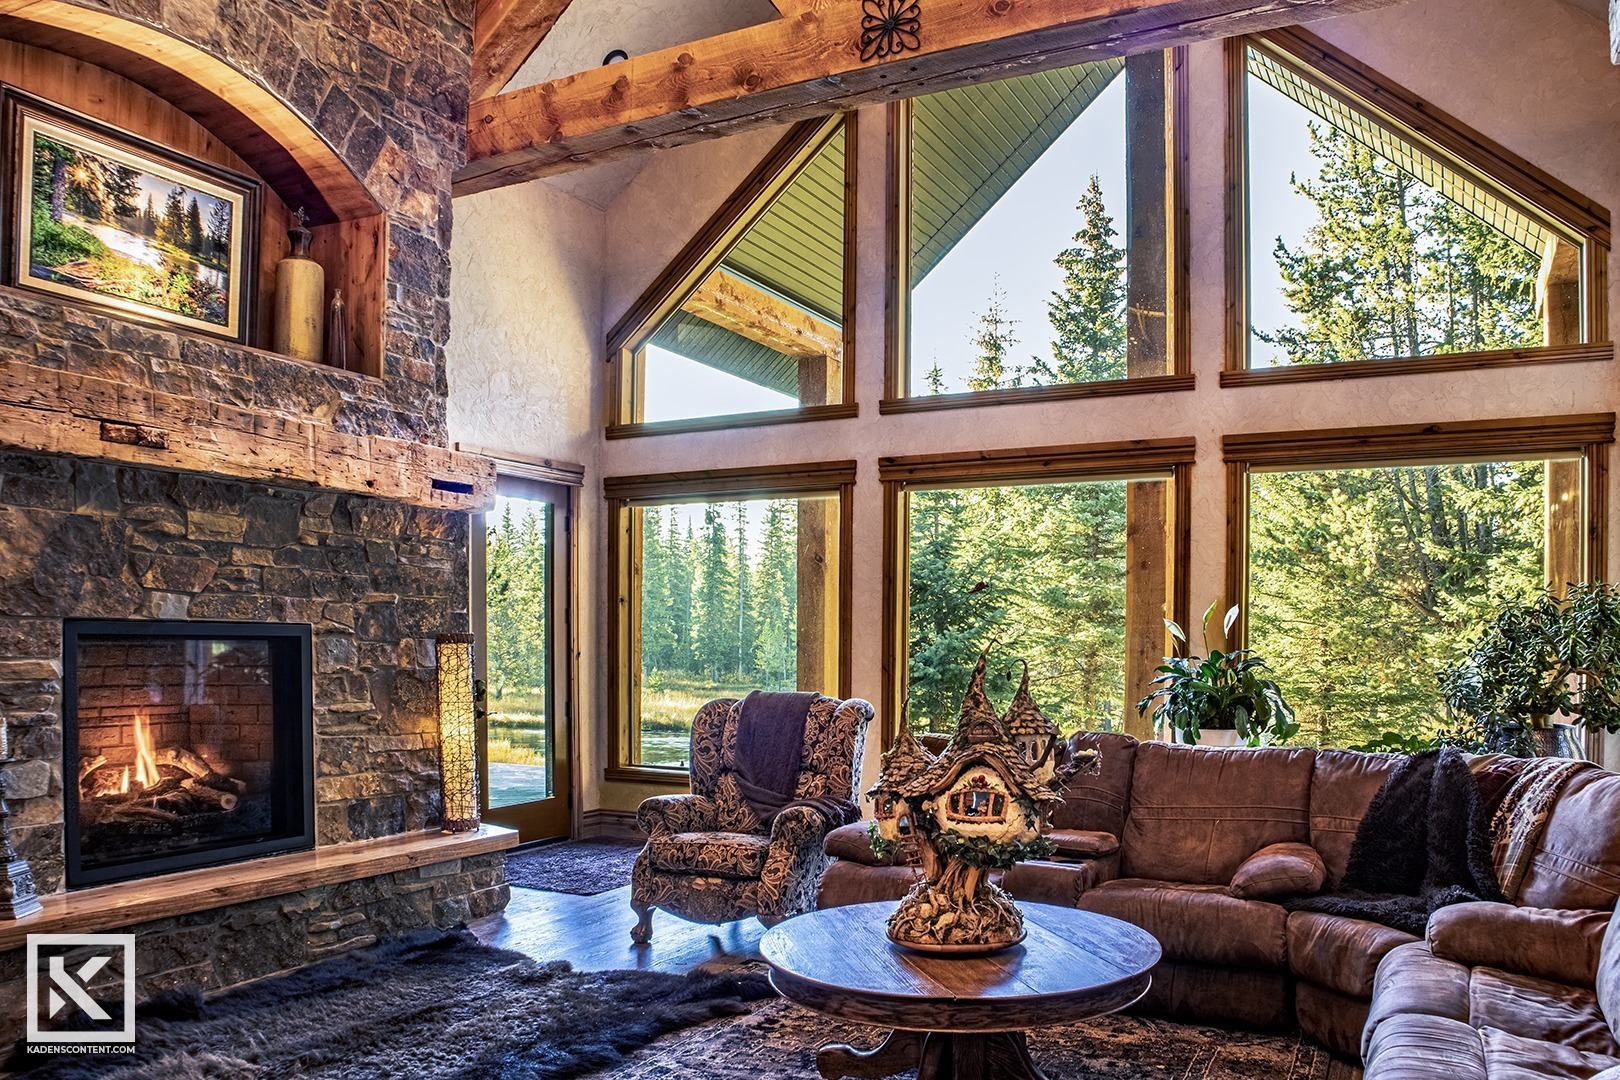
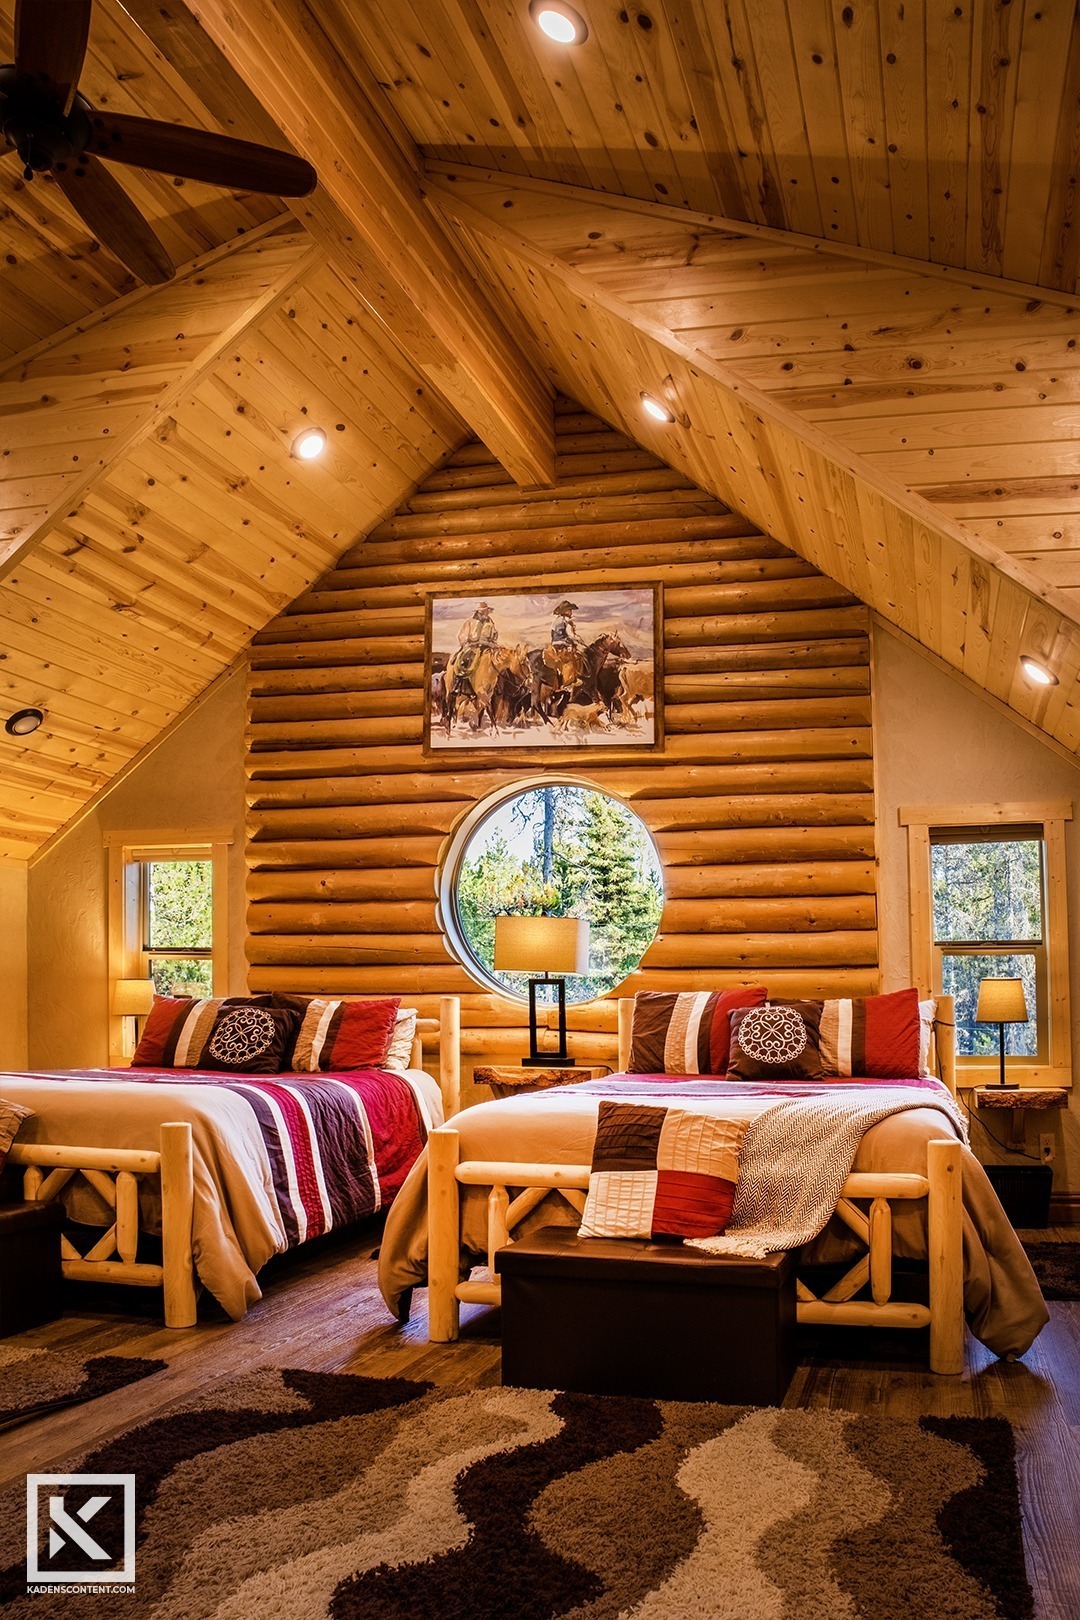
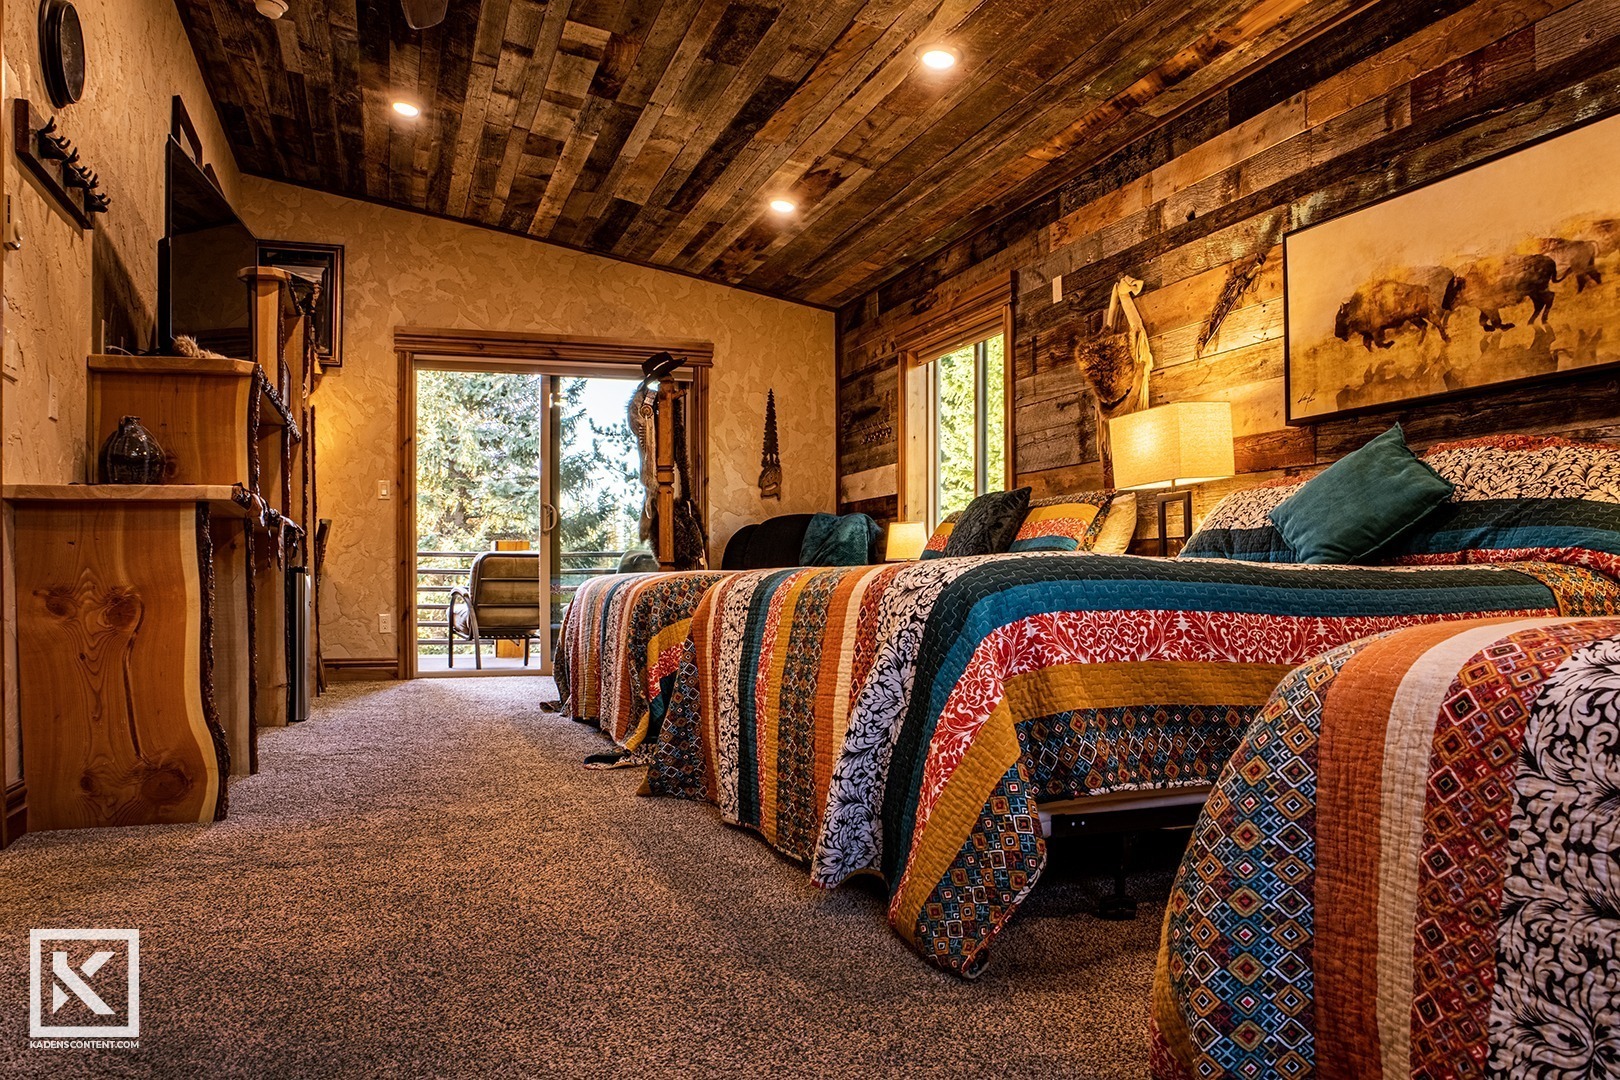
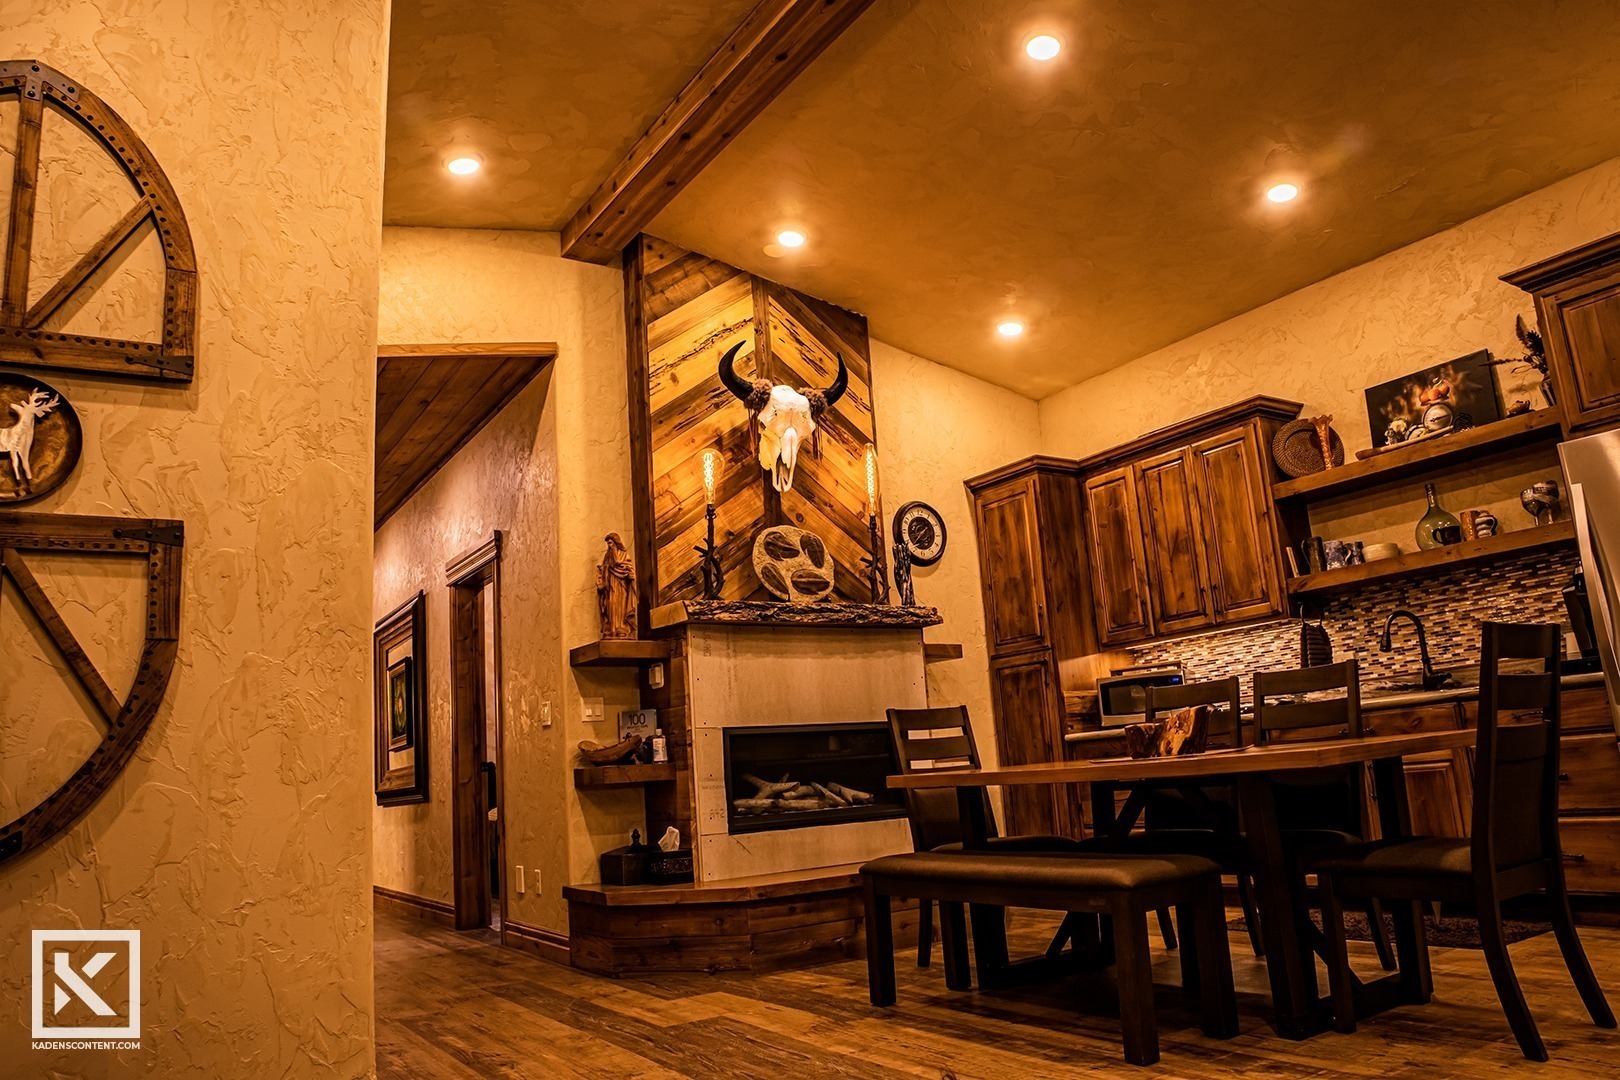
I recently had the opportunity to try out architectural photography on a beautiful log home in Island Park, Idaho. The interior of this log home was designed beautifully and had plenty of amazing subjects to photograph. Time was short, but it was well worth it to capture amazing photos of the interior of this log home.
For this photoshoot, I used my camera’s kit lens (15-45mm) to get as wide of a shot as I could. However, had I used a specialized wide-angle lens, many of the shots would have been much easier. I would highly recommend purchasing a wide-angle lens if you choose to pursue architectural photography. This would have made my photography of the log home much simpler.
This photography process began early in the morning immediately after I had finished capturing shots of the exterior portion of the log home. There were several other photographers alongside me, so we each had to rotate quickly through each room. It was a constant struggle trying to capture the perfect shot while someone else would randomly find their way in front of your camera. Nevertheless, I am super happy with many of the amazing photographs I managed to capture of this beautiful log home.
CAPTURING LOG HOME PHOTOGRAPHY
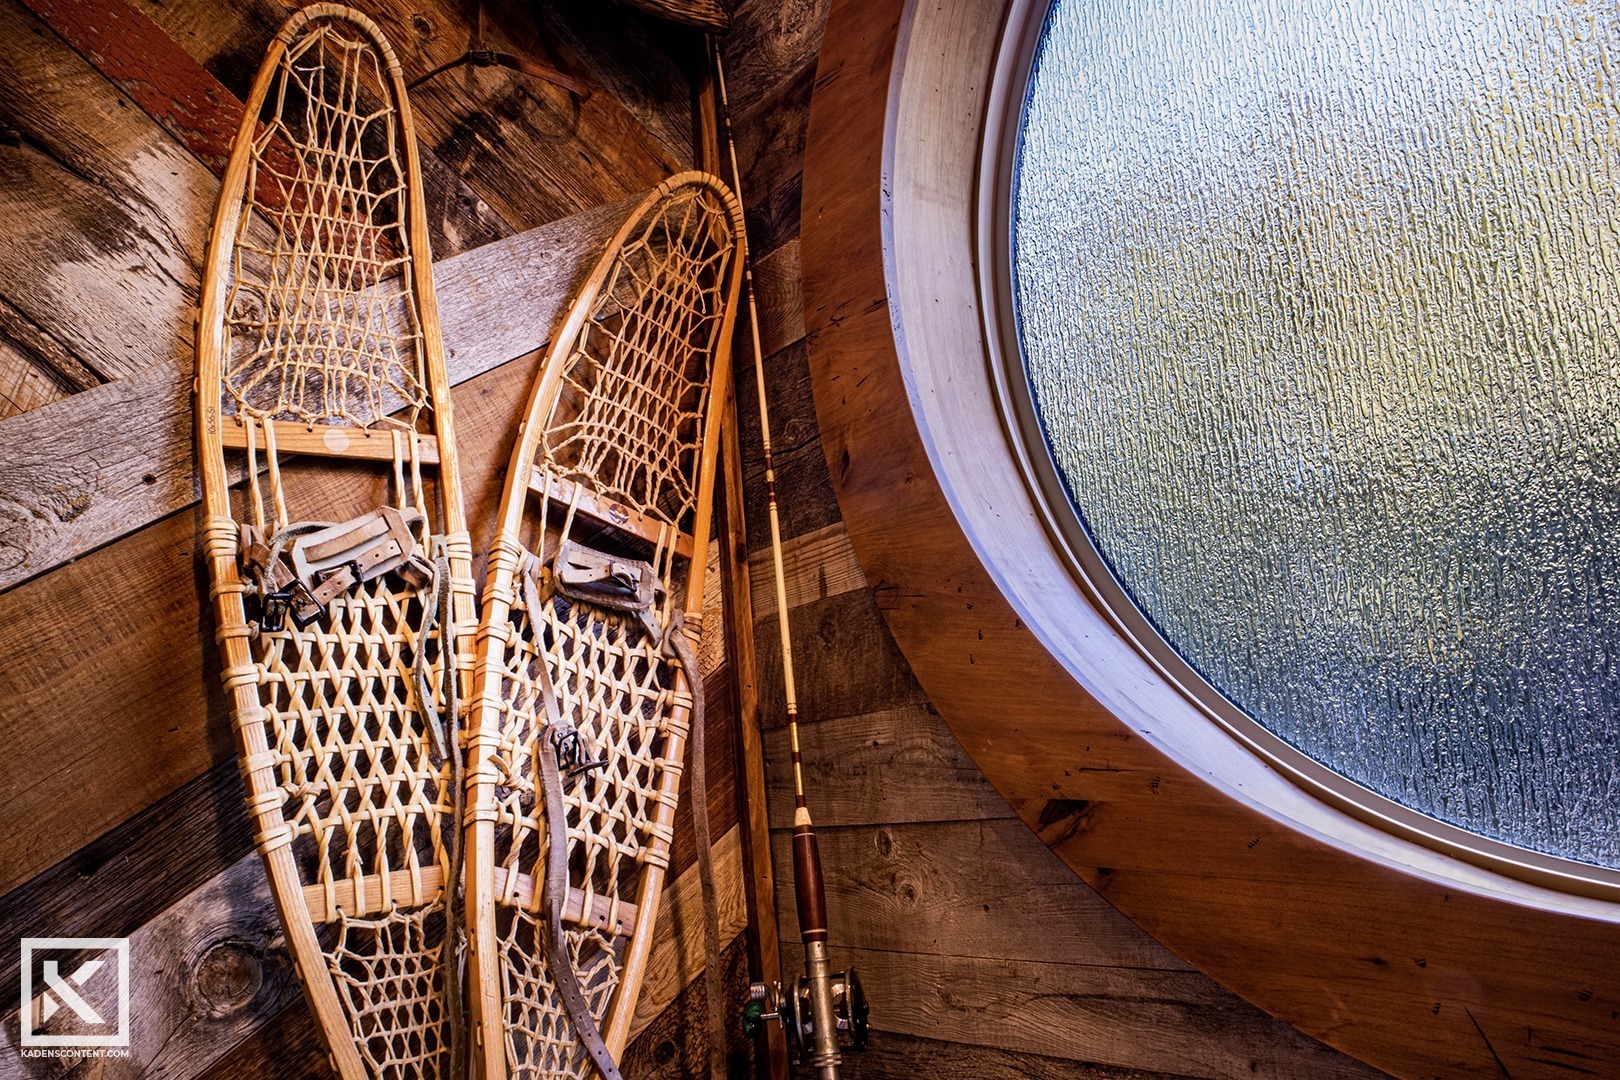
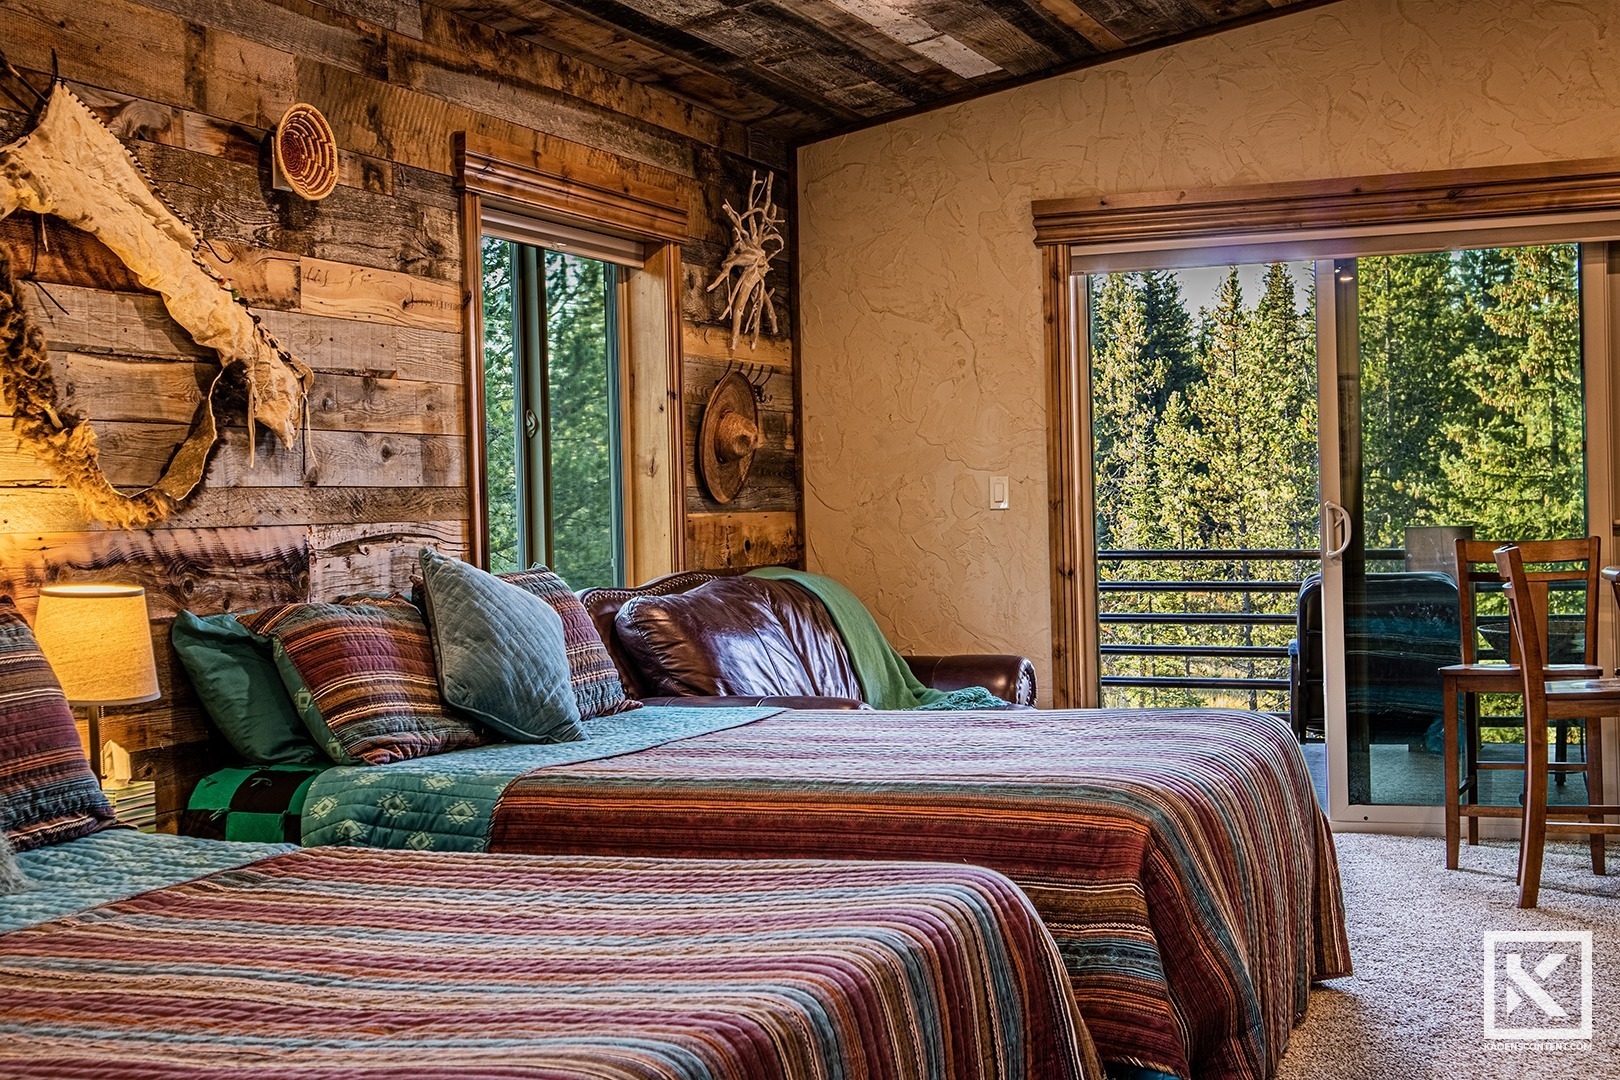
My main goal for this photoshoot was to capture the amazing accent pieces of each room. In some cases it was props, in others, it was the structure of the room itself. Each room had amazing attributes that were so much fun to capture. Everything tied so well together to show the complete beauty of the log home as a whole.
To best light my photography of the log home, I set up bracketing on my camera. By bracketing all of my shots, I was able to get three separate exposures for each image I could take into editing. This would make it possible later to go through and merge these pictures to get the best amount of detail. It also helped a lot with maintaining the colors of the sky.
Bracketing is a camera setting that you can set up on your camera. By bracketing, you capture an additional overexposed and underexposed shot according to how you set the settings of your device. The overexposed shot will give you well-illuminated details of your main subject, while the underexposed shot will give you well-illuminated details of the sky. The original shot, which is captured at your specified exposure, will give you the natural highlights and shadows of the photograph. By merging each of these individual shots later during editing, you can take the great quality of each to get one amazing photograph. This worked amazingly in my log home photography.


FIND MORE
If you are interested in finding more Log Home Photography, look here or here.
You can find more of my Commercial Photography here.
As always, thank you so much for looking into my content. I hope that it could both interest and inspire you as you continue on in your own endeavors.
Island Park Log Home Photography
CAPTURING LOG HOME PHOTOGRAPHY IN ISLAND PARK, IDAHO
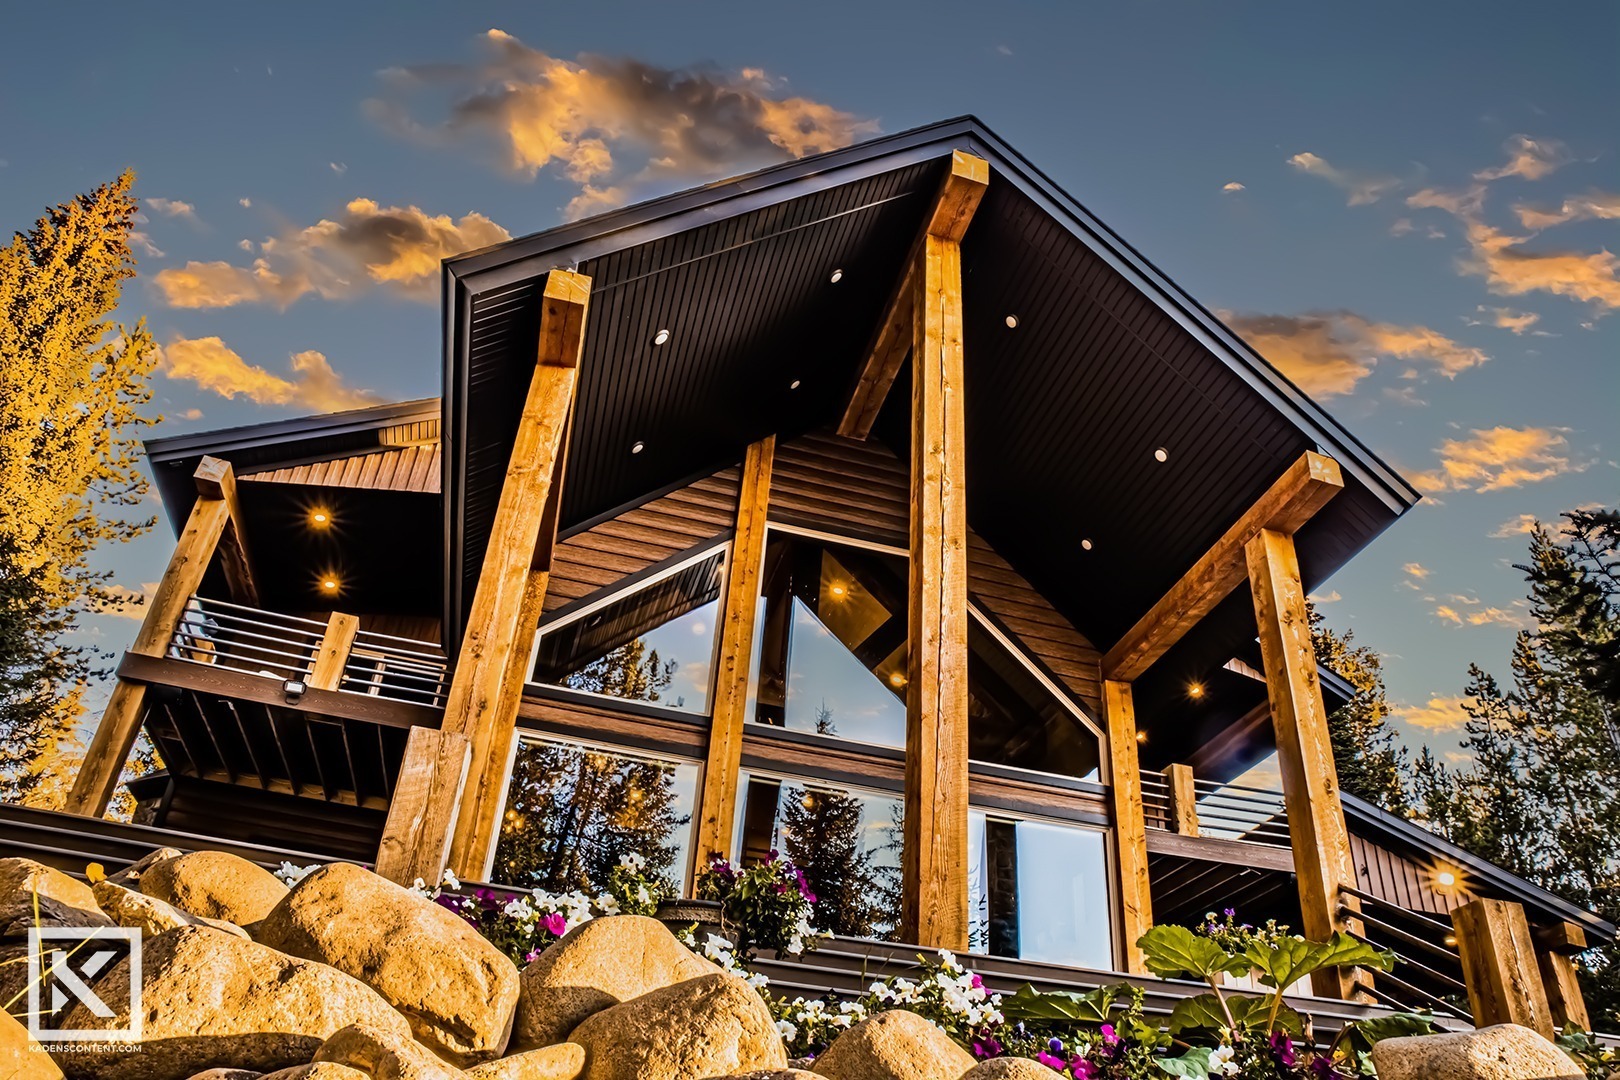
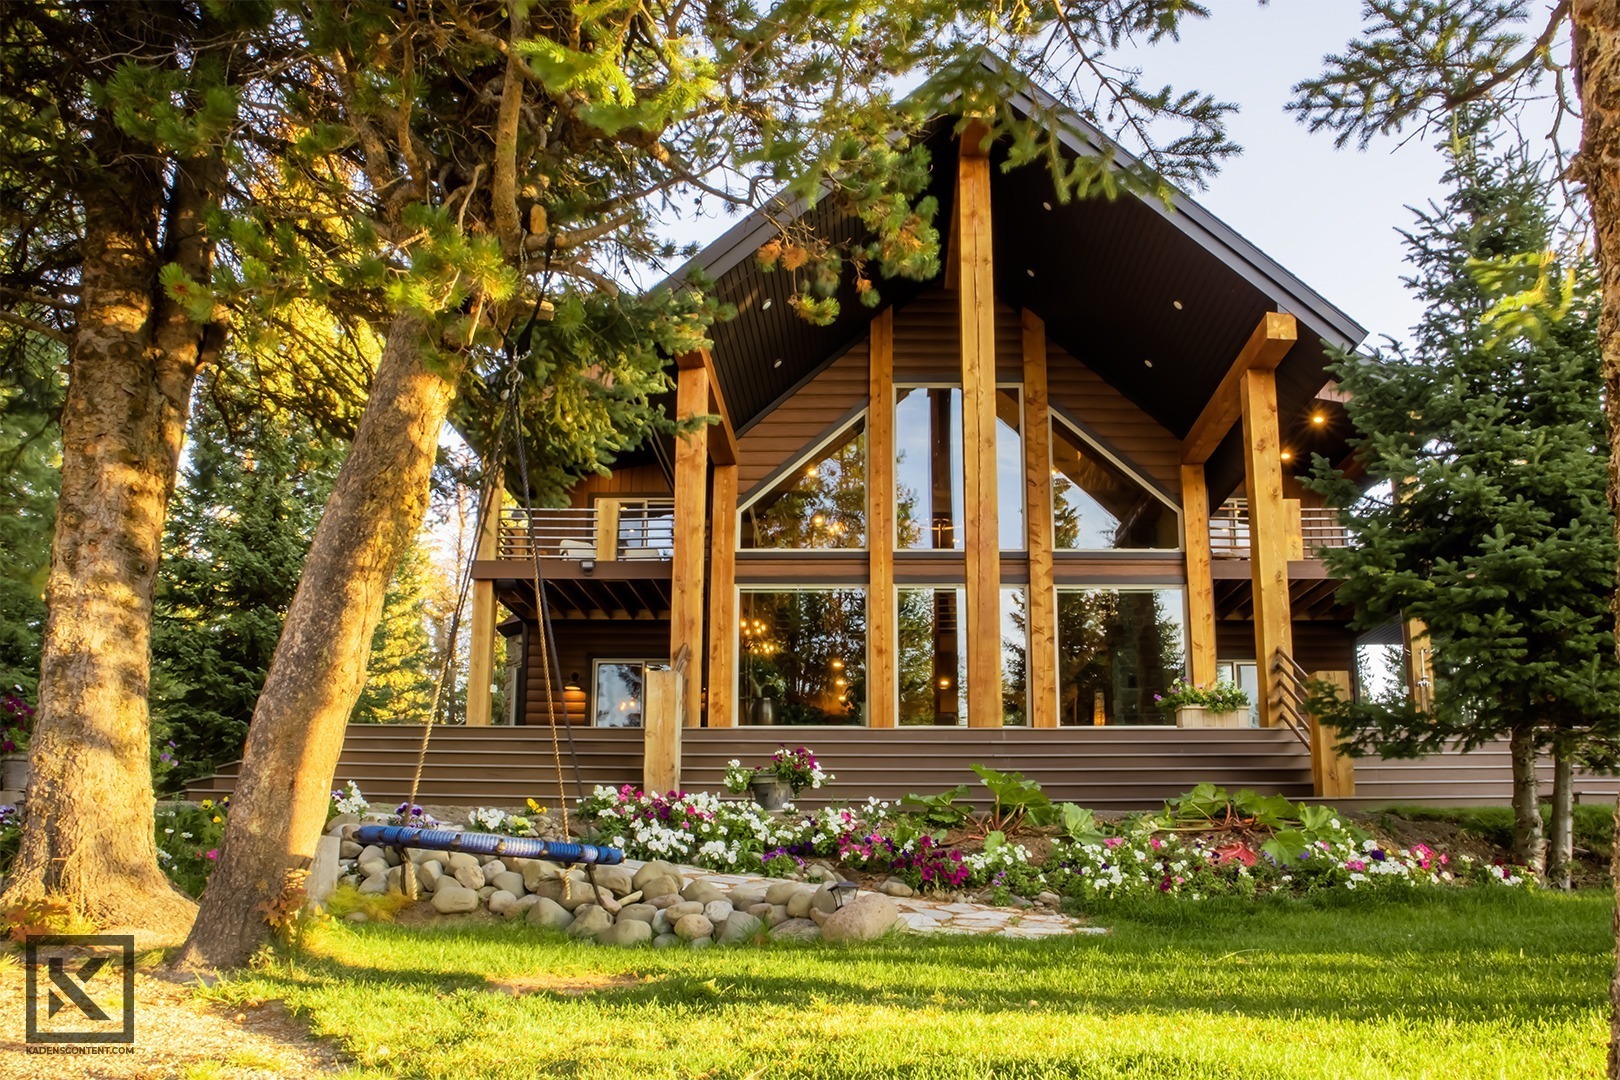
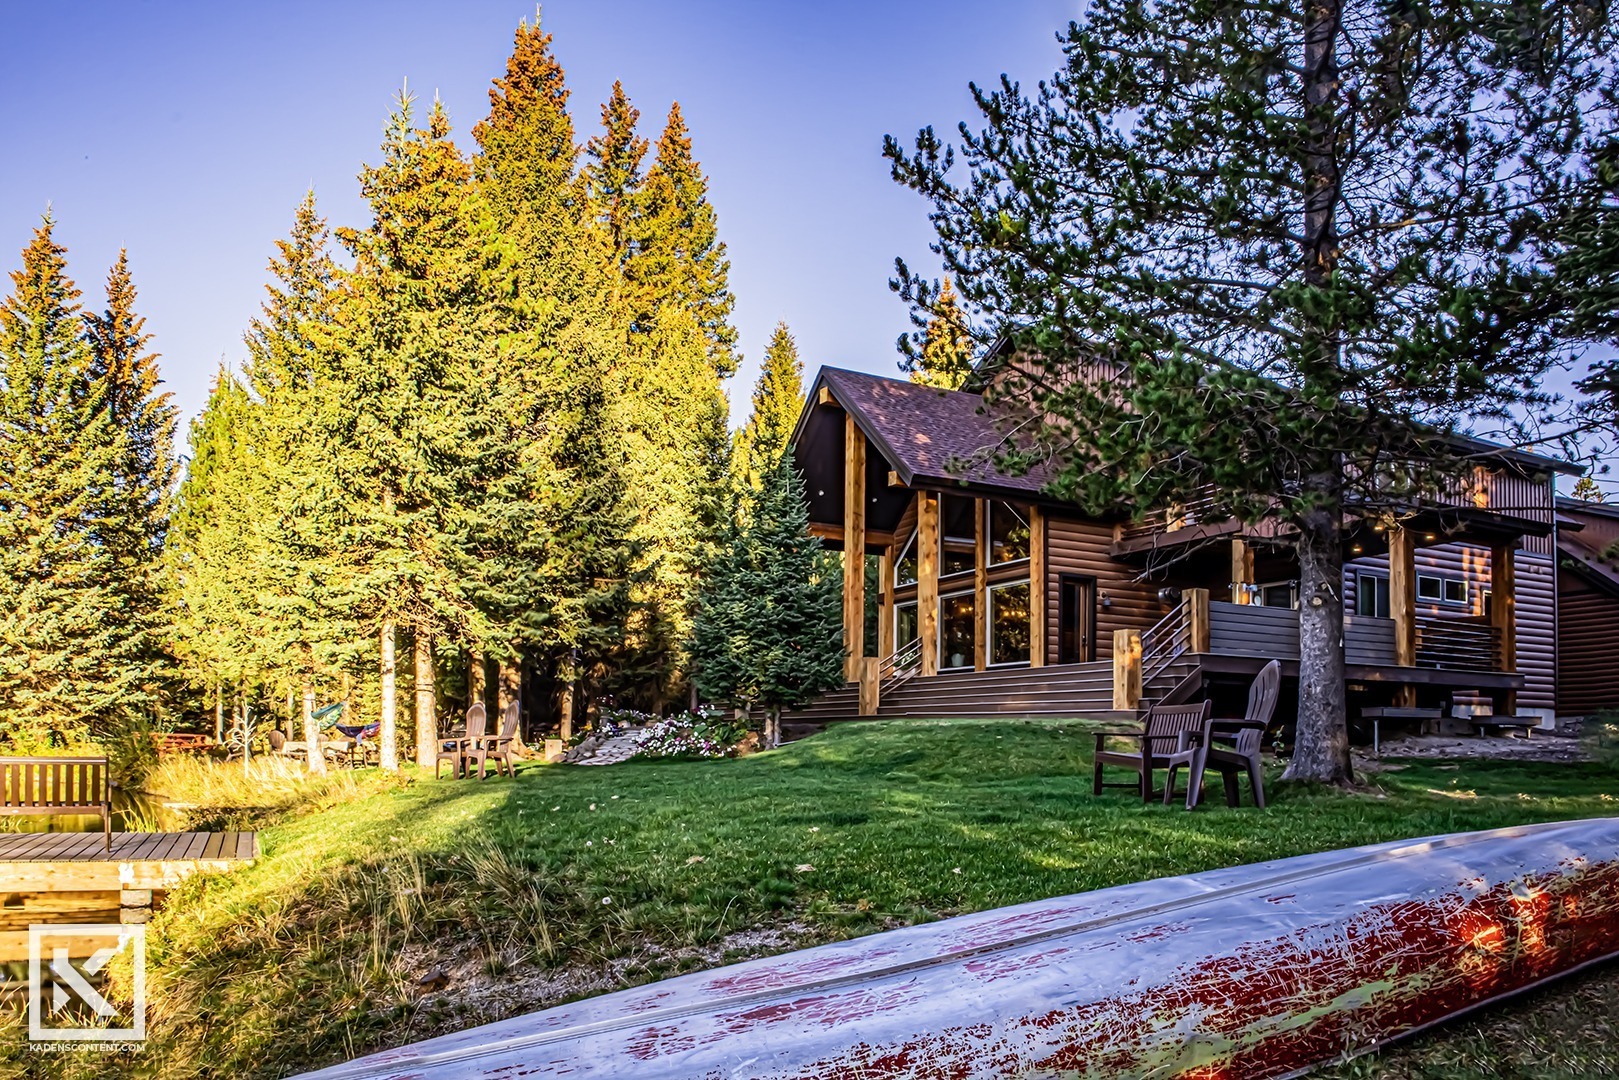
I recently had the opportunity to try out architectural photography on a beautiful log home in Island Park, Idaho. This home was built beautifully alongside the Buffalo River in Island Park and was an amazing subject to photograph.
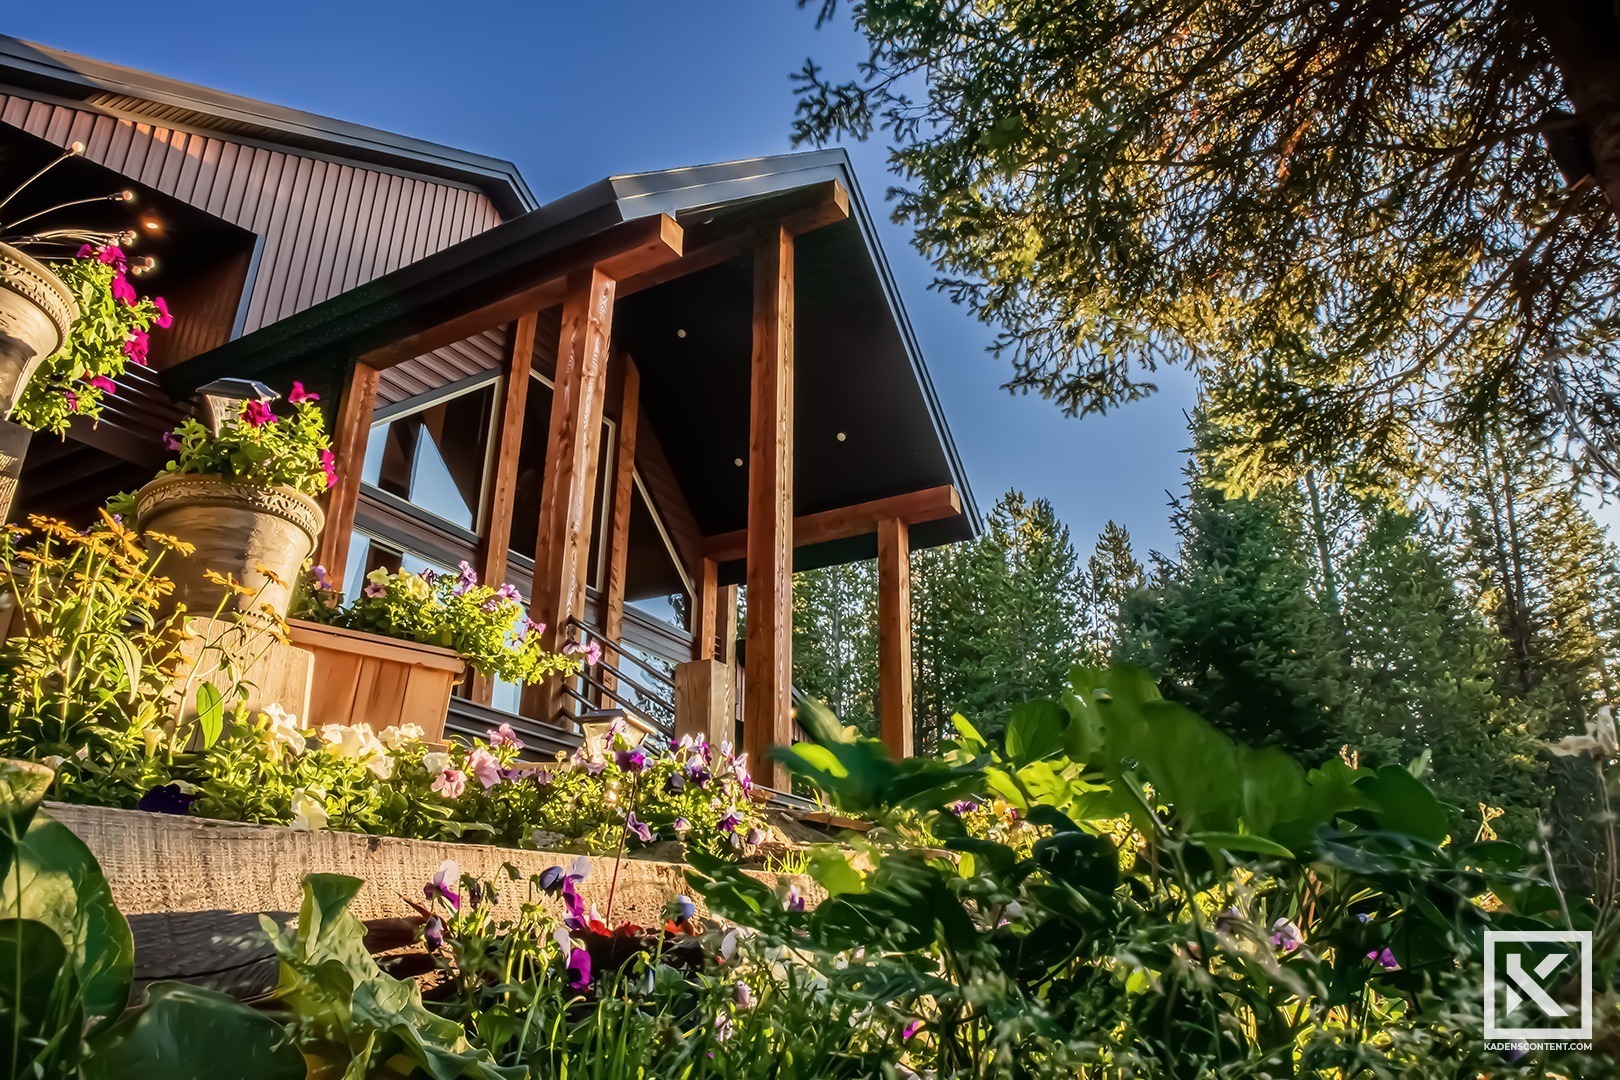
I started my photography process for the Island Park log home by getting up early in the morning. I felt that the early golden hour would give the best lighting to illuminate the home. This would warm the colors of the wooden beams and create a more welcoming tone for the photograph.
For this photoshoot, I used my camera’s kit lens (15-45mm) to get as wide of a shot as I could. However, had I used a specialized wide-angle lens, many of the shots would have been much easier. I would highly recommend purchasing a wide-angle lens if you choose to pursue architectural photography. This would have made my photography of an Island Park log home much simpler.
OUTDOOR ISLAND PARK LOG HOME PHOTOGRAPHY
The first several photos that I managed to capture were along the outside of the Island Park log home. I wanted to make sure that the lighting was perfect for my first few shots, so I took the time to get everything ready. One technique that I used during this photo-taking process was bracketing my shots.
To best light my photography of the Island Park log home, I set up bracketing on my camera. By bracketing all of my shots, I was able to get three separate exposures for each shot. This would make it possible in editing to go through and merge these pictures to get the best amount of detail. It also helped a lot with maintaining the colors of the sky.
Bracketing is a camera setting that you can set up on your camera. By bracketing, you capture an additional overexposed and underexposed shot according to how you set the settings of your device. The overexposed shot will give you well-illuminated details of your main subject, while the underexposed shot will give you well-illuminated details of the sky. The original shot, which is captured at your specified exposure, will give you the natural highlights and shadows of the photograph. By merging each of these individual shots later during editing, you can take the great quality of each to get one amazing photograph.
As I continued capturing each photograph, I stressed over getting unique angles. One method that I really enjoyed was shooting from a really low angle. This helped show the massive height of the home while still showing some of the greenery in the foreground. I really loved how this would give a slight slant to the angle of the home and make it look as though it were reaching toward the sky. You can see this in the photograph of the log home below. The slight slant to the right creates a greater sense of movement in the photograph than had it been straight upward.

FIND MORE
If you are interested in finding more Island Park Log Home Photography, look here.
You can find more of my Commercial Photography here.
As always, thank you so much for looking into my content. I hope that it could both interest and inspire you as you continue on in your own endeavors.
Epic Portraits
THE KEY TO CAPTURING EPIC PORTRAITS
There are so many things that you can do to make your portraits look epic. One thing that I found helpful during my progression through photography was learning about how to manage light. I feel like a common theme of photography is the lighting of the shot. You have to have everything at the ready to make sure the next portraits you’re going to take are going to be epic.
A common struggle that we experience when trying to photograph epic portraits outside is the lighting. If we set the exposure to best show the subject, the background becomes completely blown out. If we set the lighting for the background, the subject can barely be seen. The only way to compete with the natural light coming from the background is to use artificial light on your subject.
LIGHTING FOR EPIC PORTRAITS
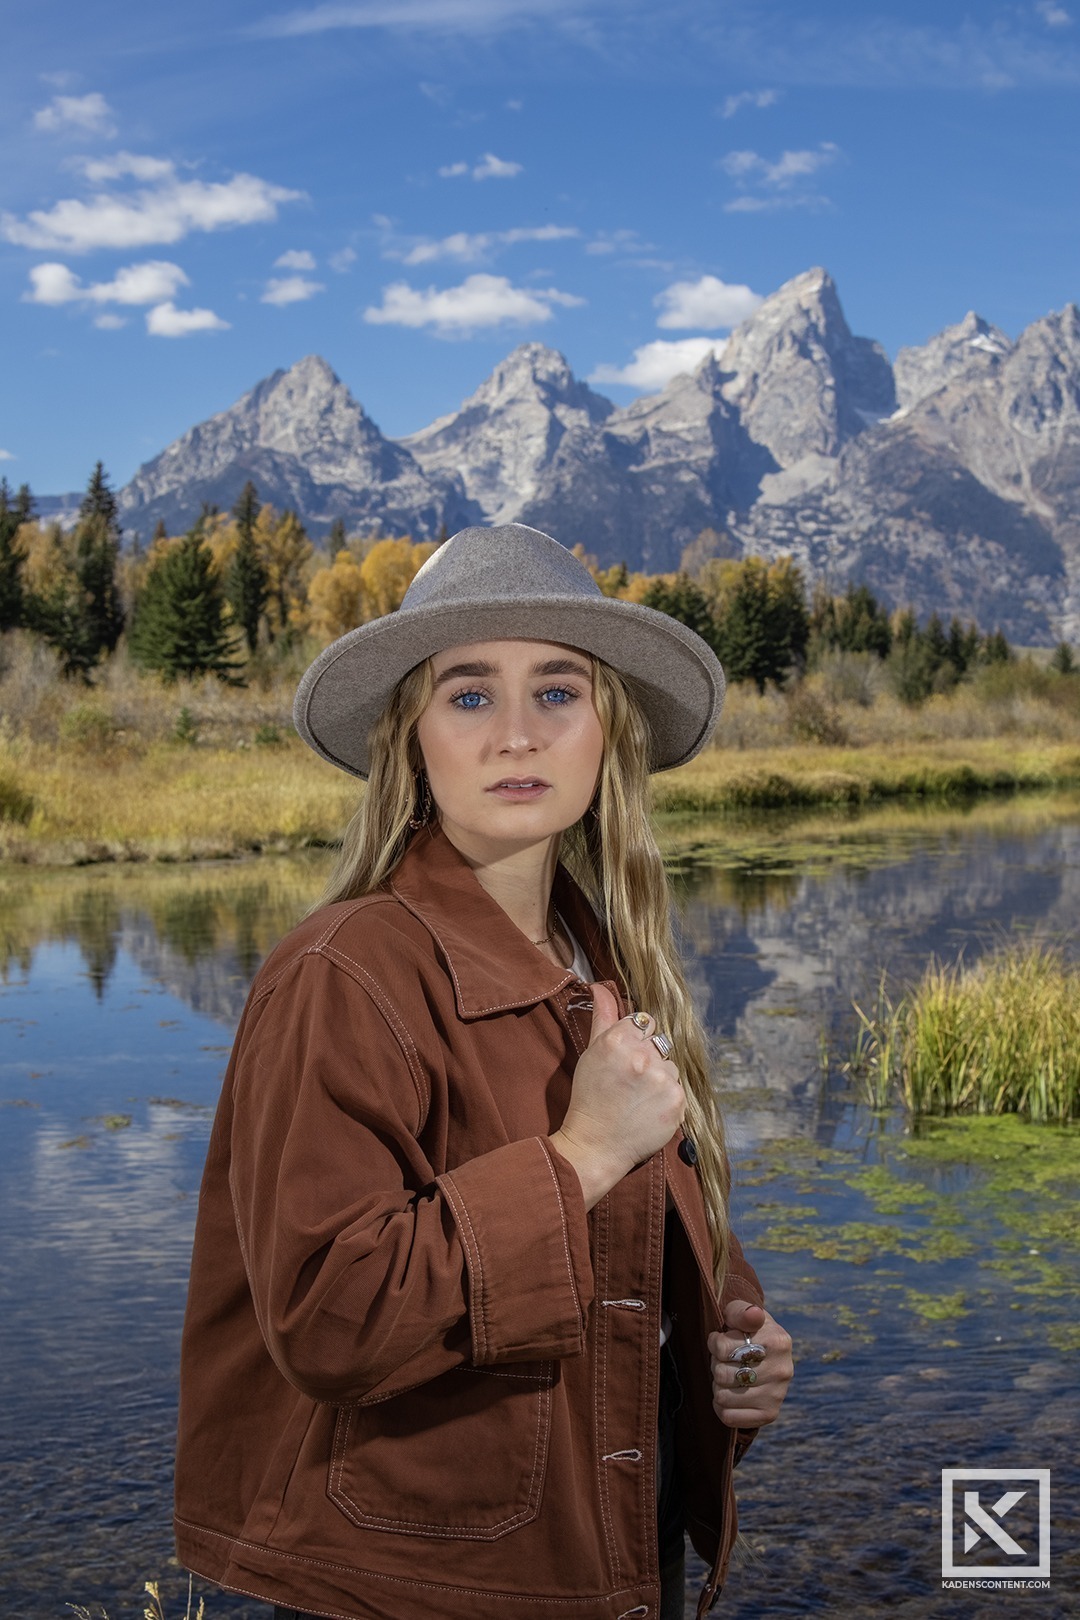
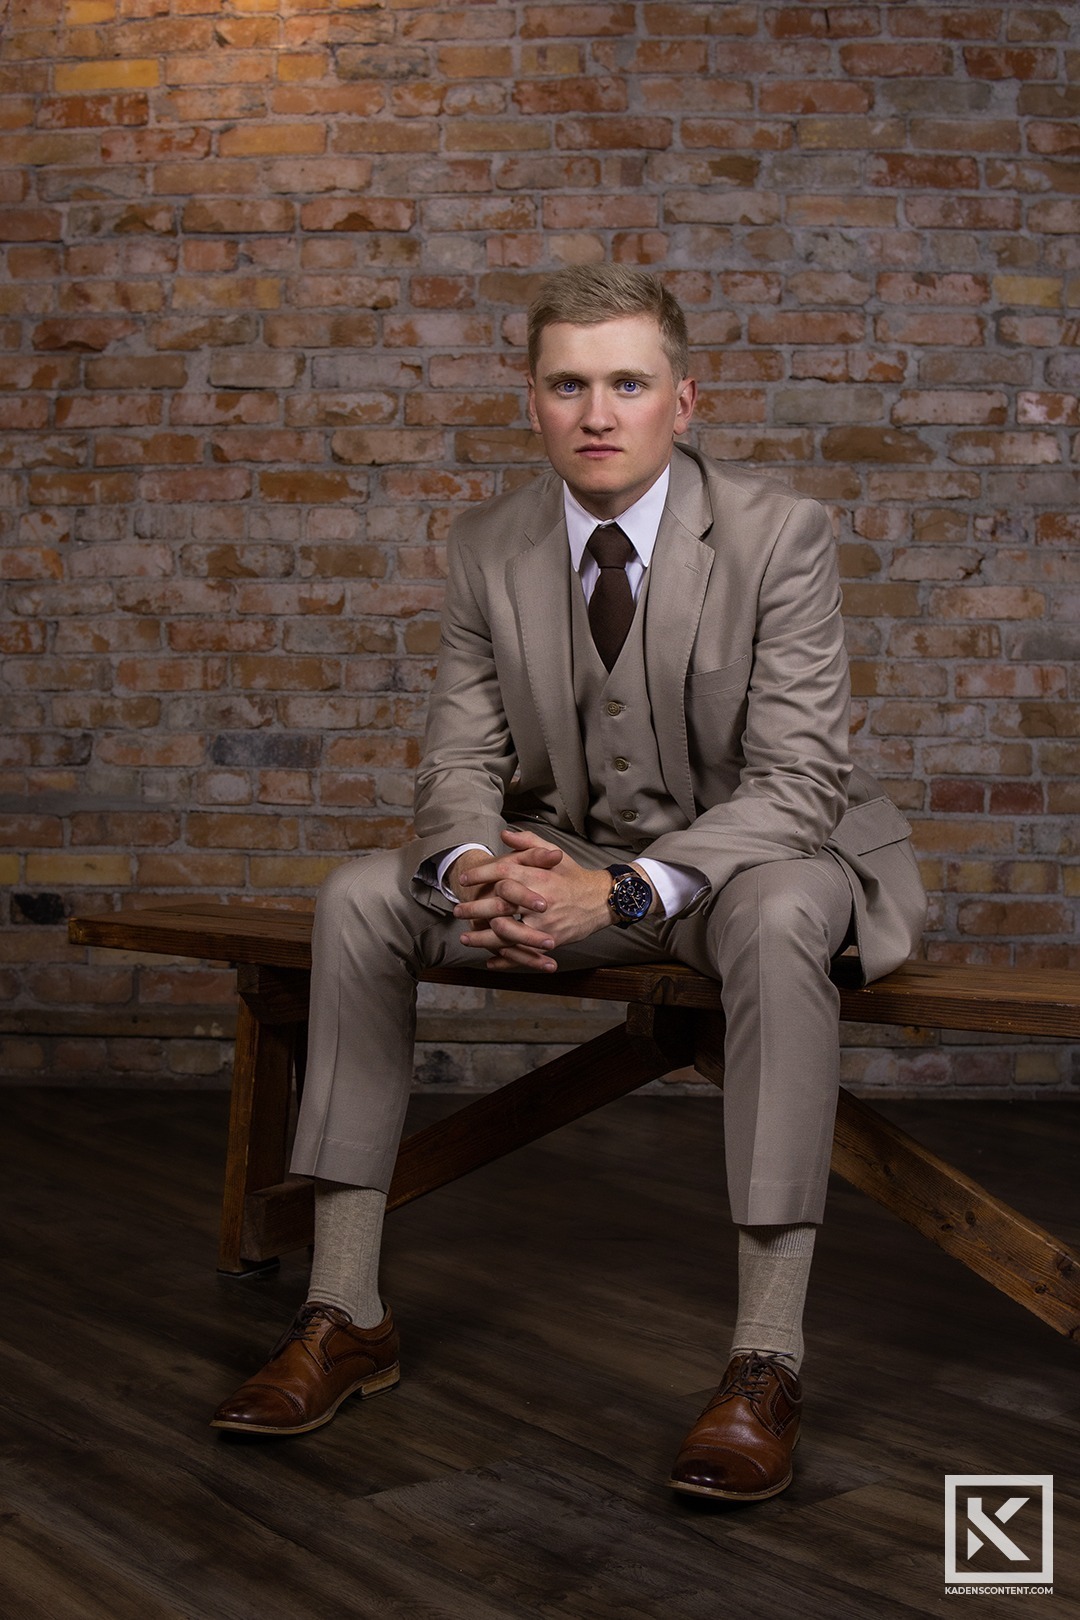
In this epic portrait that I was able to capture at Grand Teton National Park, I used natural, reflected, and artificial light to illuminate my subject and the beautiful background. I used a golden reflector to bring some of the natural light back to the model’s clothes that were underexposed. I also used a speed light to brighten up her face. Using both of these helped my portraits look even more epic.
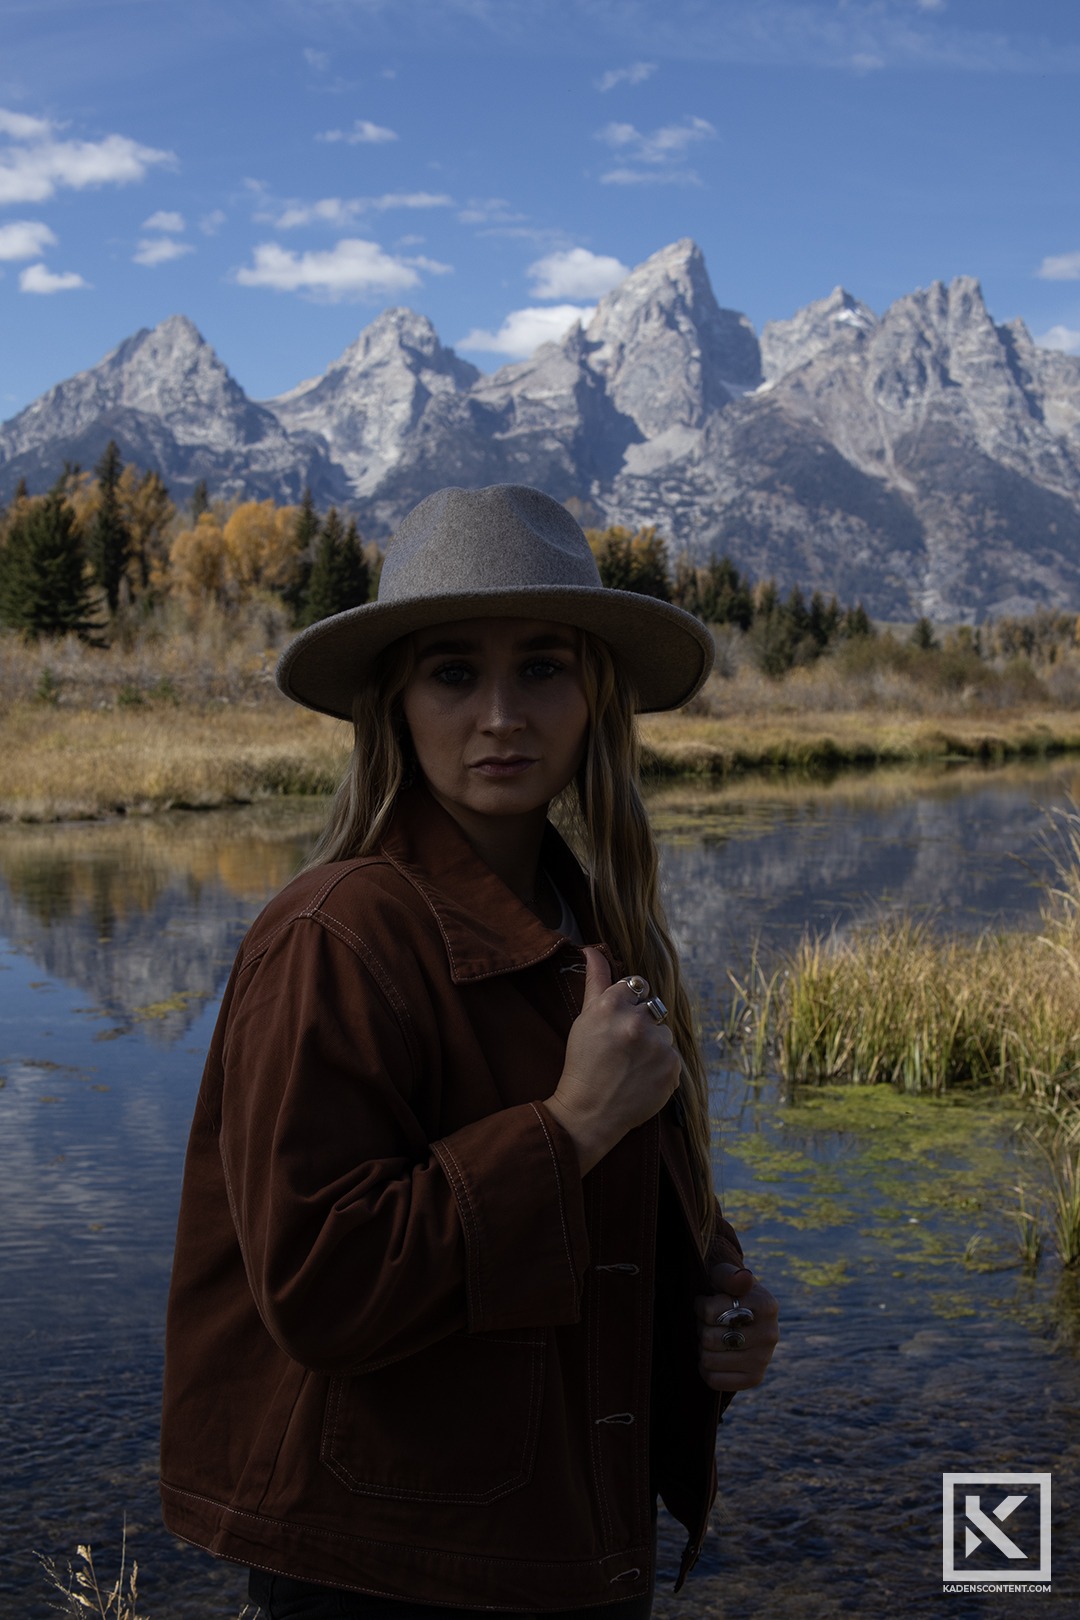
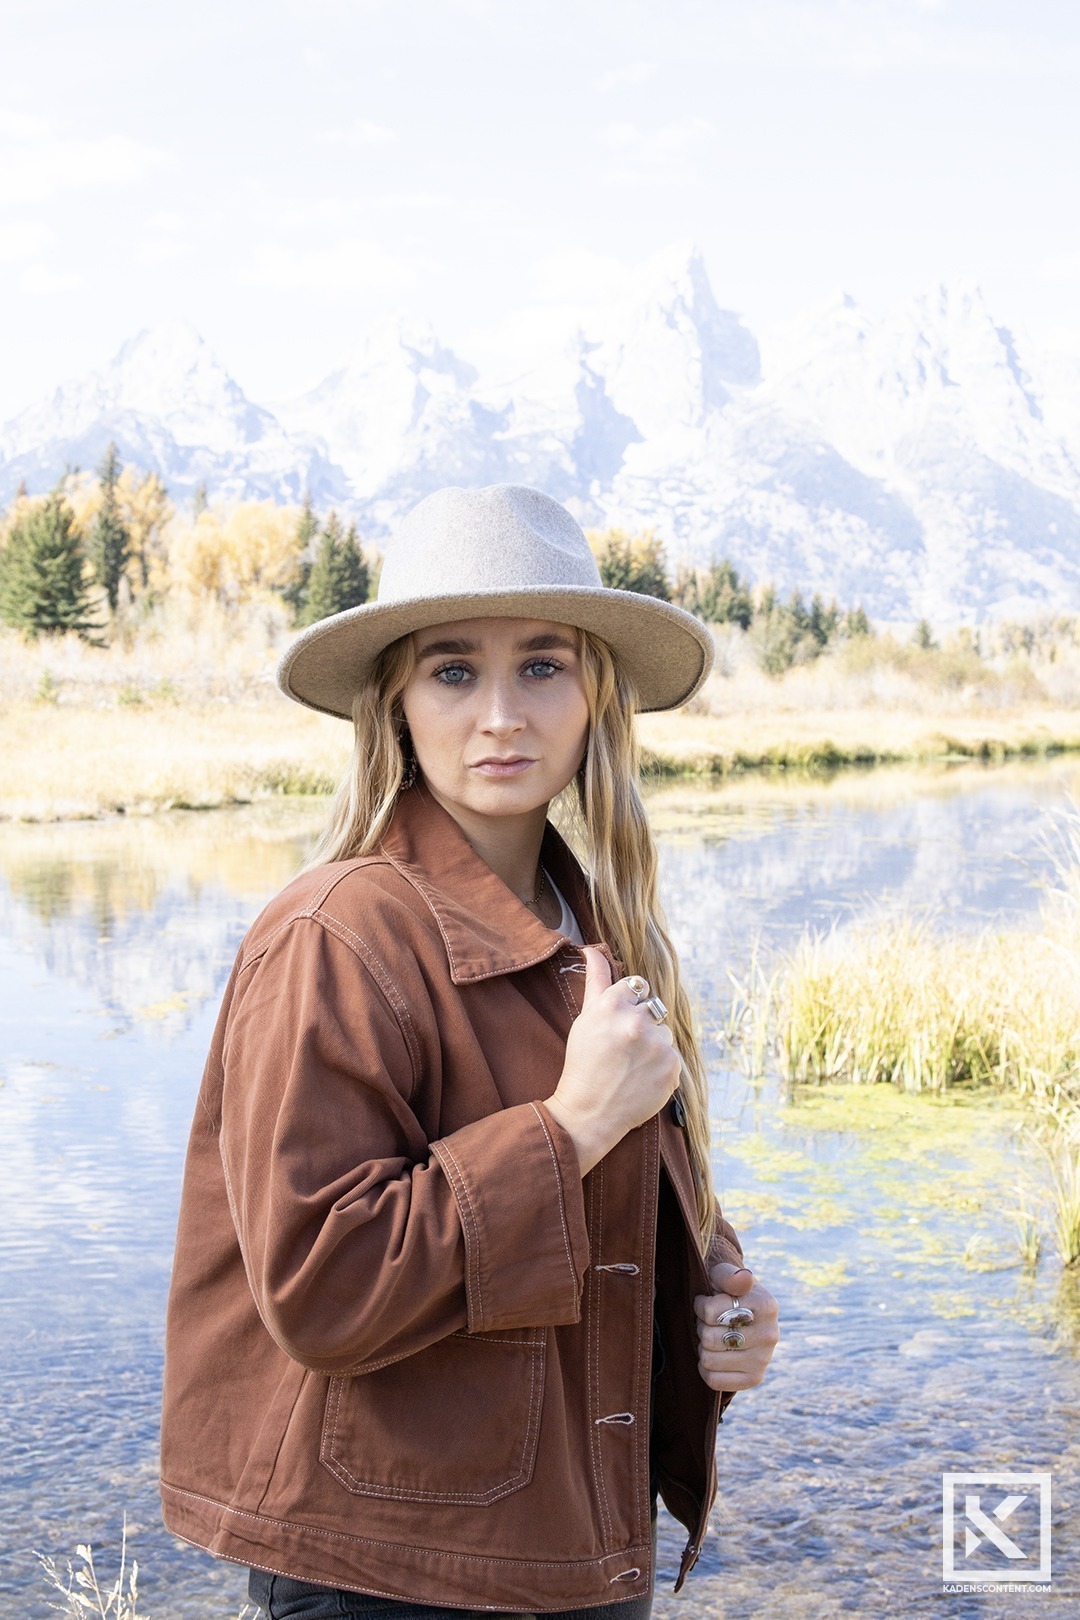
I loved these remaining portraits but they weren’t quite as epic. As previously discussed, the lighting can be a little difficult. Looking at the image above, we can see that it was well exposed for the background. The sky is blue and the peaks of the Tetons look amazing; however, the subject is way too underexposed. Moving to the next shot, I fixed the exposure on the model, but the sky and background are barely visible. They are far too blown out and overexposed. The only way to get that epic shot was to bring in the artificial light.
Overall, I am super happy with how this shot turned out. It was a little frustrating for a time, but once I finally found a balance in the light, I loved it. Go ahead and try this out for yourself.
FIND MORE
If you are interested in finding more Epic Portraits, look here.
You can find more of my Portrait Photography here.
As always, thank you so much for looking into my content. I hope that it could both interest and inspire you as you continue on in your own endeavors.
National Park Portraits
HOW TO CAPTURE NATIONAL PARK PORTRAITS
Capturing national park portraits can be so much fun. It allows you to work with themed props and outfits and even throw in a bit of travel. A simple portrait can be made so much better by the fantastic backdrops that national parks have to offer. By following a bit of my own adventure, you can learn a little bit more about capturing national park portraits.
When I traveled to Yellowstone National Park, I had several other photographers accompany me who could stand in as models for my portraits. We also had several props that the models could use to better add to the theme. Not everyone got a prop, but in some cases, they weren’t too necessary. The area alone was beautiful and gave plenty to the shot. The photo shoot was fun, and I am super happy with how some of my photos turned out.
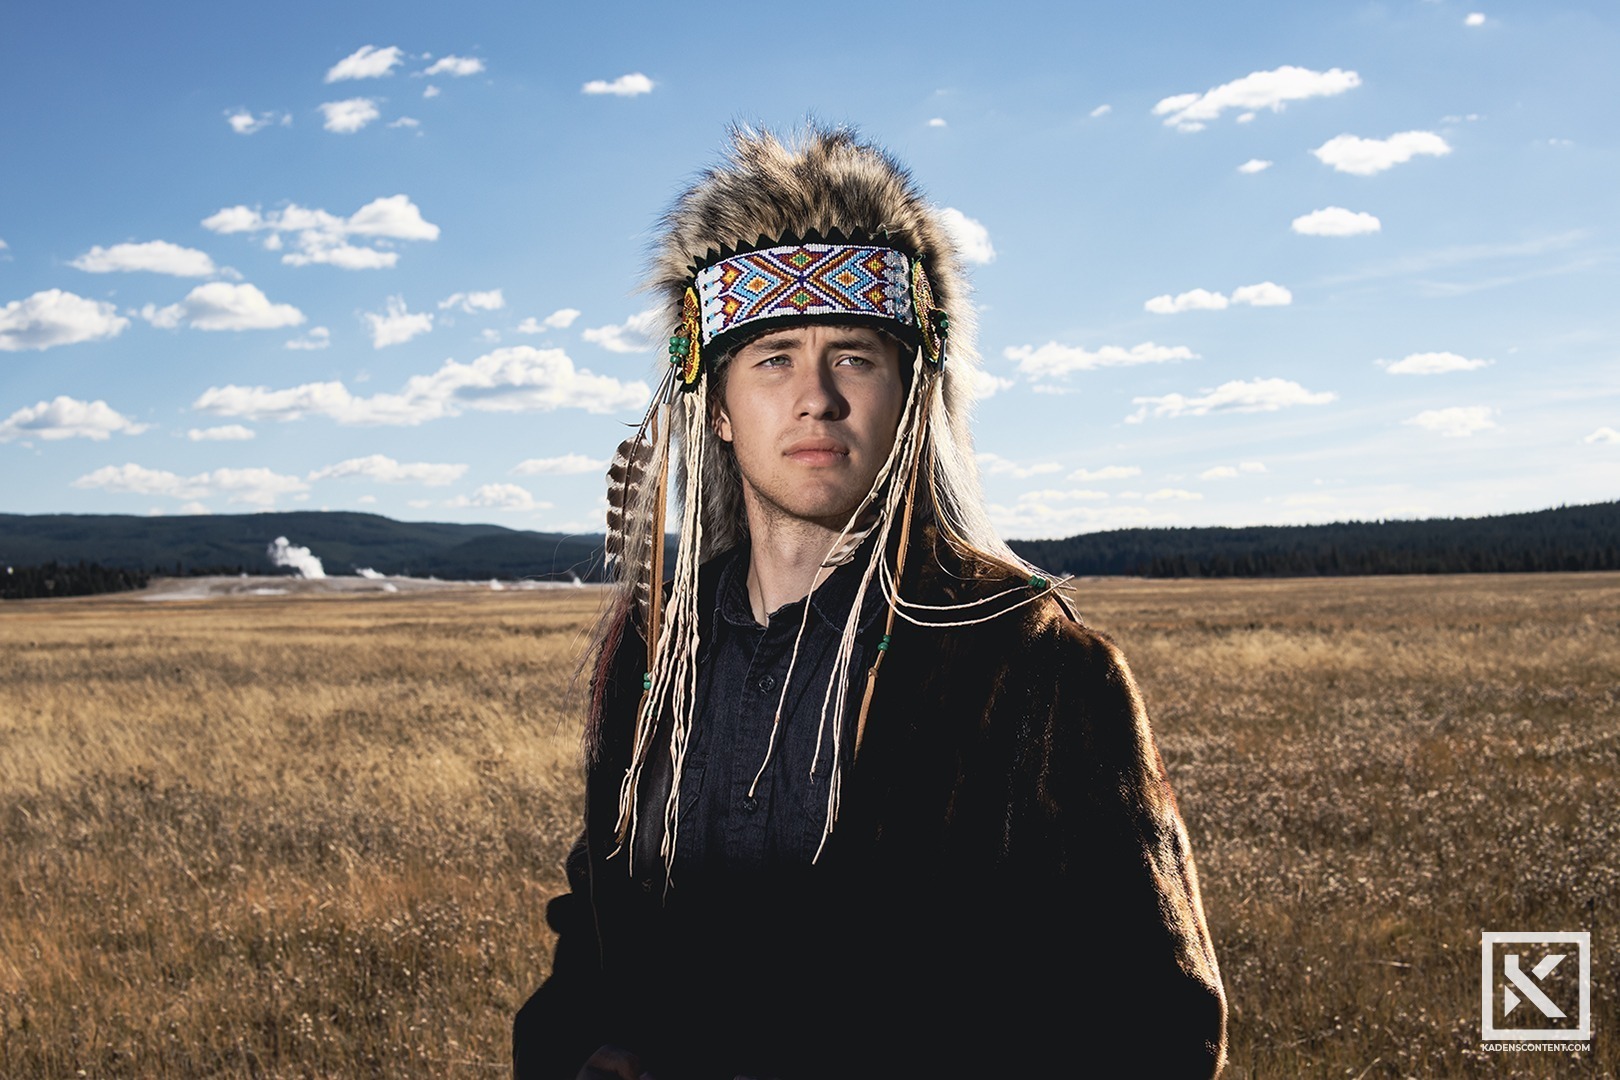
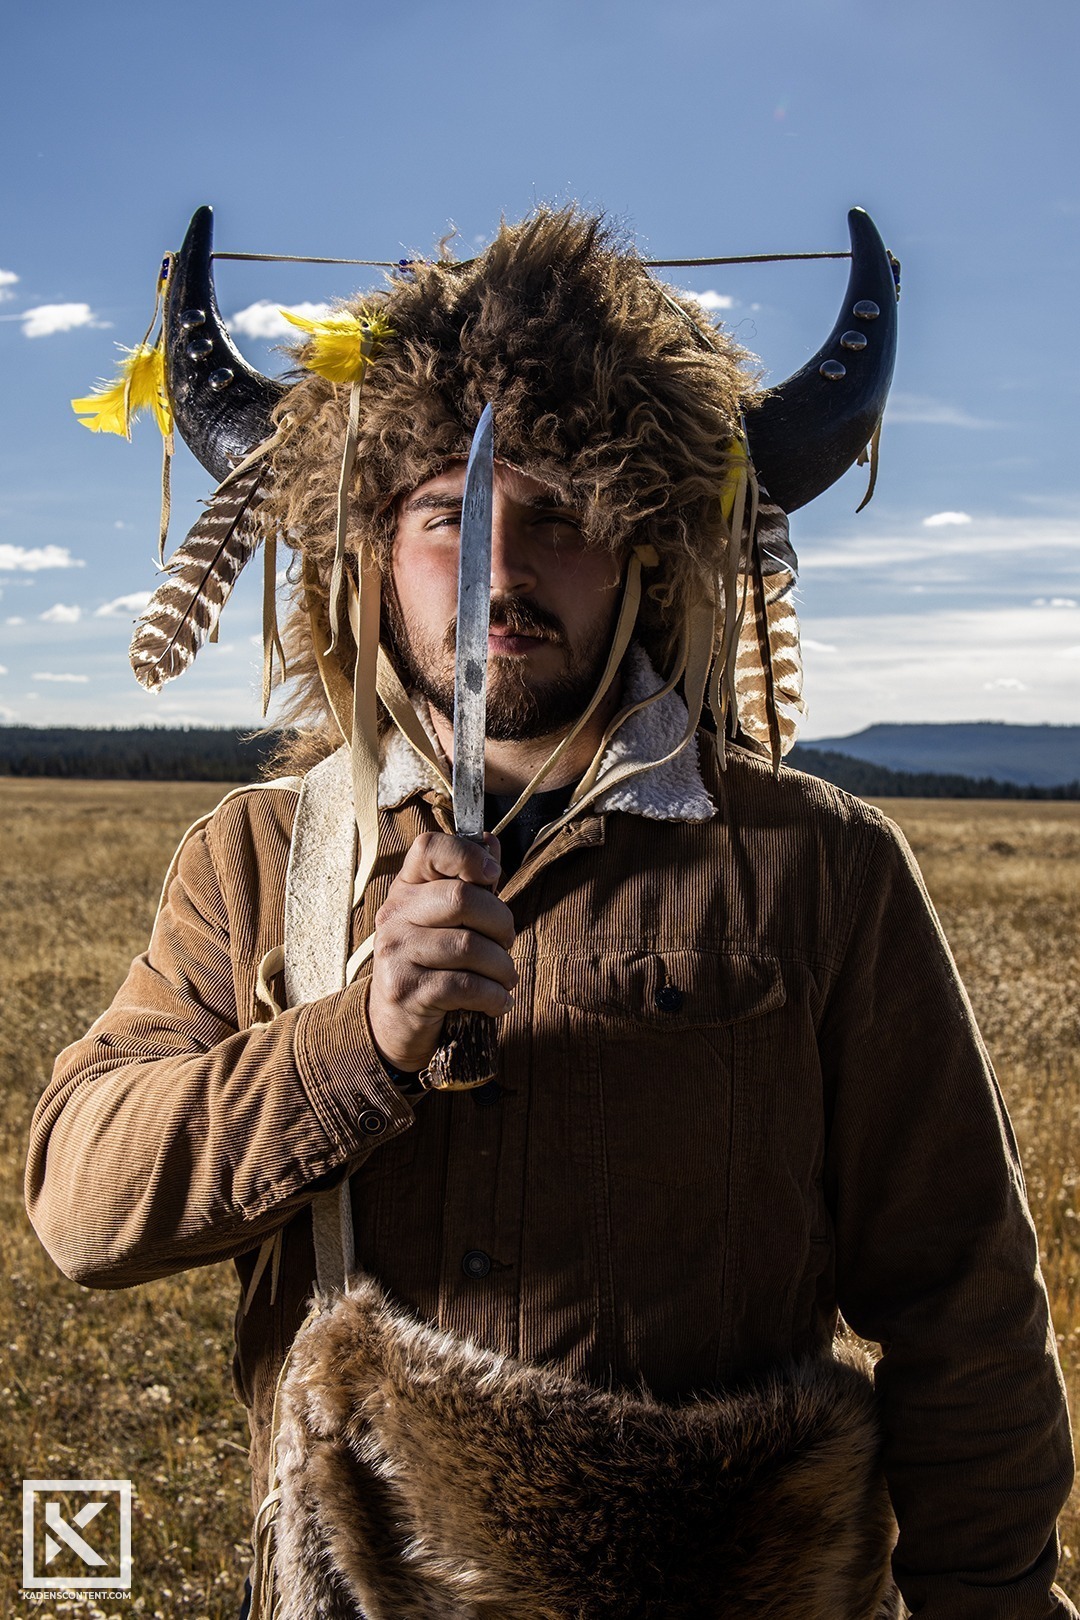
With some of the portraits I captured, I used speed lights. This would illuminate the subject without having to lighten the background. When you want to keep the detail of your background, a Speedlight is a great tool to have. I used this in my three photos of mountain men. Before their faces would have been too dark, but with a light, I was able to illuminate the face without having to overexpose the background. It also gave me the freedom to create more dramatic lighting for my national park portraits.
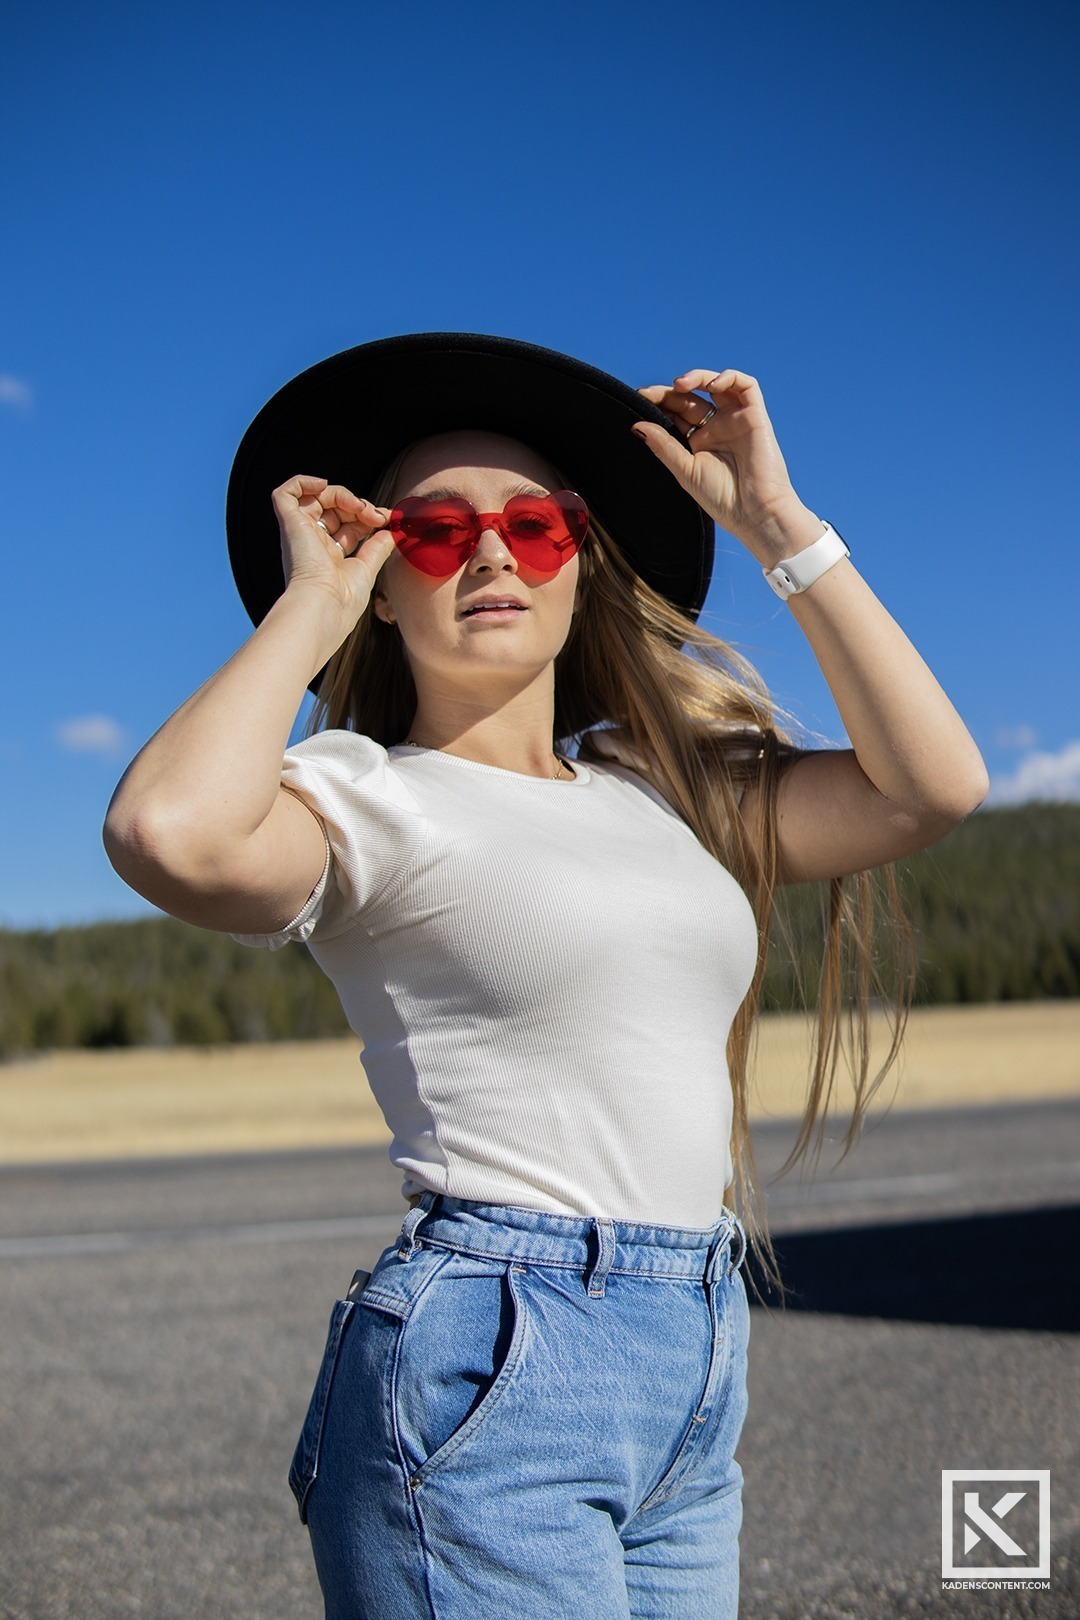
When capturing national park portraits, you don’t need to have a lot of props. Even the simple things that you have on your person can create their own story. With one of my models, just a simple pair of sunglasses were able to add more drama to one of my photos.
If you are not so concerned about getting a cool collection of backdrops in your national park portraits, you can just give your attention to lighting. These amazing areas have so much to offer your portraits and can help you get some really amazing shots. One of my portraits didn’t have much of a background, but the area itself created amazing lighting for my subject.
Portraits can be so much fun, and it is always a blast to get to travel a little as you capture them. Go ahead and try it out for yourself. The next time you go and visit a national park, be sure to bring your camera. You never know how good of portraits you might be able to capture along the way.


FIND MORE
If you are interested in finding more National Park Portraits, look here.
You can find more of my Portrait Photography here.
As always, thank you so much for looking into my content. I hope that it could both interest and inspire you as you continue on in your own endeavors.
Autumn Fashion Accessories
PREPARING AUTUMN FASHION ACCESSORIES
Working with autumn fashion accessories was so much fun. We already worked with the models to capture amazing looks, but the important thing about fashion photography is to make the accessories and clothing marketable. To do this, we had to take several shots of the accessories that these models were using in their shots.
The accessories that we used during the autumn fashion shoot varied. Some models simply brought their own jewelry or outfits, others had accessories added to their look once they were at the venue. These accessories varied from rings and necklaces to skateboards and bouquets. Overall, each fashion accessory added a different feel to each model that made the look more intriguing and marketable.
My favorite shots of the night were those that were most simple. Making the fashion accessories stand out was very simple. All it required was proper lighting and angling. I’m starting to see this as a common theme in photography. I loved being able to accentuate each accessory and show it off in the way that I used my camera. Overall, this was an amazing experience, and I am super happy with how my photographs of autumn fashion accessories turned out.


AUTUMN FASHION ACCESSORIES AT THE VENUE
This was such an amazing fashion shoot to be able to take part in. The location that we were able to work with was called The Venue. It was so beautiful and provided an amazing backdrop to all the different fashion booths we had set up. I thought it would be good to include a few pictures of the venue where all of these fashion photos came from.
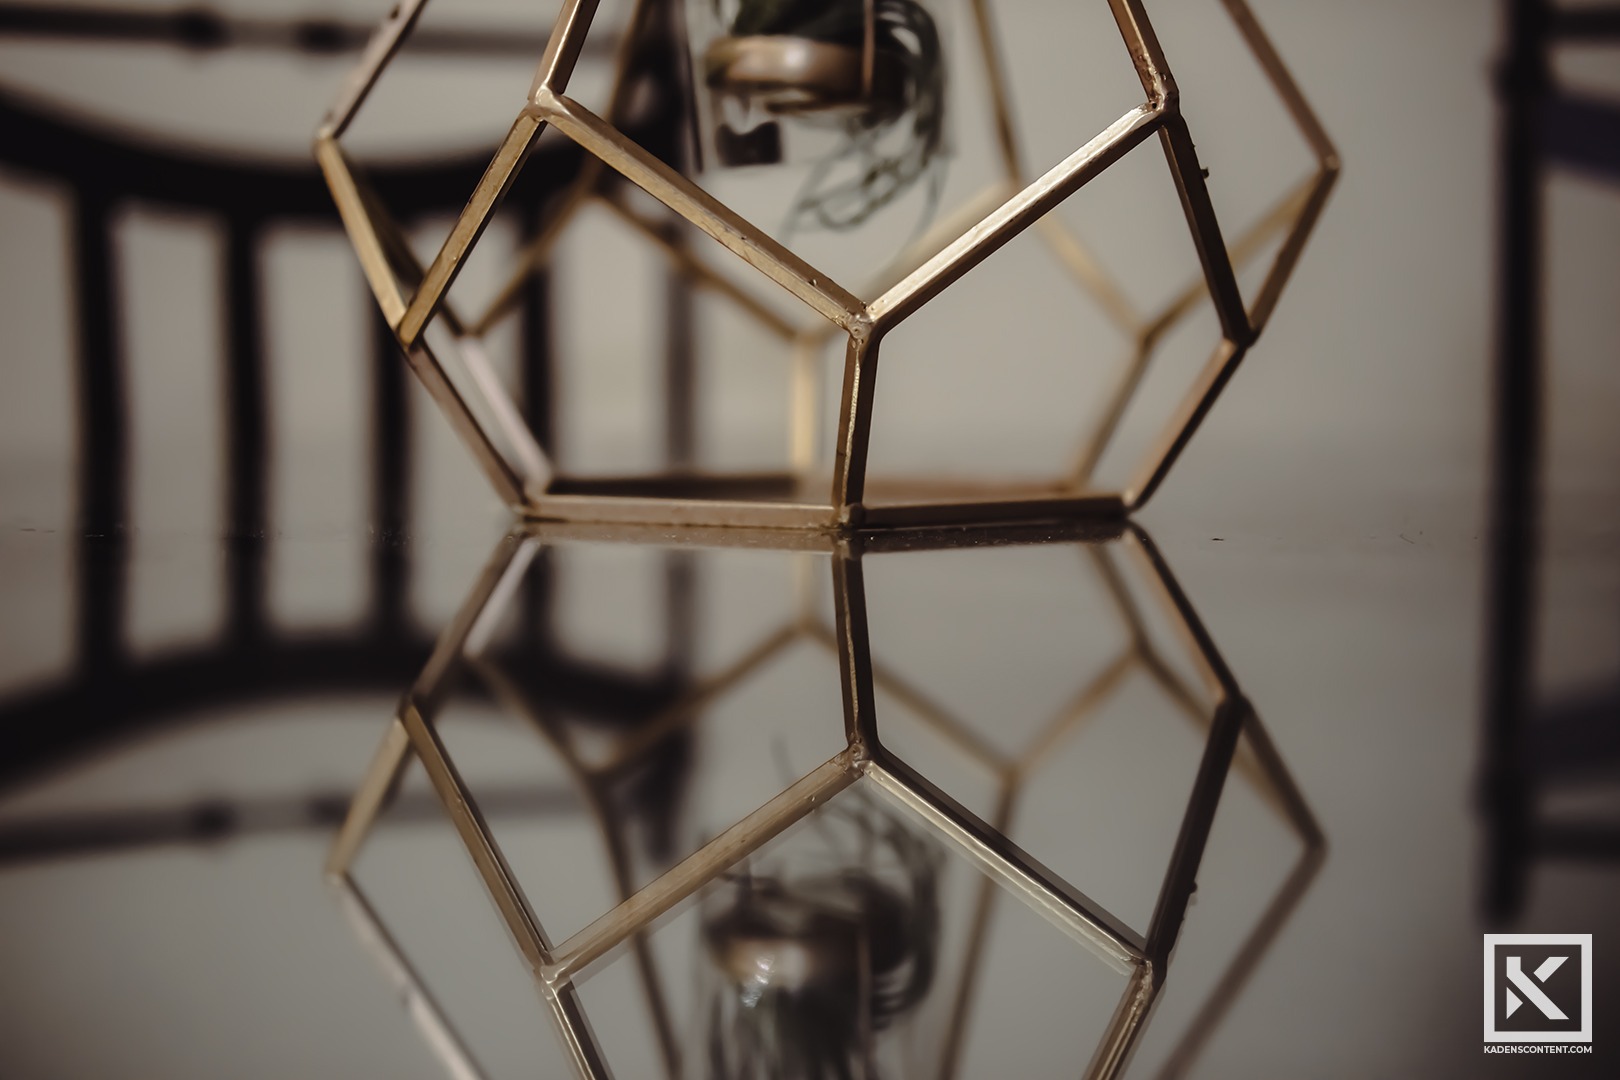
The rustic feel of the Venue really added to the theme of some of the looks we were going for in our shots. The Venue was well furnished with pieces that added to our shots. After the models had all gone, I went around with my camera to try and capture some additional shots. I was able to find cool reflections and textured backgrounds that all made for some more interesting shots.


FIND MORE
If you are looking for more Autumn Fashion Accessories, look here.
You can find more of my fashion and portrait work here.
Group Autumn Fashion
PREPARING GROUP AUTUMN FASHION
Working on group autumn fashion photography was so much fun. It was great being able to work with each model one on one, but it also got a little interesting as we started to pair up some of the models. We gave the bride a groom and the singles some friends. It was so much fun taking this autumn fashion shoot and pairing up the models into groups looks to make it more like a party.
Preparing for this fashion shoot, some other photographers and I took about a dozen models to an open venue. There, we were able to set up different booths to help each model put together different looks. In these booths, we had models dressed as bride and groom, friend groups, and various other looks. Also, since this fashion shoot took place during the onset of autumn, most of our model group attended in their warmer attire. With all the looks that we had ready, we began to group them up and get some interesting looks.
PHOTOGRAPHING GROUP AUTUMN FASHION
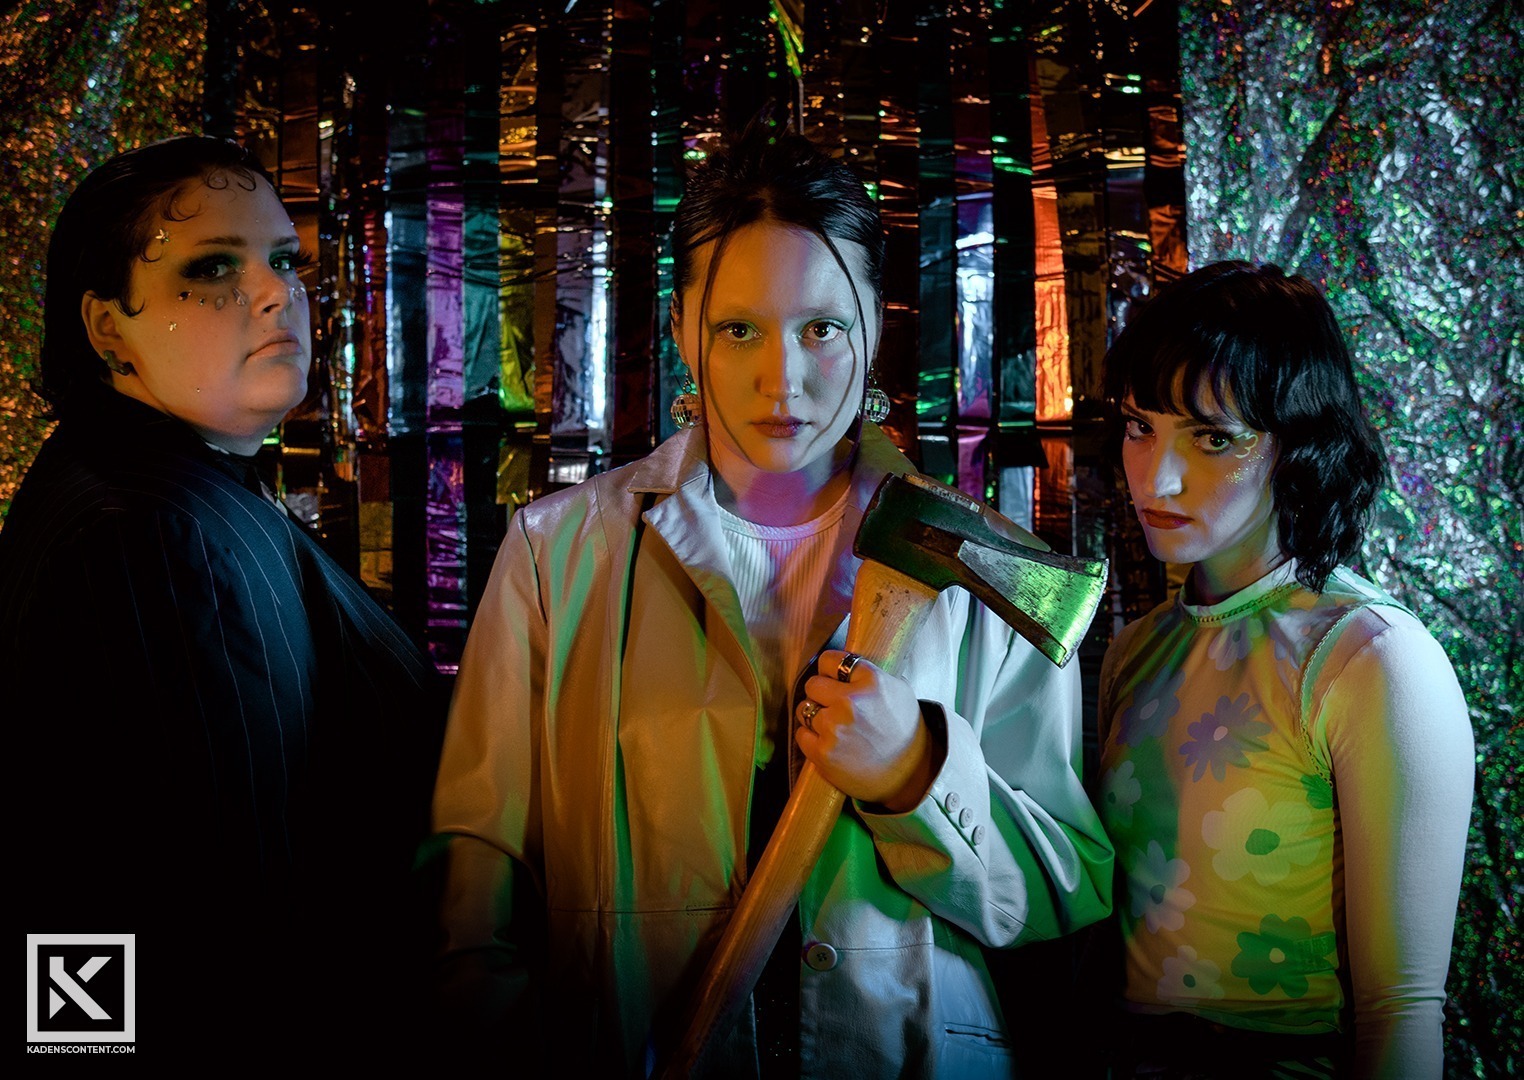
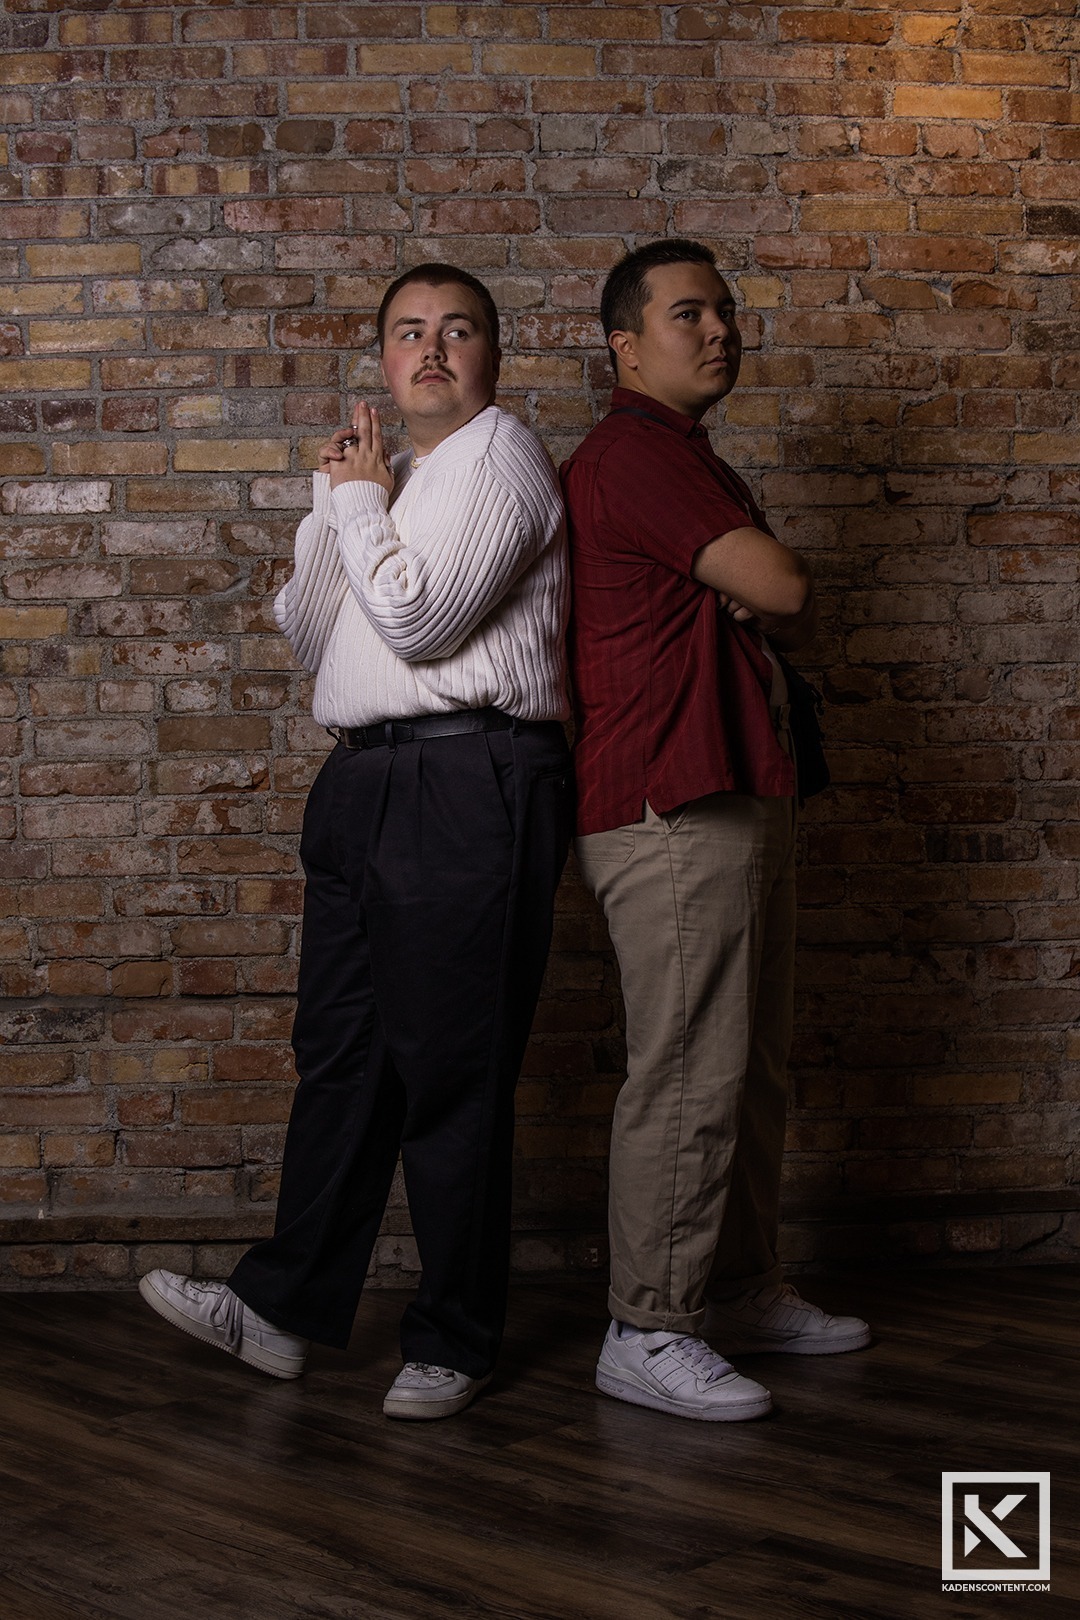
With these new groups put into place for the autumn fashion shoot, I wanted to find ways to better create a story. One way that I thought was pretty fun was giving the party girls an axe. The booth that we had set up was for three girls that were all dressed to party. I like this look, but I thought it would be cool to add in a scarier element. I gave one of the models an axe and asked all of them to make sinister faces toward the camera. This look made me think more of the teenage drama that we see all over TV series today. I thought it looked awesome and I was super happy with how it turned out.
Overall, I am thrilled with all the looks I was able to put together during this autumn group fashion shoot. I love the amount of fun I was able to have with each model, and I am happy with how all the photos turned out. Looking forward to doing it again in the future.
FIND MORE
If you want more inspiration for Group Autumn Fashion, check out more outfits on Pinterest.
You can find more of my fashion and portrait work here.
Women’s Autumn Fashion
PREPARING WOMEN’S AUTUMN FASHION
Photographing women’s autumn fashion was so much fun. Recently, some other photographers and I had the chance to work with dozens of models to capture several different autumn looks for both men’s and women’s fashion. Overall, the experience was a blast, and I even captured some great shots along the way.
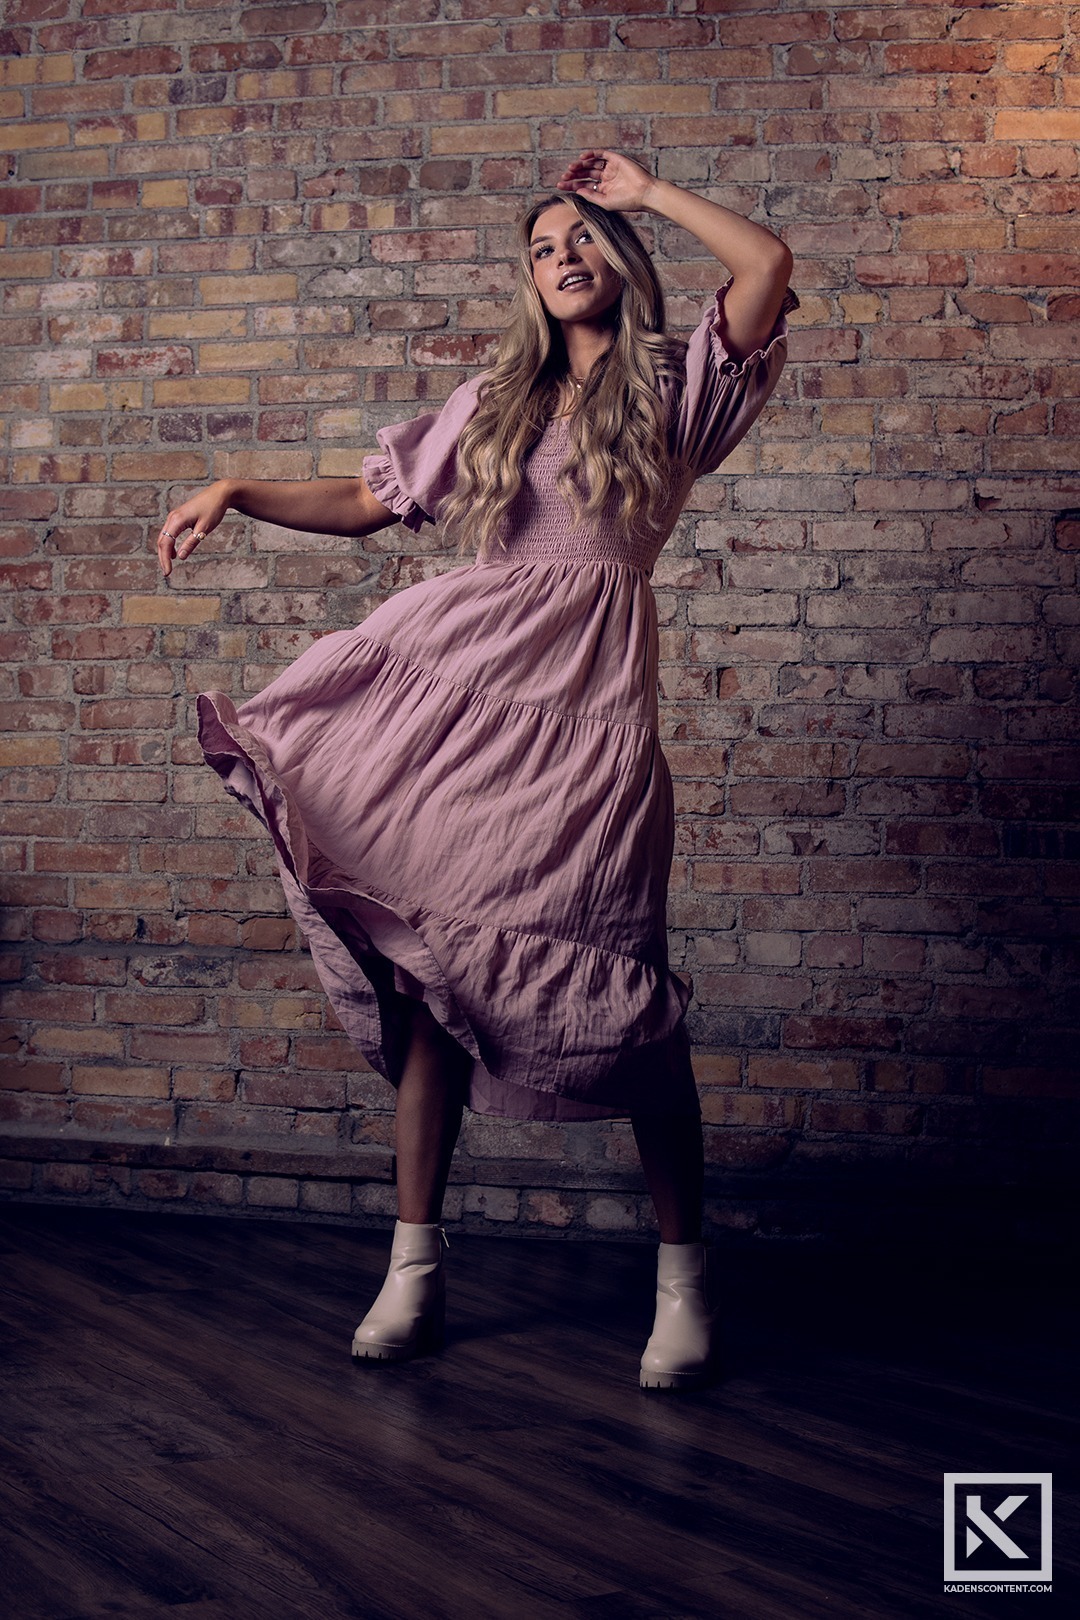
To prepare for this autumn fashion shoot, dozens of models were contacted to wear different looks for the camera. Some of the models were dressed in wedding dresses, others casual, and some even dressed to party. We wanted to take these looks and make them look both fashionable and marketable. Overall, we all had a great time photographing women’s autumn fashion.
PHOTOGRAPHING AND EDITING WOMEN’S AUTUMN FASHION
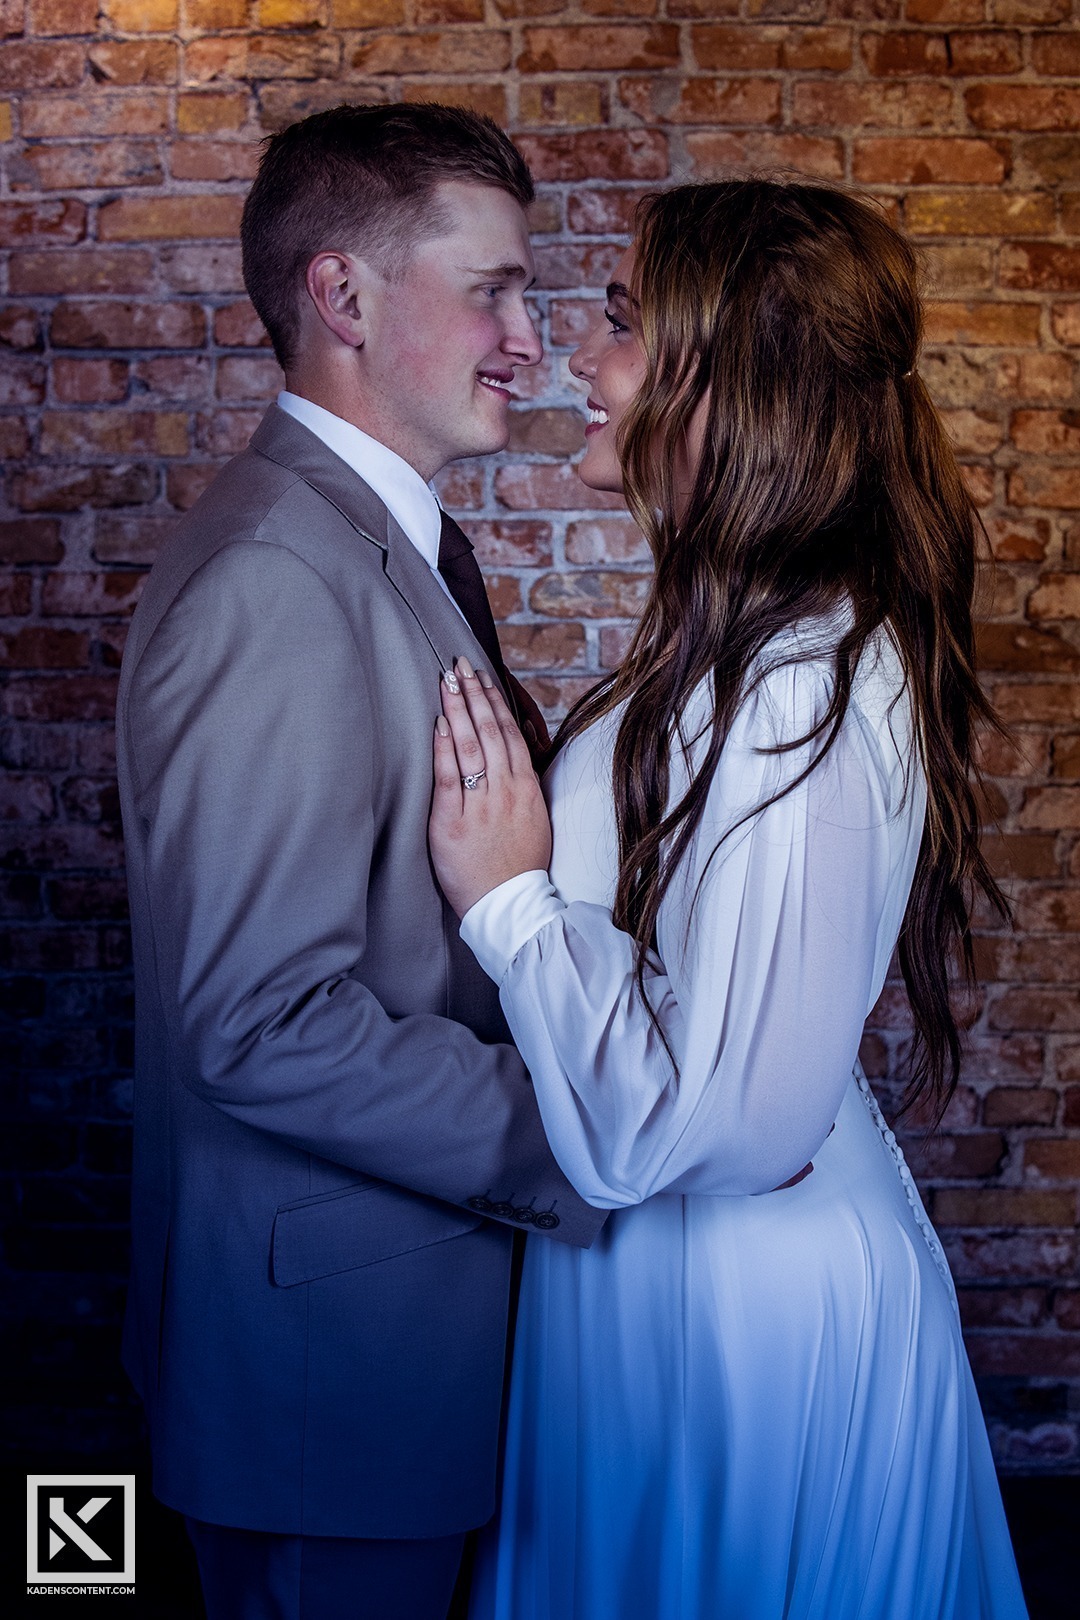
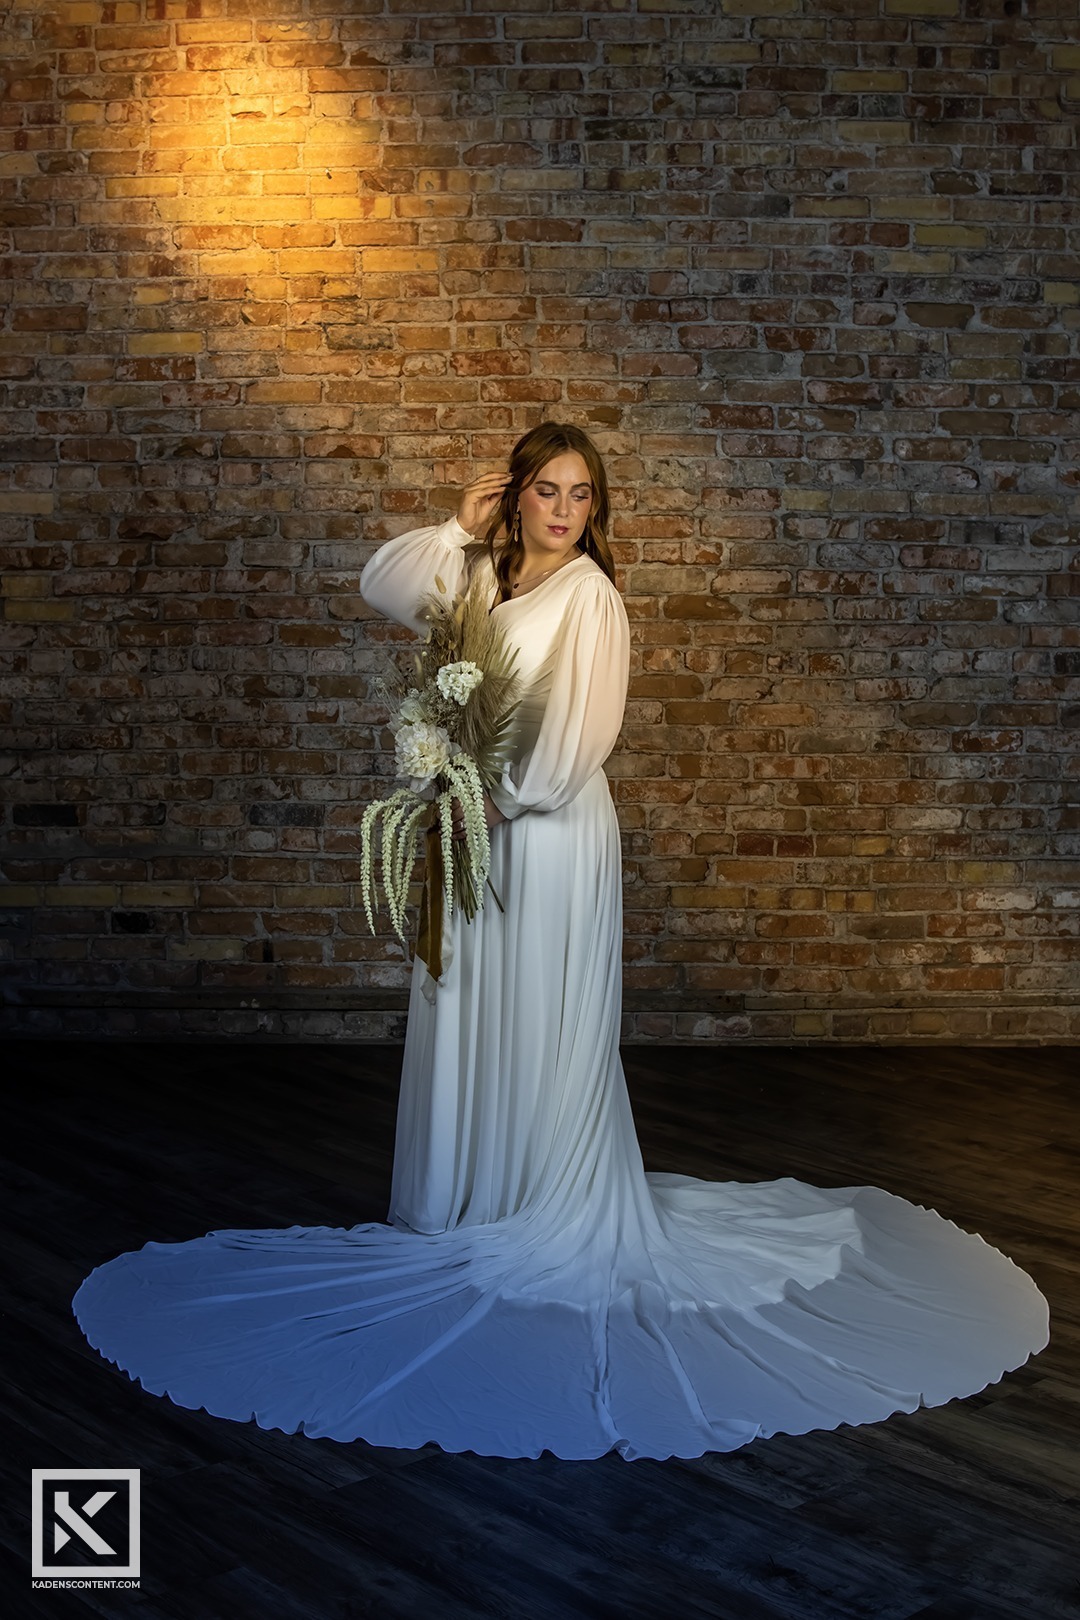
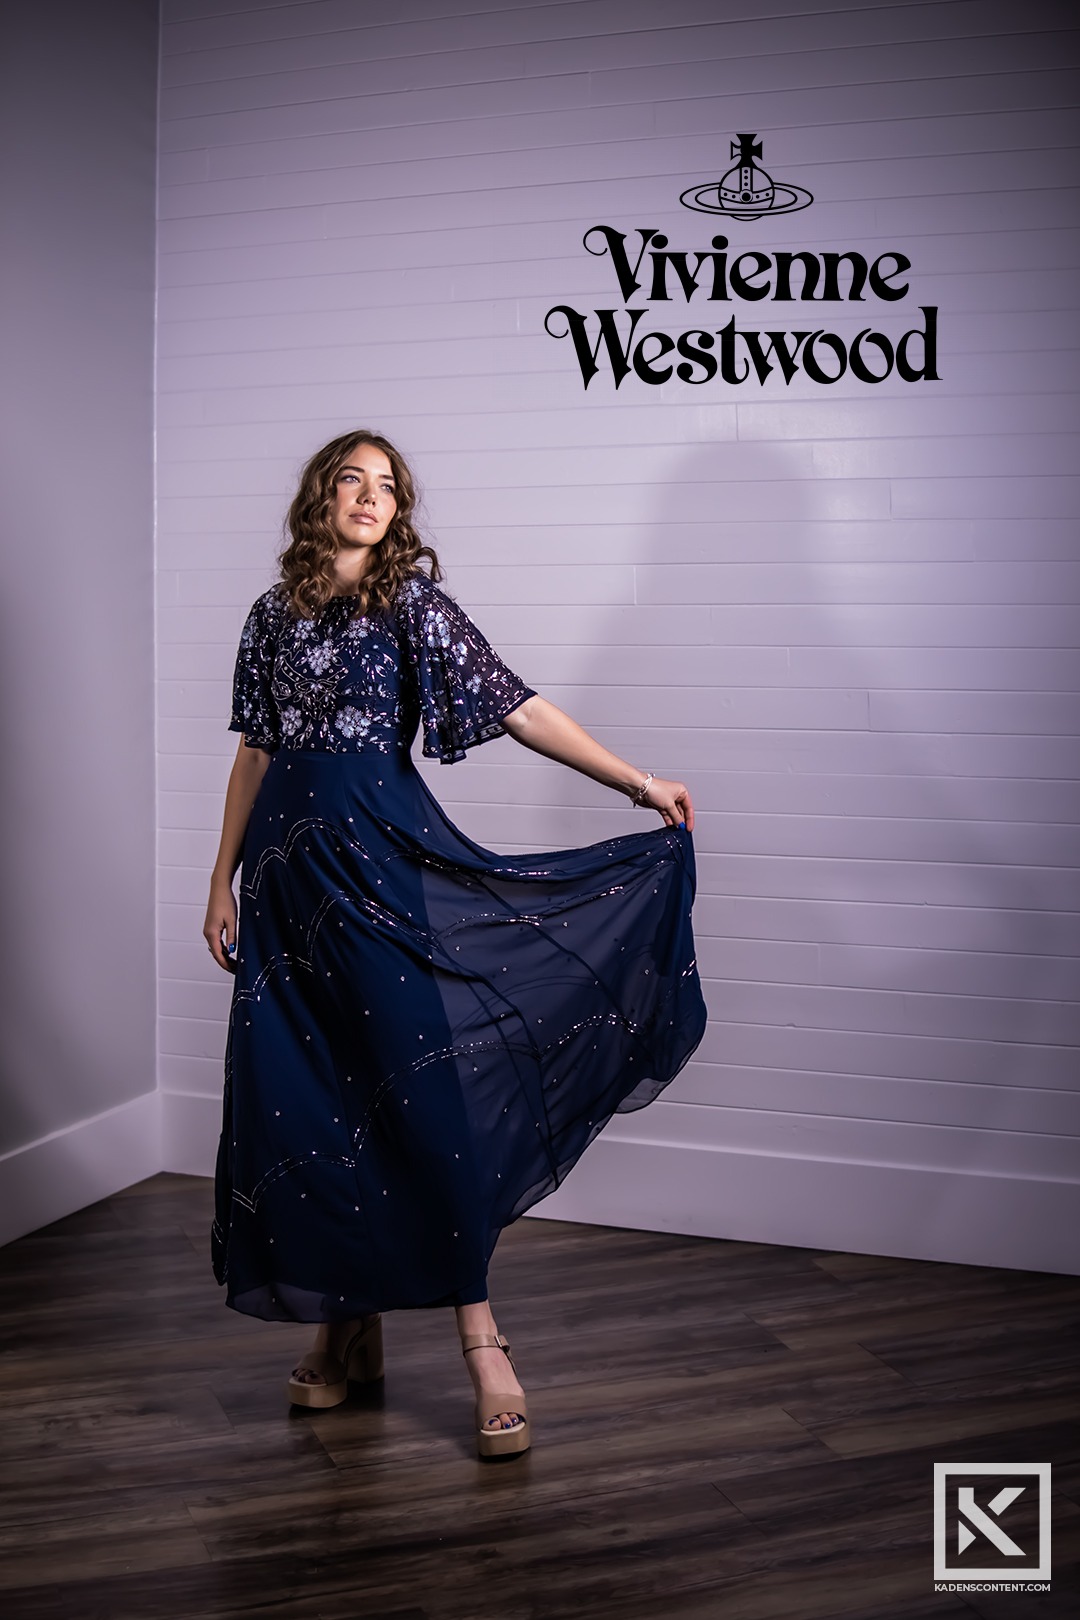
Along with photographing fashion, I also wanted to do some fashion edits as well. One area that I really thought would be fun to mess with was wedding photography. One of the models that we had was dressed in a wedding dress. This provided a perfect opportunity to work on a type of photography that is in high demand.
I worked a lot with this model to get some awesome angles that could really show off the wedding dress. Once I had the shot I wanted, it was up to my editing skills to take it the rest of the way.
I was really excited about one photo where the model was standing in front of a brick wall. There was a slight spot of light on the wall behind her that I really wanted to accentuate in my edits. I made the spot more of a pillar and used it to direct more of the focus to the face of the bride.
The light colors were also fun to work with and helped create more interesting tones in the overall look. I like the combination of warm and cool tones, so I added in more blues to the shadows and oranges to the highlights. This created interesting contrasts that balanced the entire piece. Overall, I was super happy with the final look.
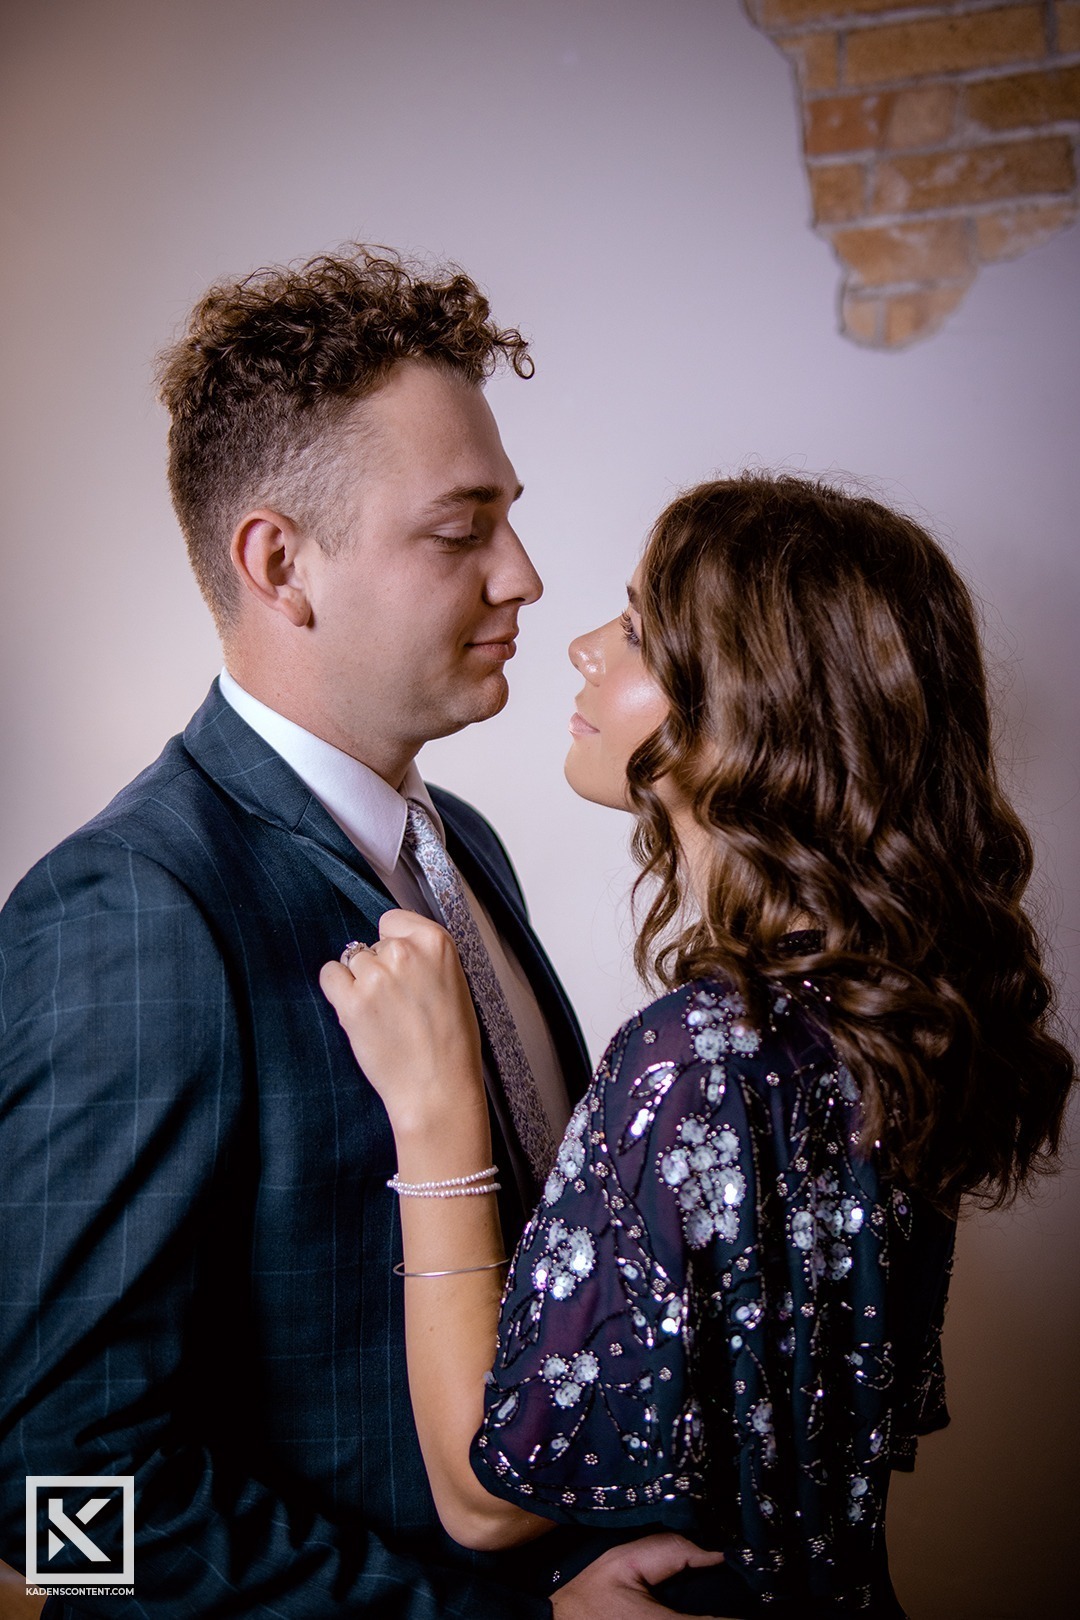
The remaining looks were also a blast to work with. We worked with different backdrops and studio lighting to help create varying looks for women’s autumn fashion. Overall, I am super happy with how all of these shots turned out, and I look forward to doing this again.


FIND MORE
If you want more inspiration for Women’s Autumn Fashion, check out more outfits on Pinterest.
You can find more of my fashion and portrait work here.
Men’s Autumn Fashion
PREPARING MEN’S AUTUMN FASHION
Shooting men’s autumn fashion photography was an awesome experience. I feel like we are all constantly looking for the next best outfit to put on for the next chilly season. During this photoshoot, I got to work with dozens of models to capture different marketable looks for men’s autumn fashion. Overall, I had a great time with the fall fashion shoot and was happy with the wide variety of men’s clothing and looks I got to work with.
PHOTOGRAPHING MEN’S AUTUMN FASHION
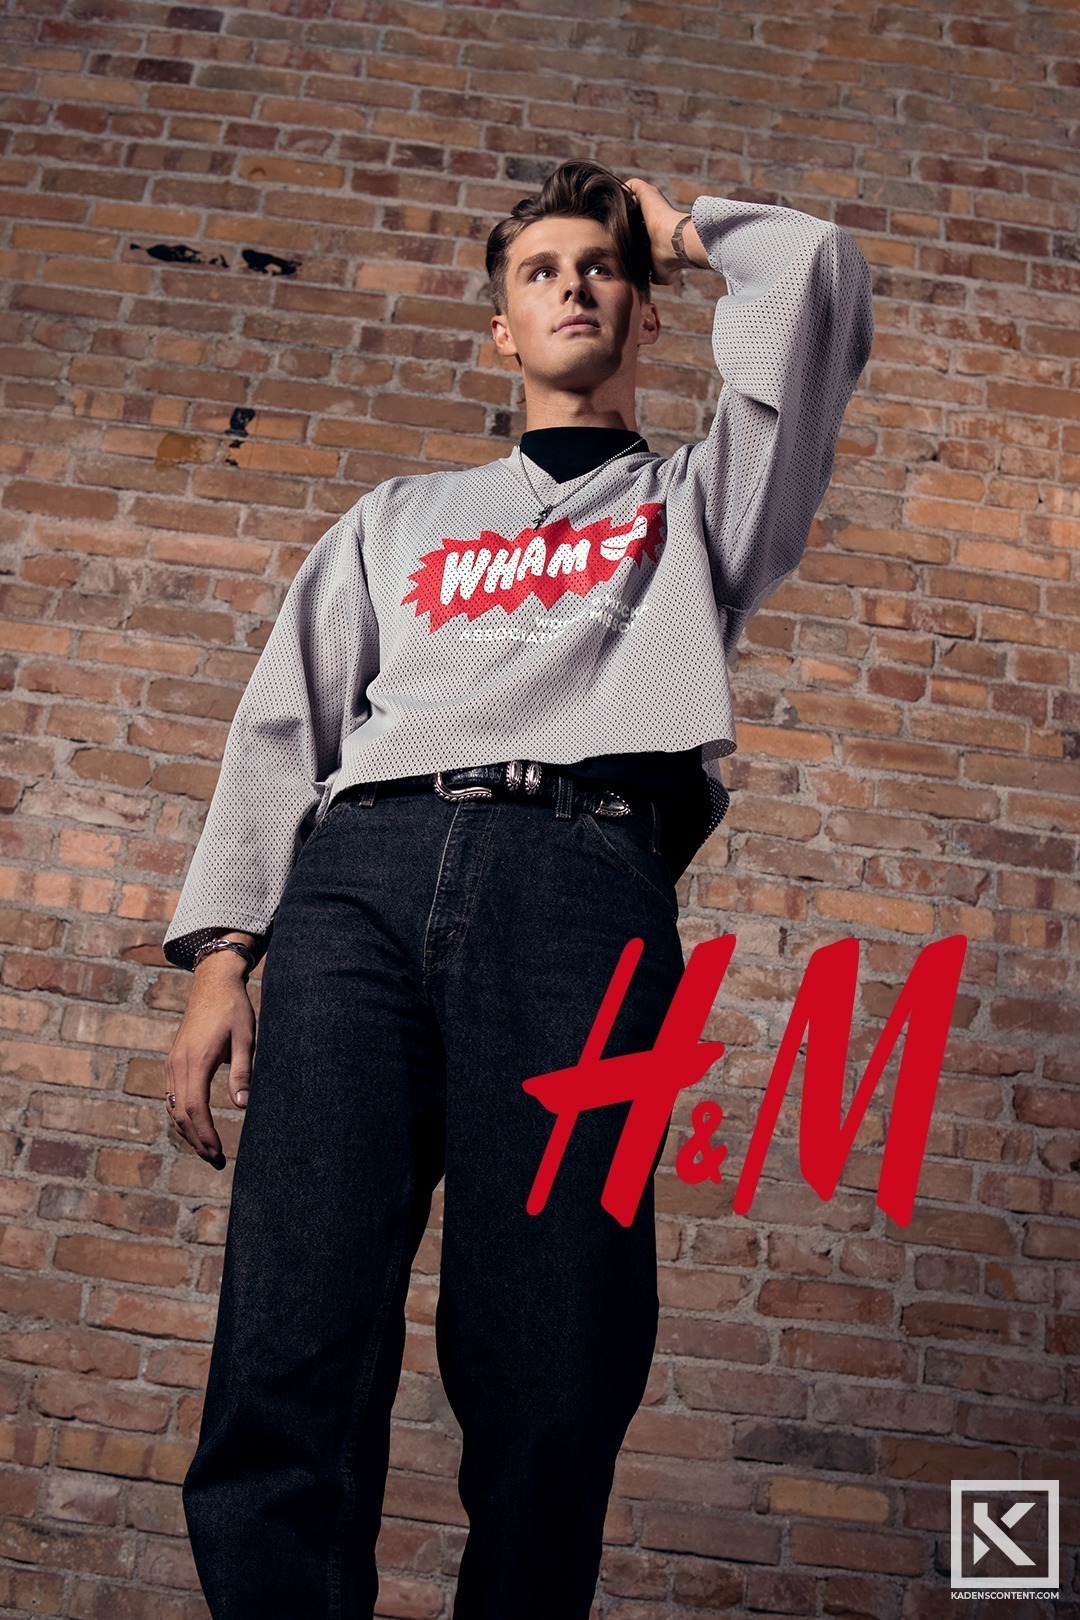
One of my goals in this photo shoot was to capture images that I could link to a specific brand. I wanted to make my shots of men’s autumn fashion marketable. I was able to achieve this by aiming for a specific look.
The main look that I decided on in one of my shots was the brand H&M. I thought one of my models had an outfit that really tied to their style, so I took several shots to try and match their brand. After I was happy with what I got, I took it into Photoshop and began to make the small edits that could really link it to the H&M brand. After all the preparation during the shoot, the only thing I really needed to add was the logo.
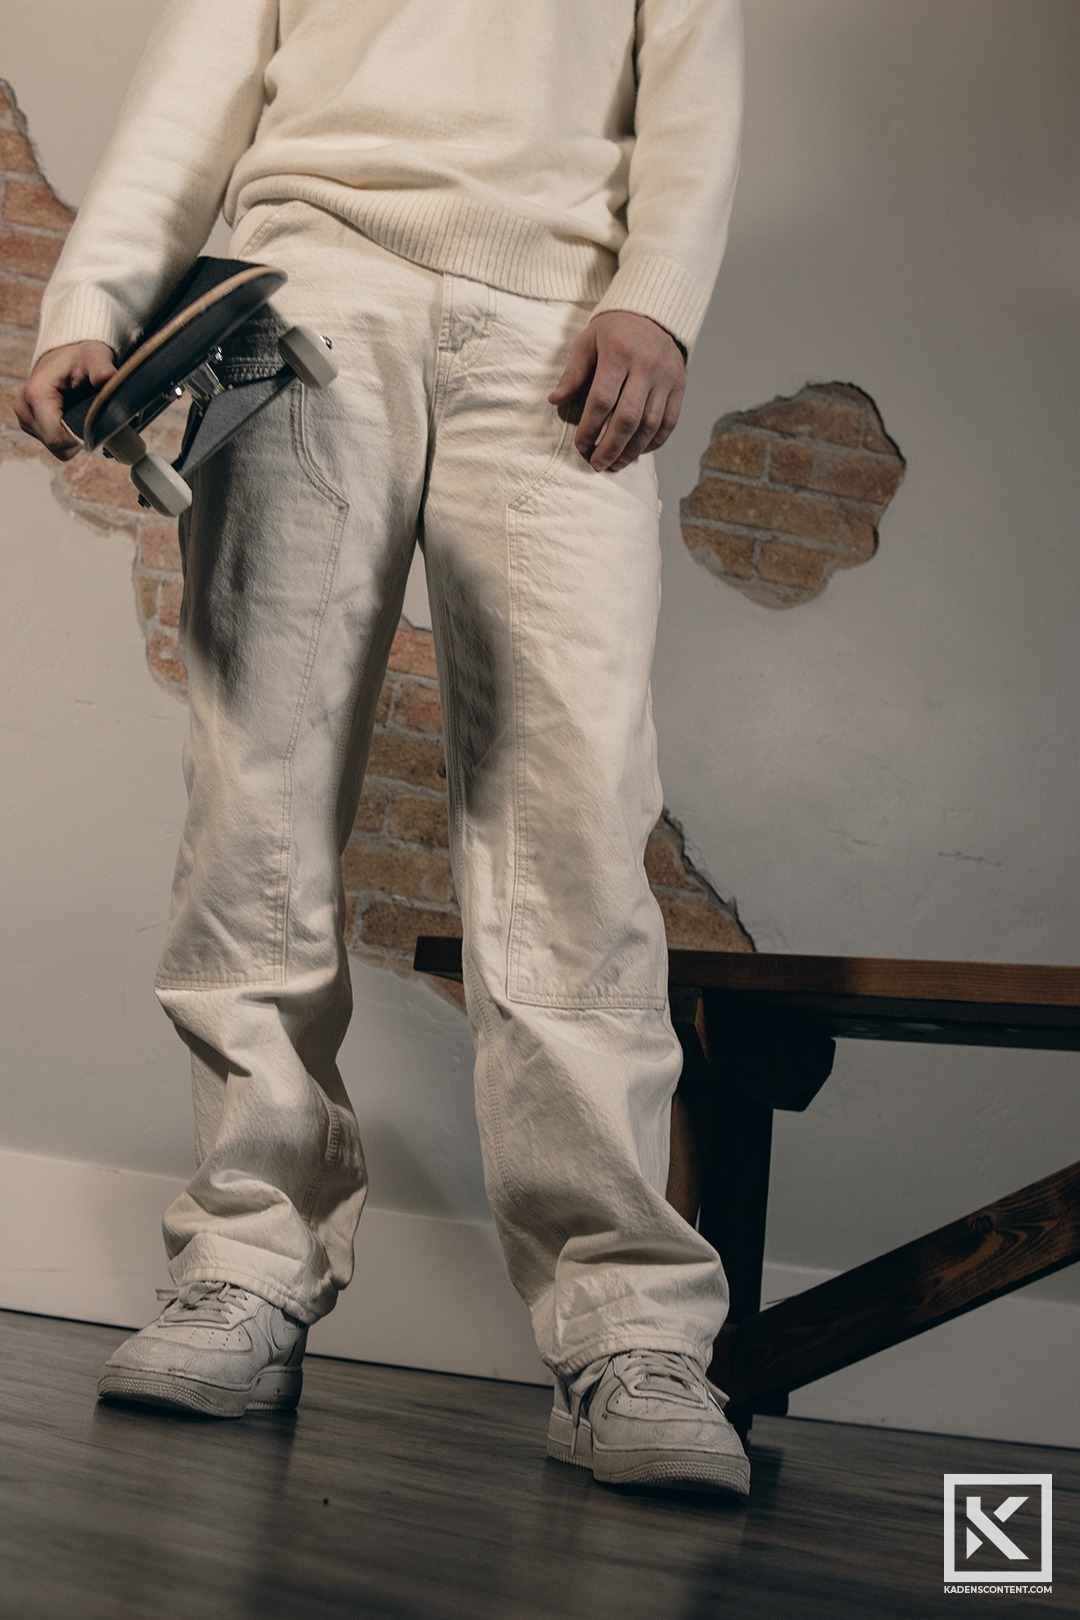
Below is an example of what I managed to capture. I was really excited with the angle that I used. This made the shot feel more alive. I feel like the H&M logo really completes the look of the photo.
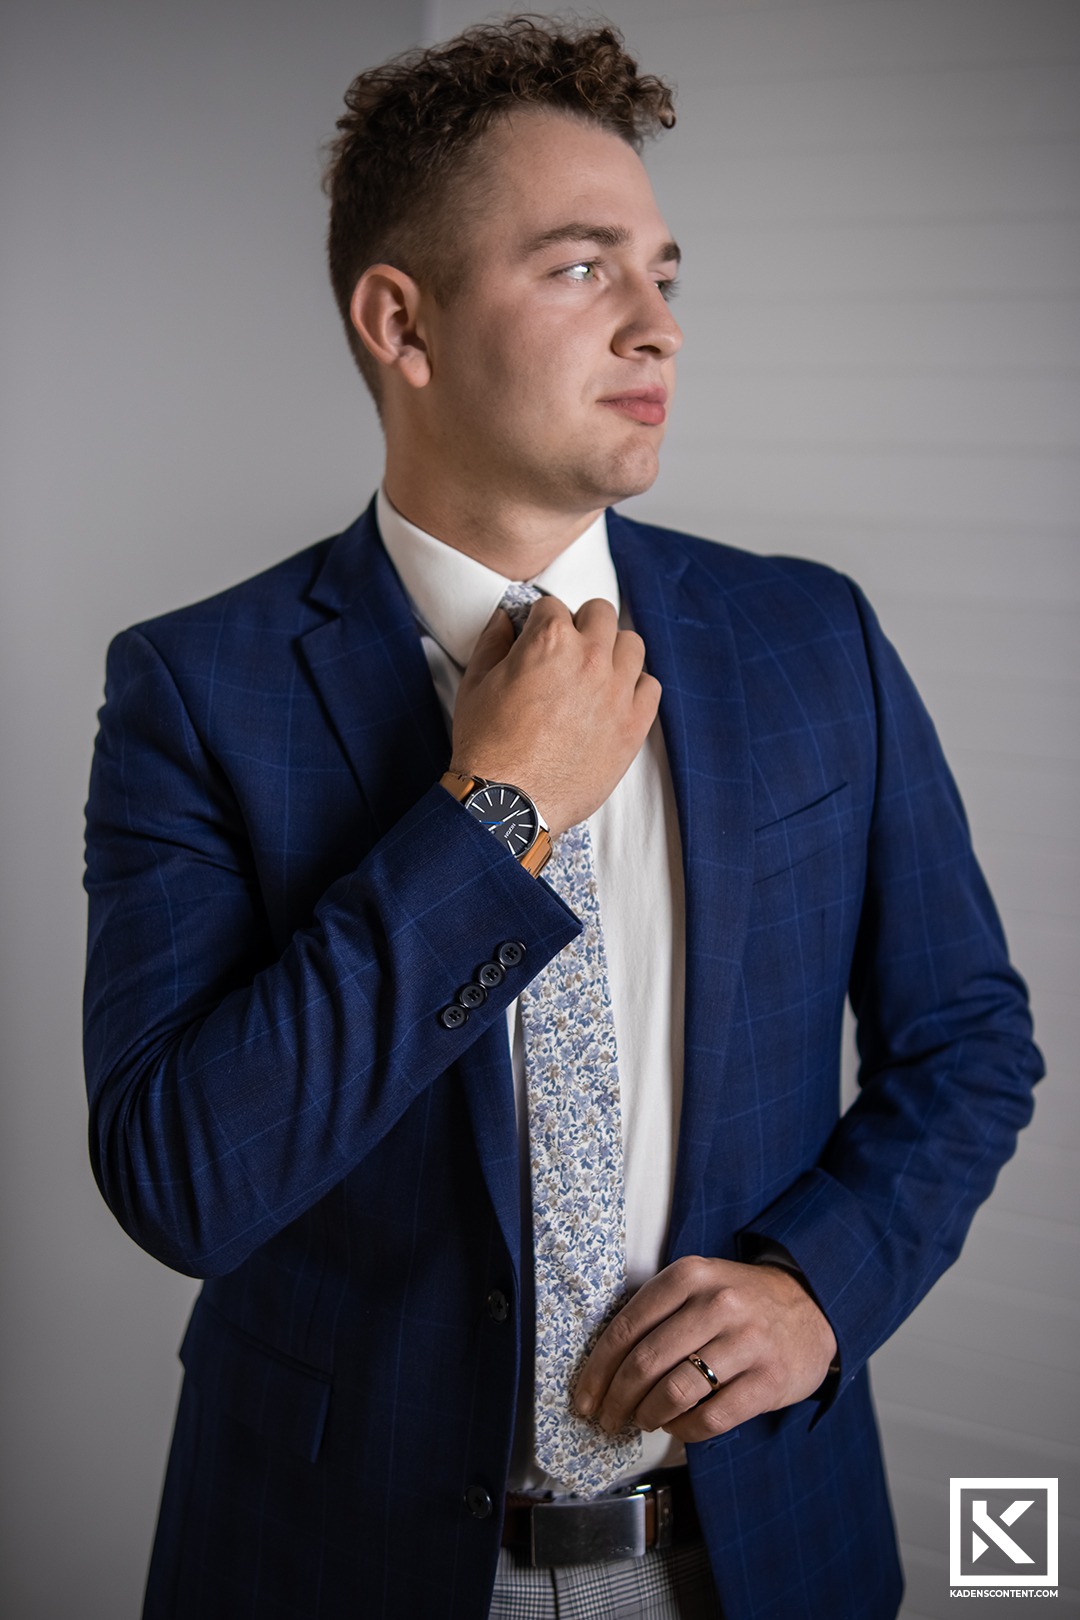
I continued working with some of the other models, and I found each of their looks to be incredible as well. Some of the outfits looked very professional while others looked more casual. In the end, both looks were extremely fun to work with. Overall, it was a great experience to take part in a fashion photoshoot.


FIND MORE
If you want more inspiration for Men’s Autumn Fashion, check out more outfits on Pinterest.
You can find more of my fashion and portrait work here.
Buffalo River Photography
HOW TO CAPTURE AMAZING PHOTOGRAPHY AT THE BUFFALO RIVER
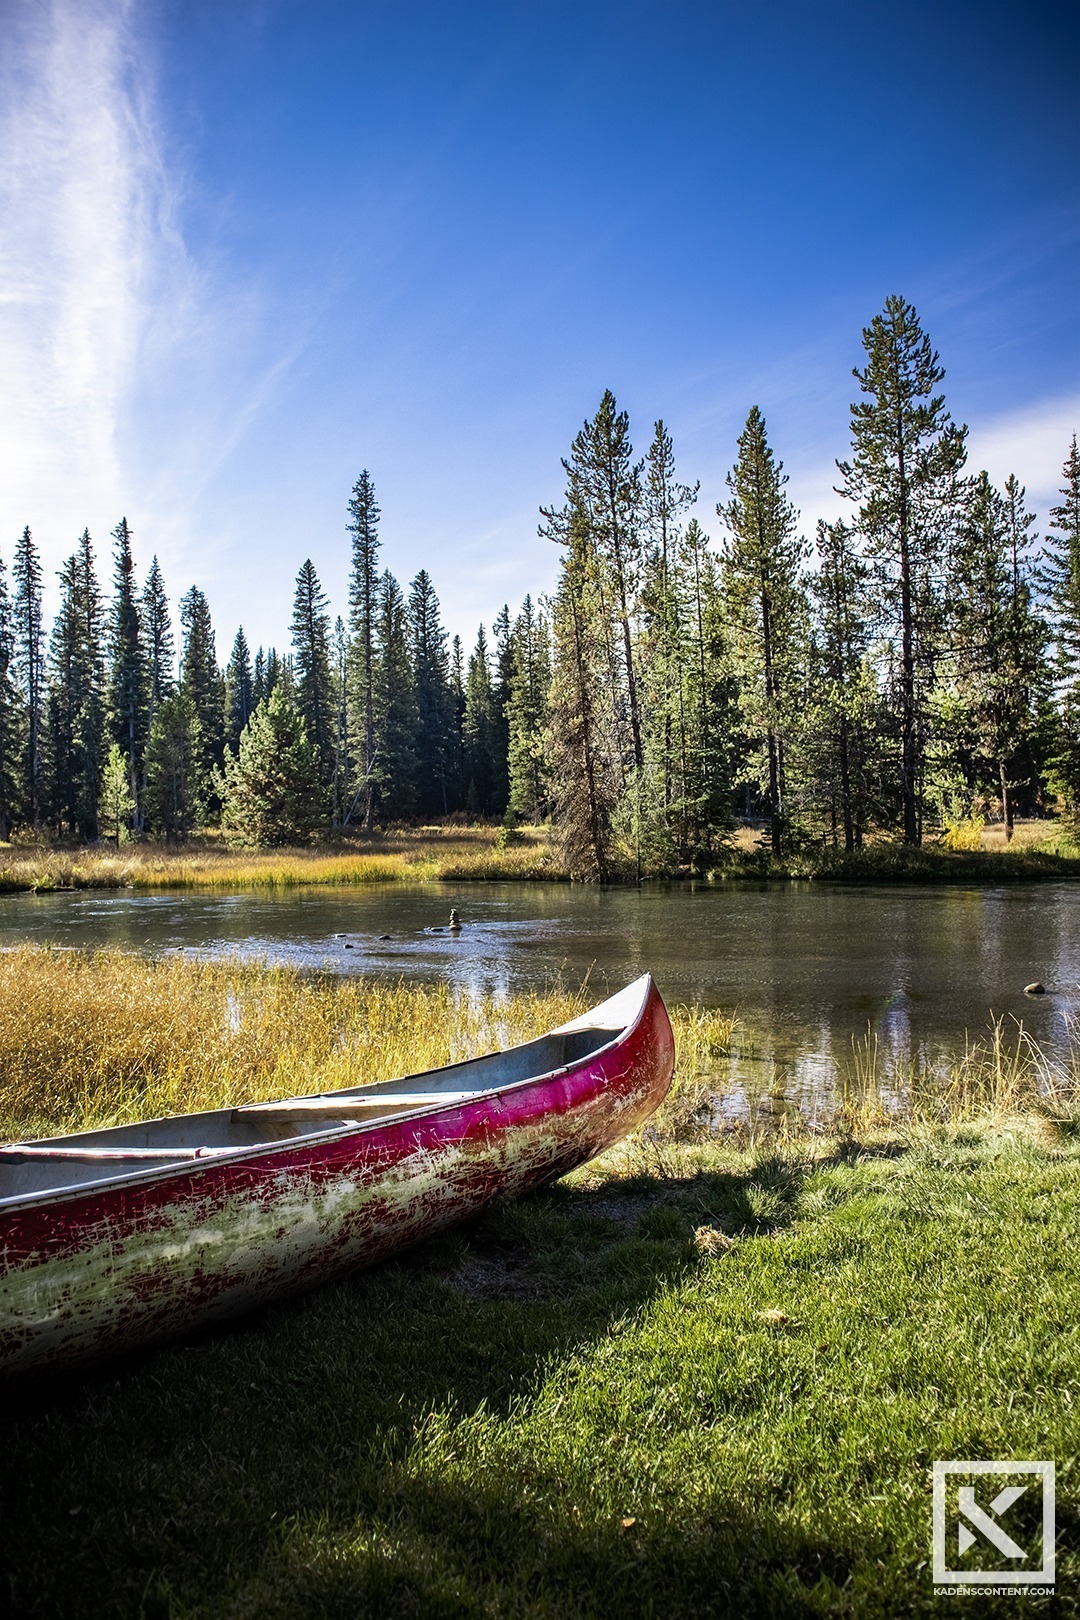
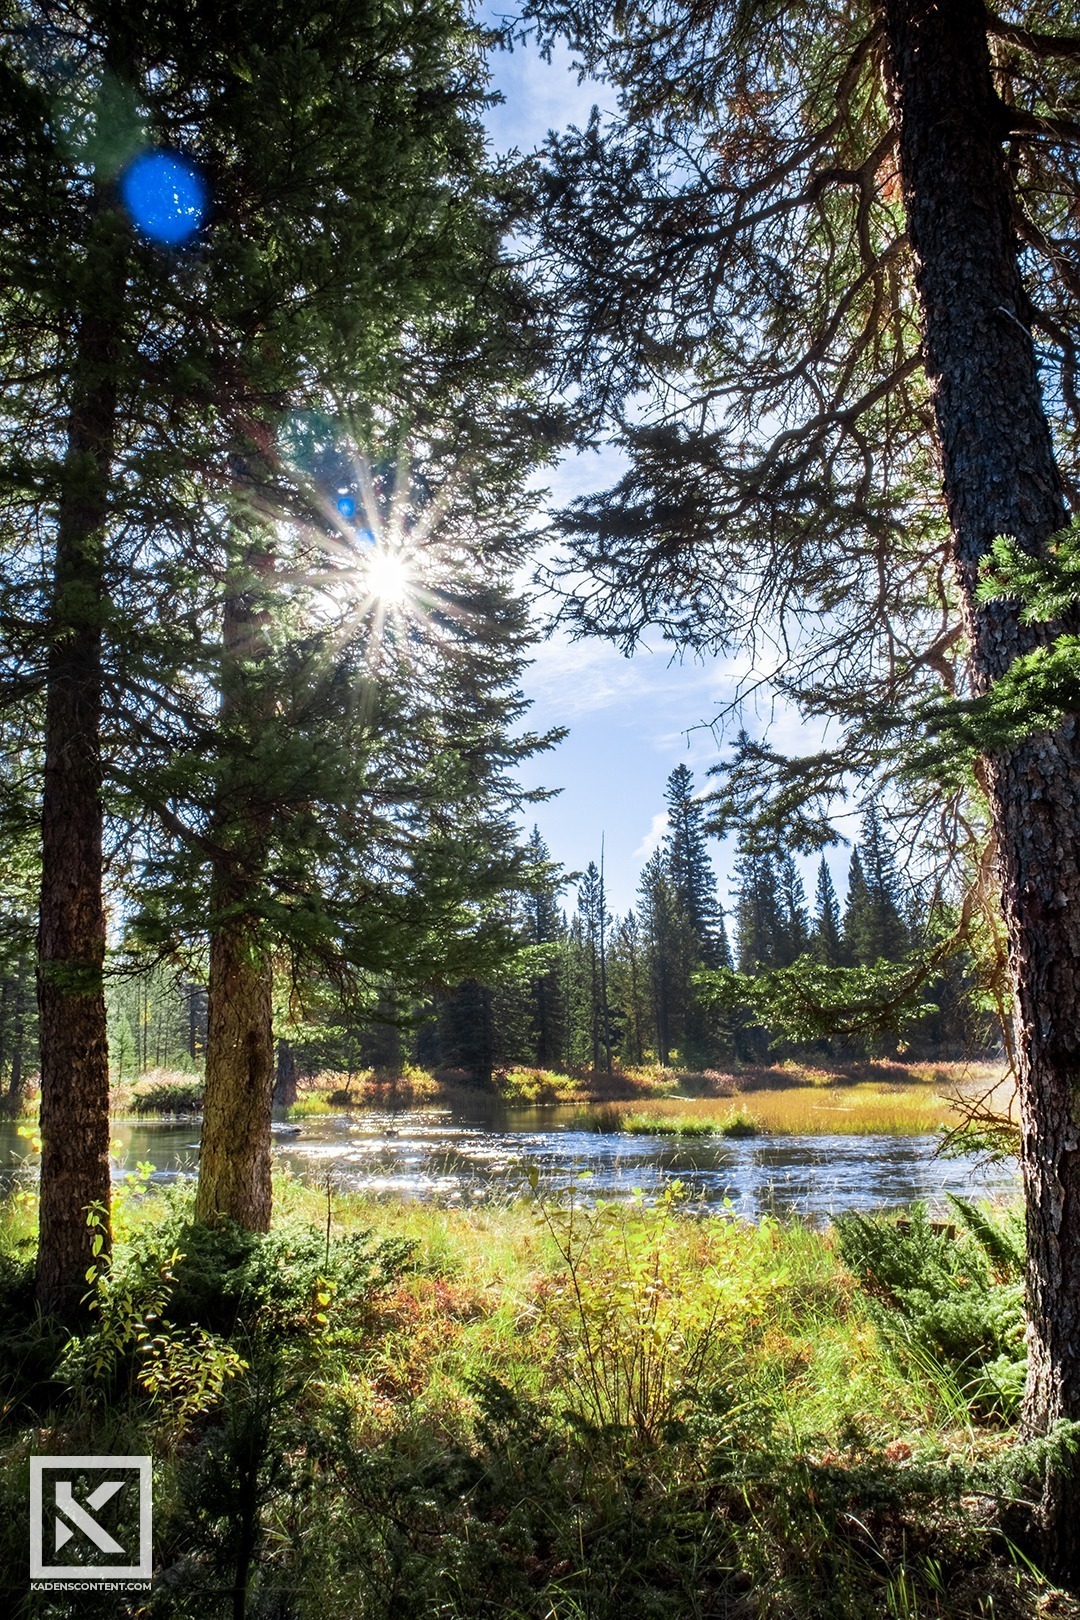
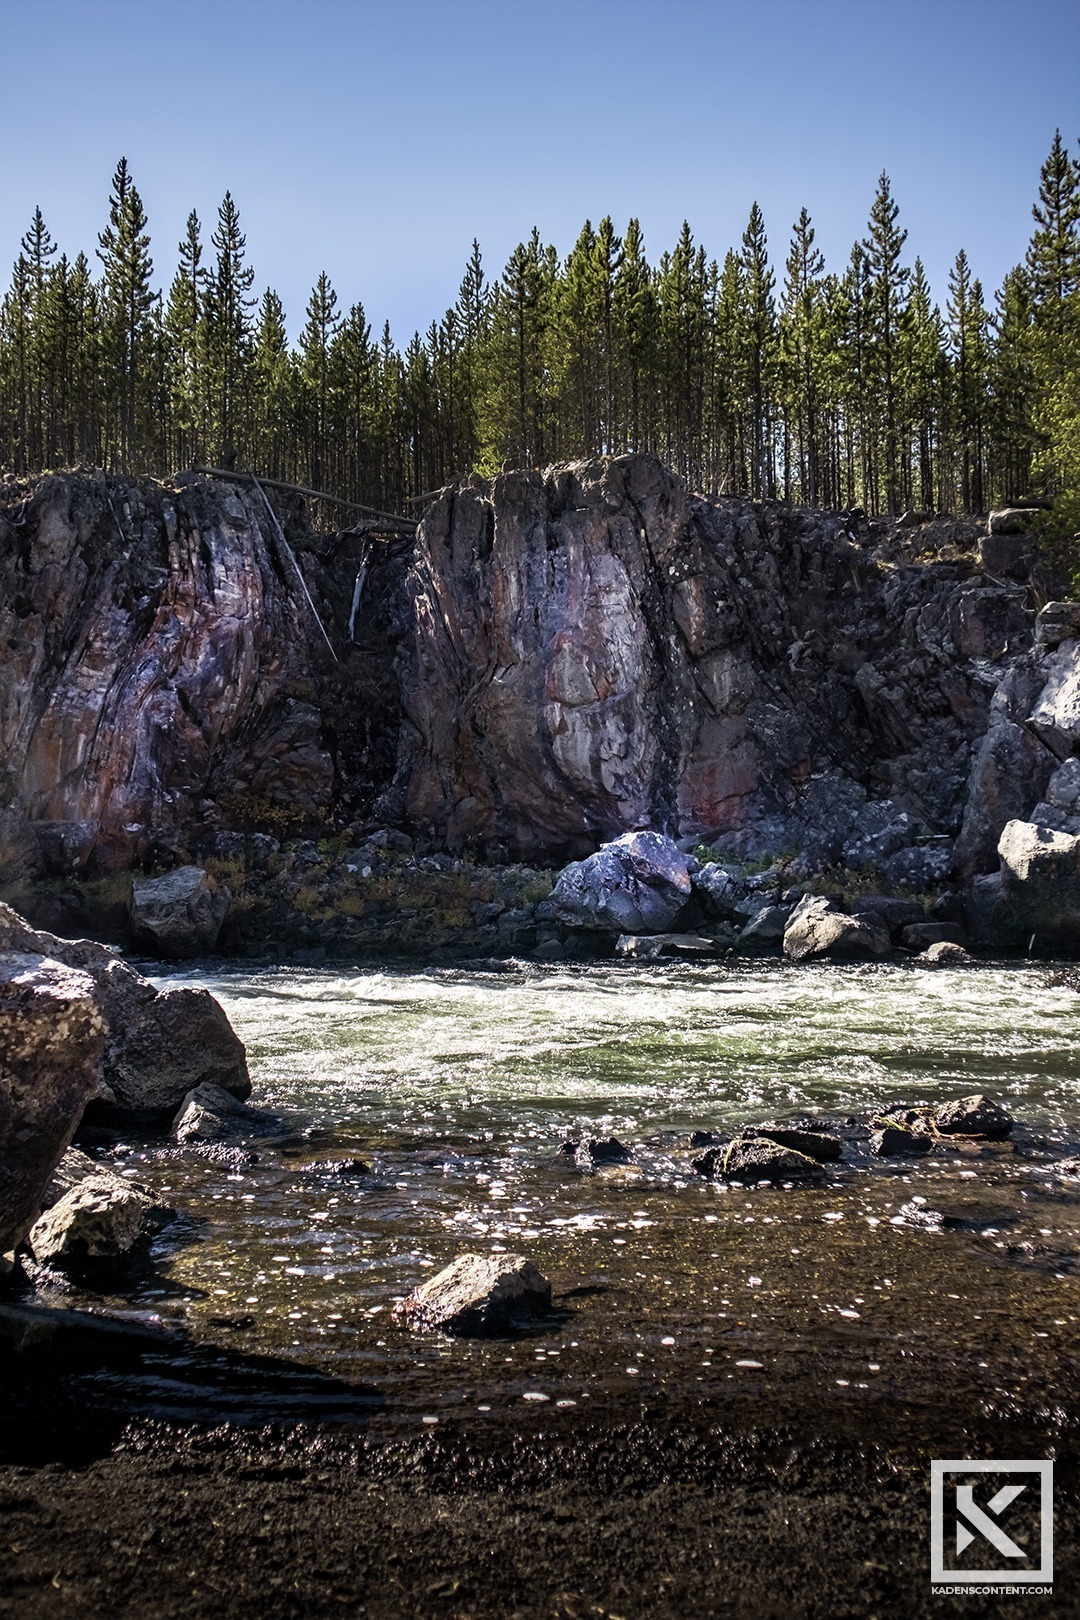
I recently had the chance to go on a photography excursion at the Buffalo River in Island Park, Idaho. The scenery was just amazing and I was so inspired to take several different shots along the water’s edge. Though I only spent a short time there, I am very pleased with the quality of the pictures I was able to capture.
The weather while we were shooting photography at the Buffalo River was amazing. I had fantastic clear skies and plenty of light in all of my shots. I was super happy with how well the sky worked with each shot. The weather was just amazing. Though the lighting was amazing, I still used a lot of bracketing when capturing my shots.
CAPTURING BUFFALO RIVER PHOTOGRAPHY
When capturing photography at Buffalo River, I used bracketing for all of my shots. With bracketing, you can set your camera to capture a shot in three separate exposures. These three shots can then be merged during editing to get the most details out of each exposure.
Bracketing is set to capture an additional overexposed and underexposed shot according to the settings on your camera. On your card, you will collect the original image and these additional two bracketed images. By having an underexposed shot, you can get a clear, well-saturated image of the sky. With an overexposed image, you can get a clear shot of all the details that are in the shade. The original image will give you the baseline of where most of your basic details are visible.
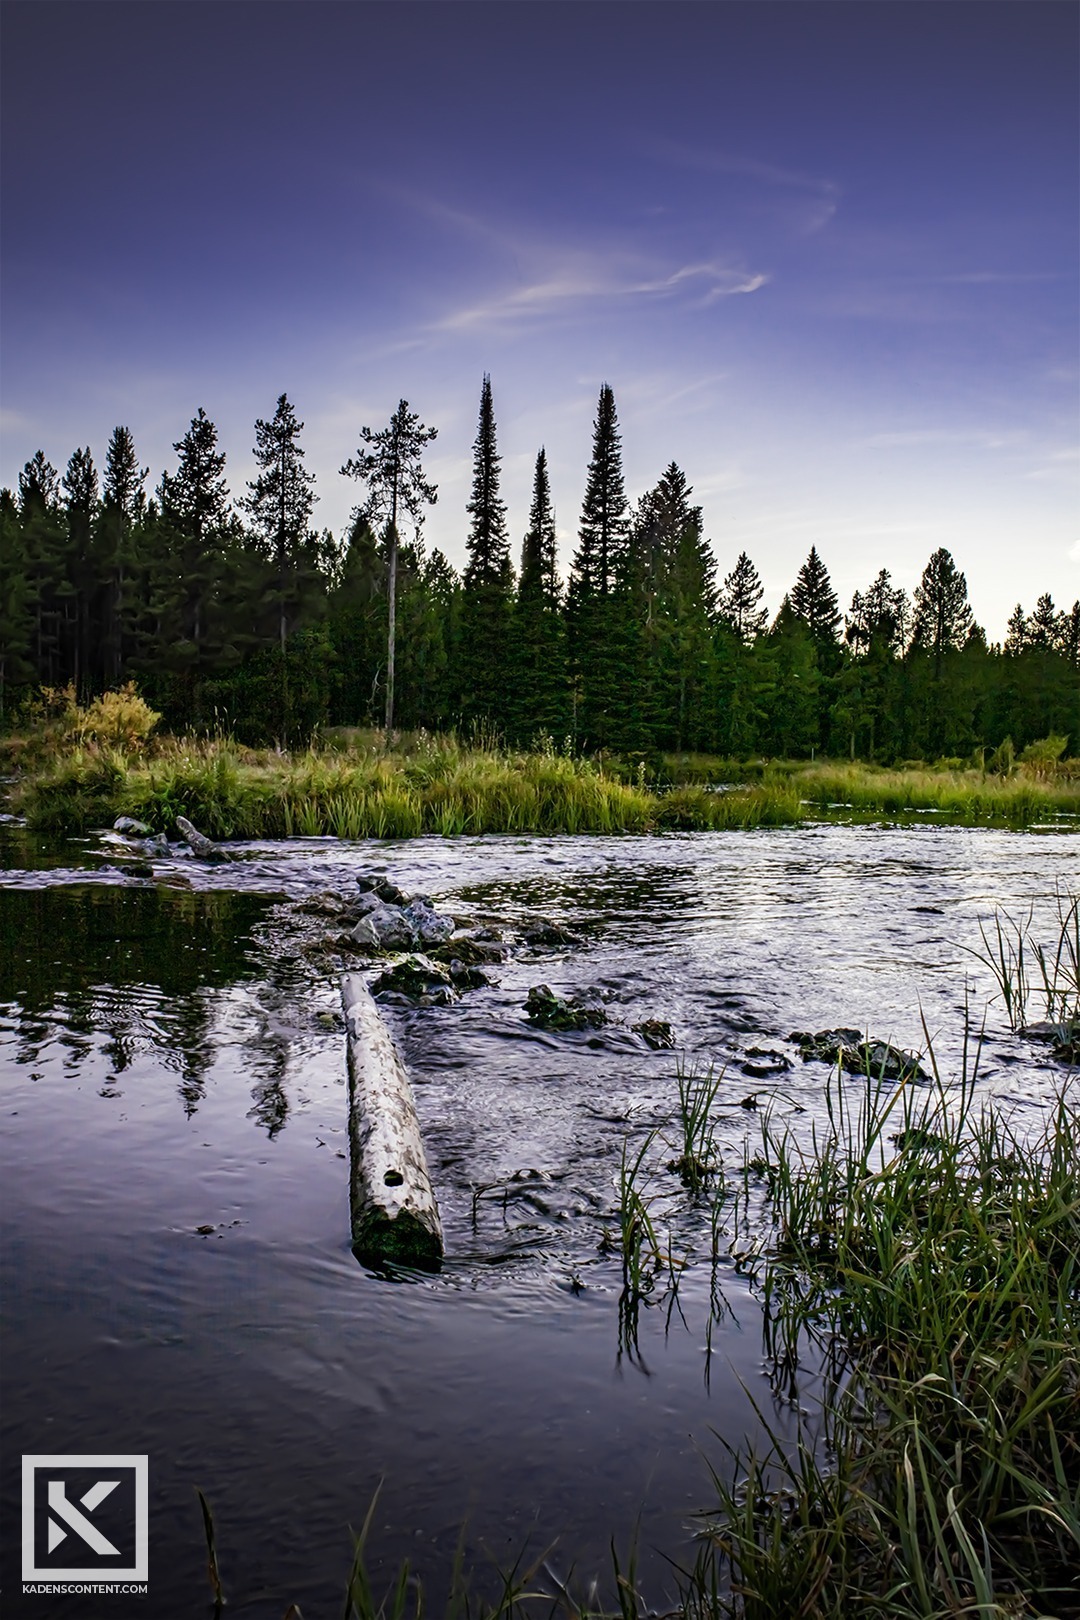
At Buffalo River, all of my photography was shot like this. This helped me later in editing to merge these three images and show more of the details of each location.
Overall, I am super happy with all the pictures I managed to capture on this excursion. I love all the beautiful scenery of the area, and I loved being able to have even captured just a glimpse of it. I encourage you to go out and try capturing some bracketed images for yourself.

FIND MORE
If you are interested in seeing more amazing Buffalo River photography, visit here.
You can find more of my Fine Art photography here.
As always, thank you so much for looking into my content. I hope that it could both interest and inspire you as you continue on in your own endeavors.
Yellowstone Photography
HOW TO CAPTURE AMAZING PHOTOGRAPHY AT YELLOWSTONE NATIONAL PARK
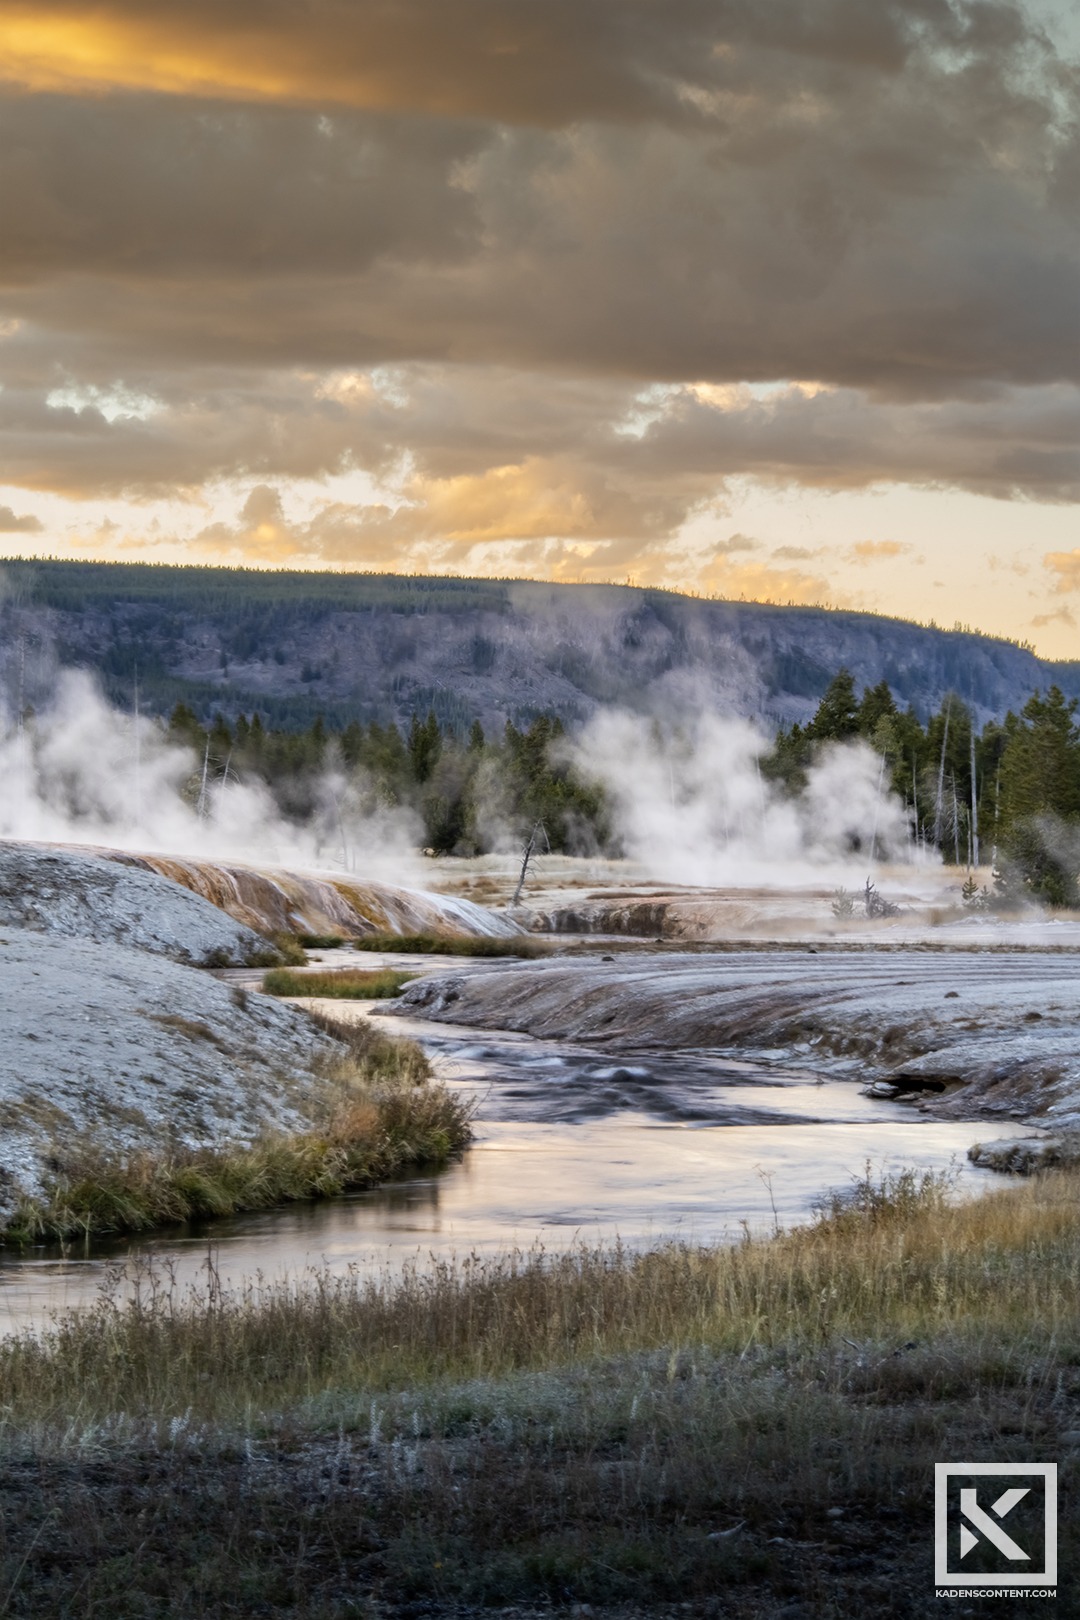
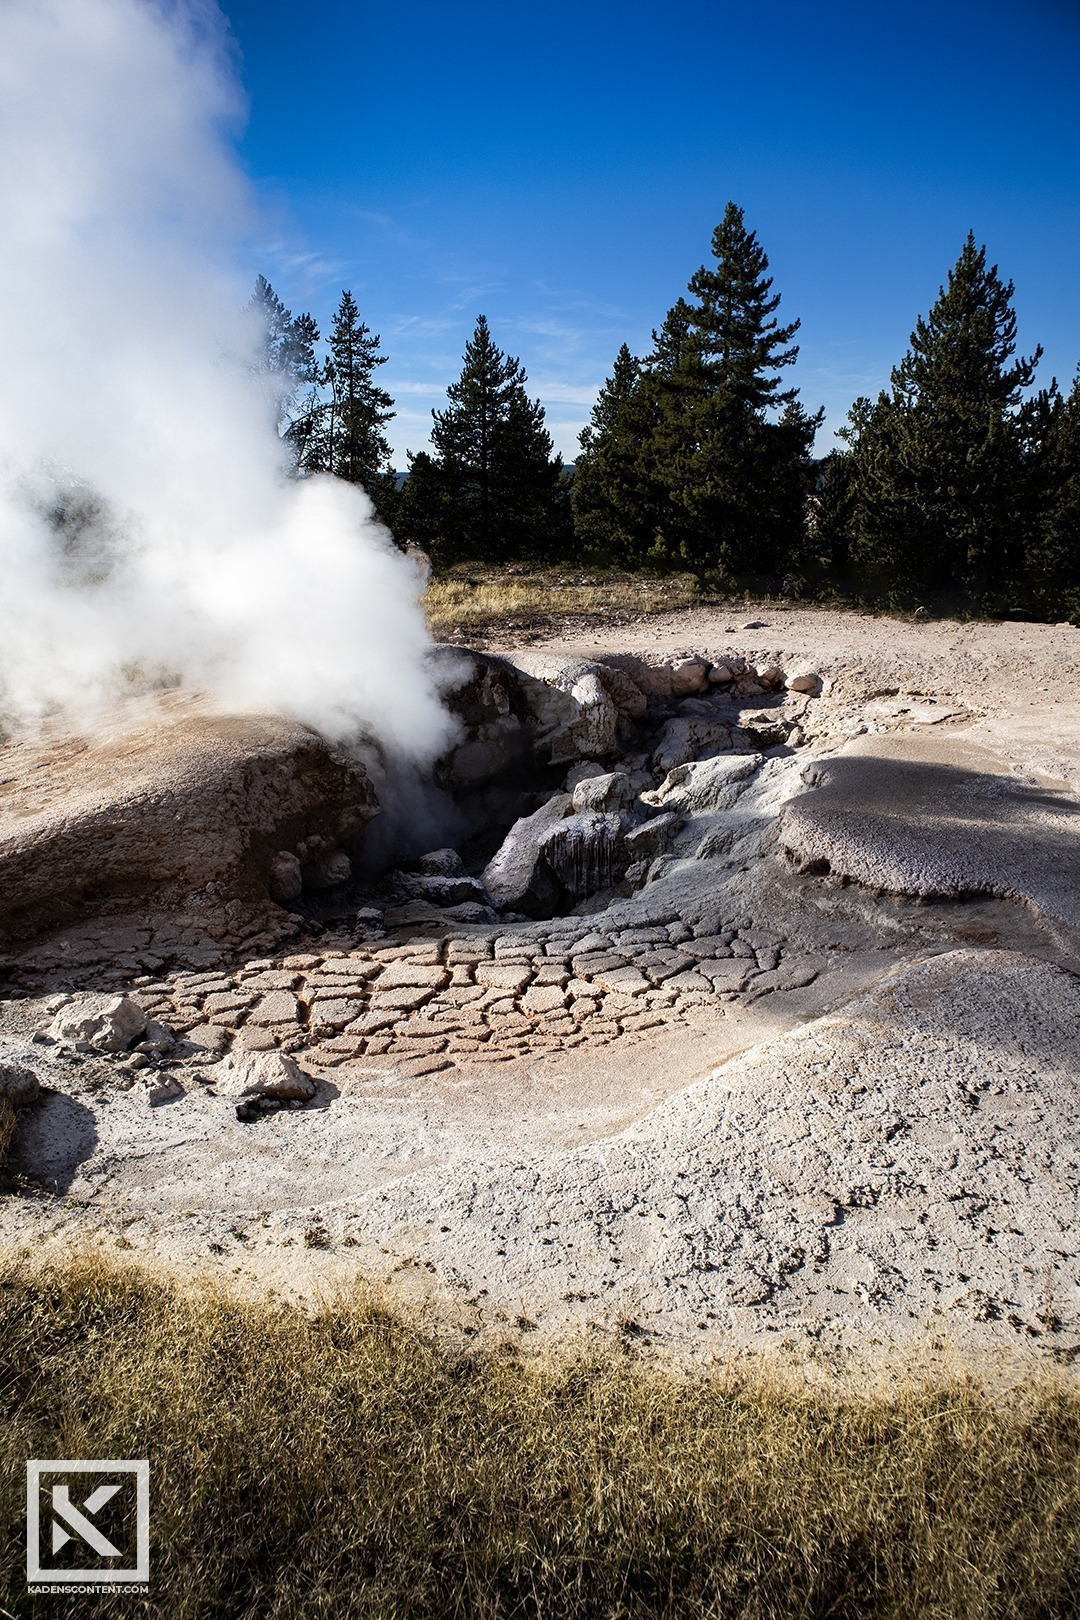
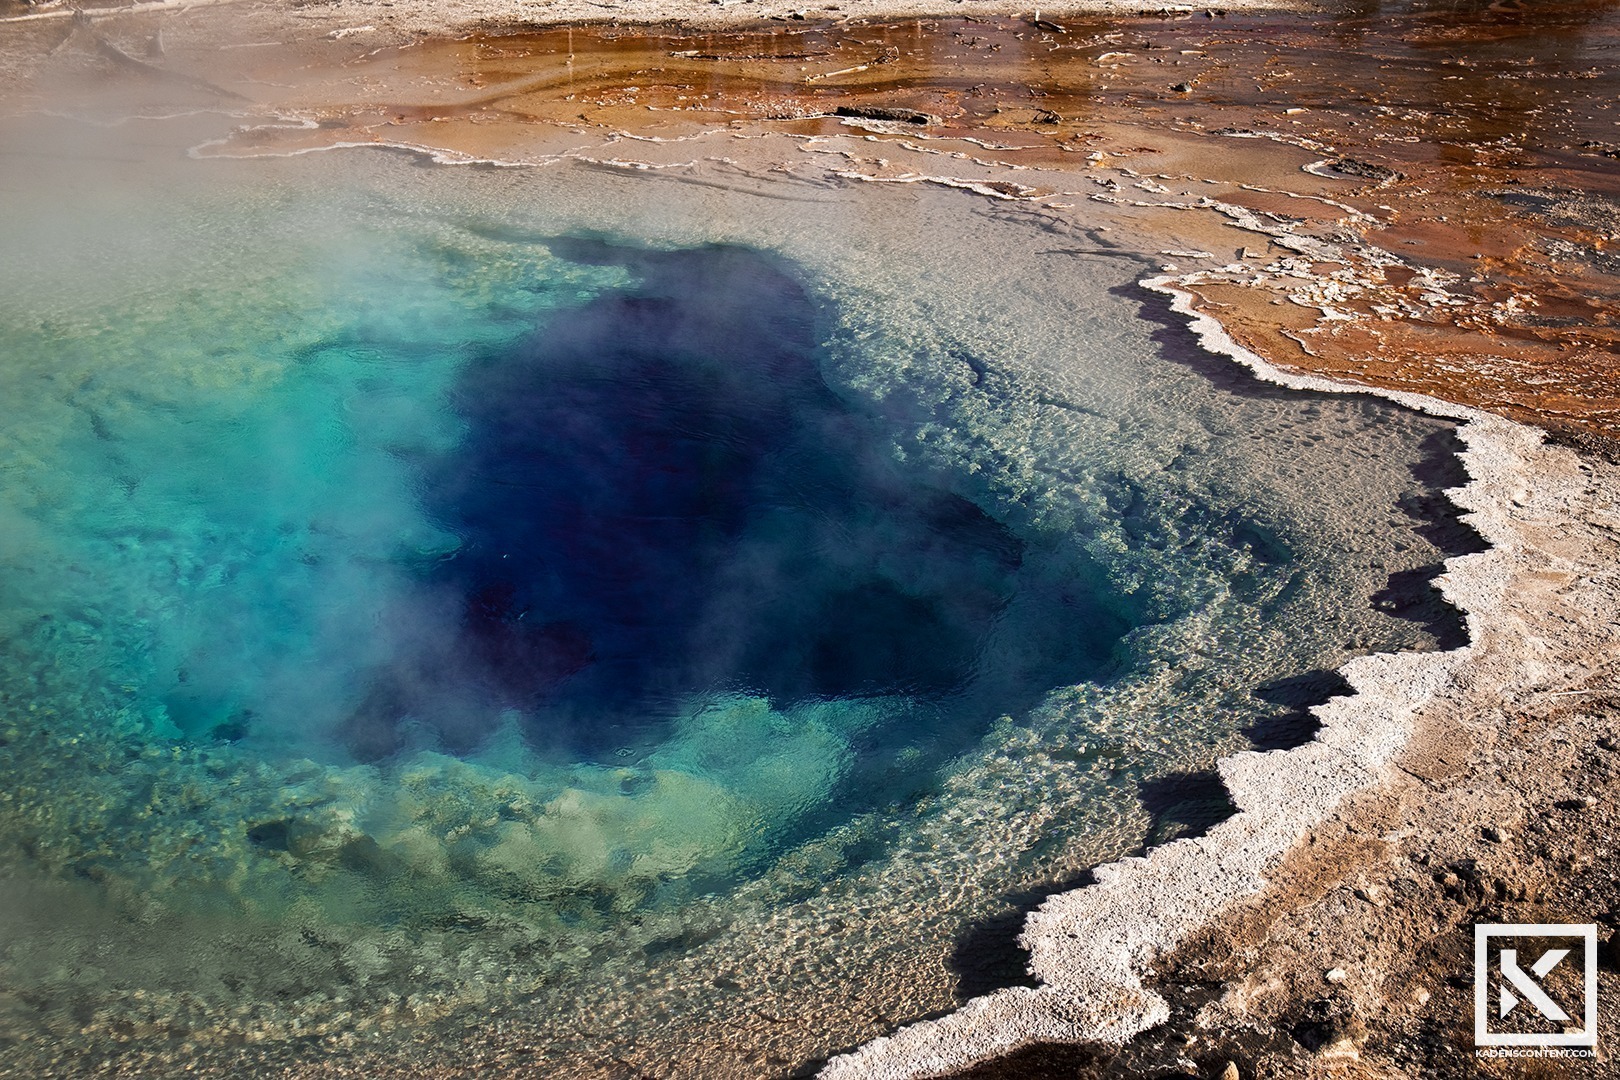
Several other photographers and I went on a full-day photography excursion to Yellowstone National Park. Though I was super drained by the end of it, I was extremely happy with the amazing photos I was able to capture along the way. In the end, I managed to capture hundreds of different shots of Yellowstone’s various wildlife, landscapes, and nature. I had a ton of fun, and I am super excited about what I managed to capture on my camera.
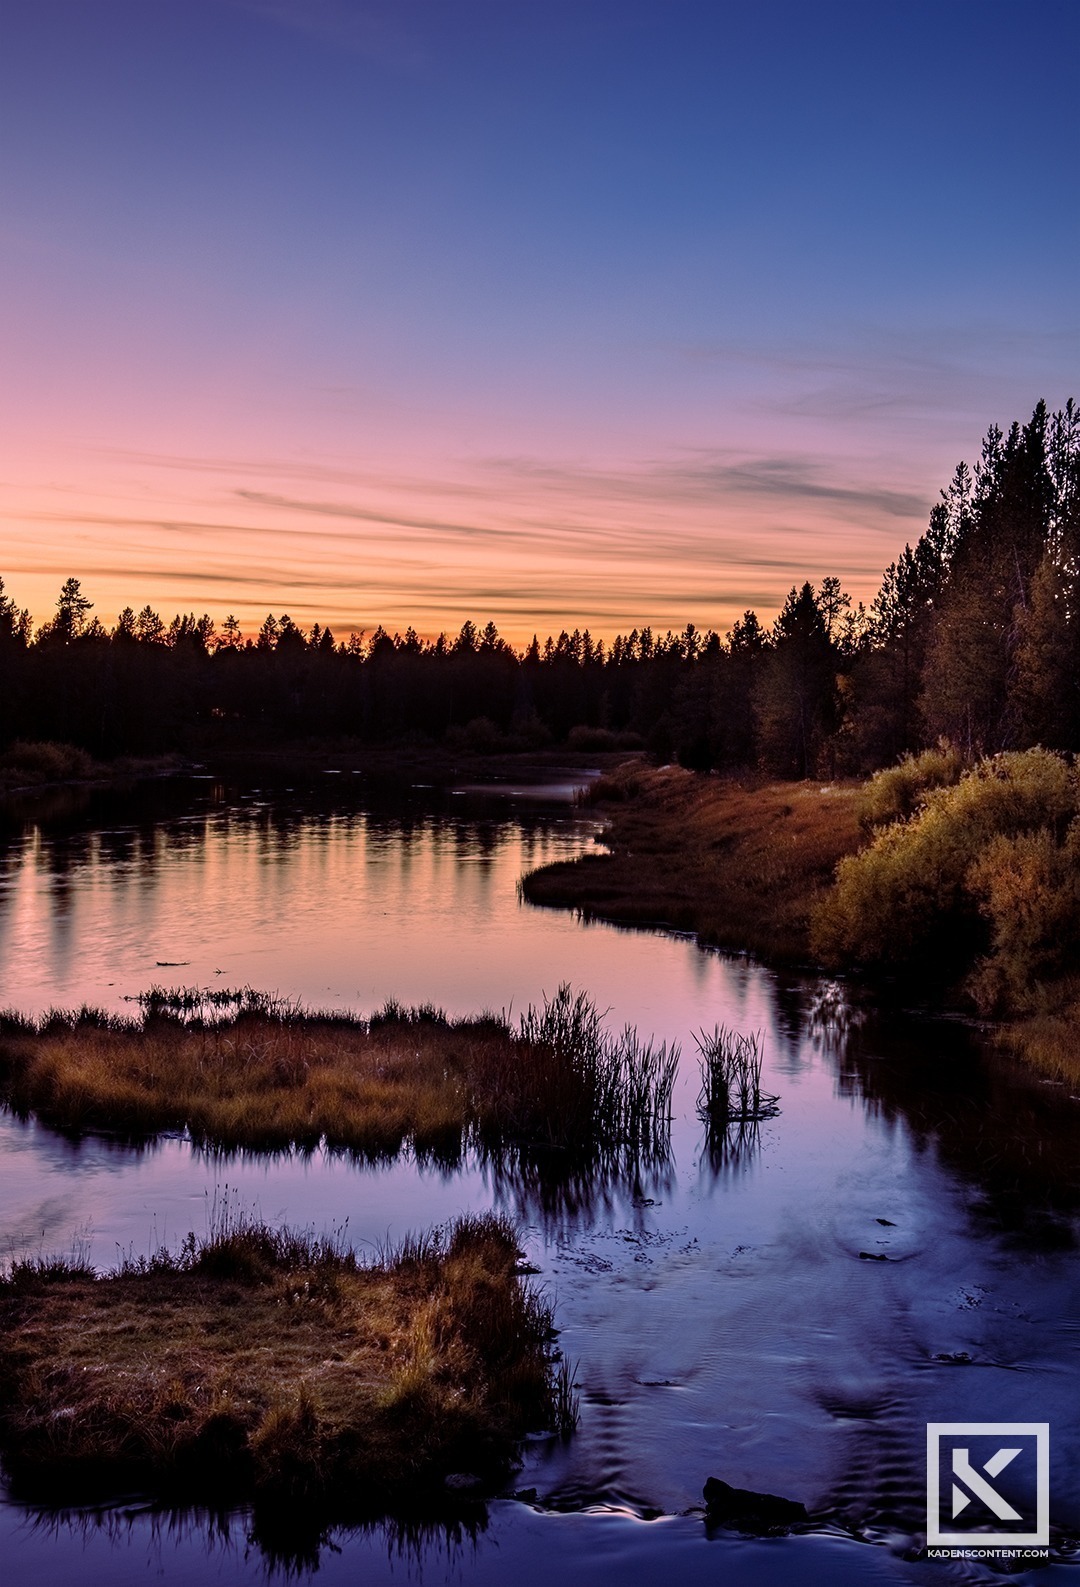
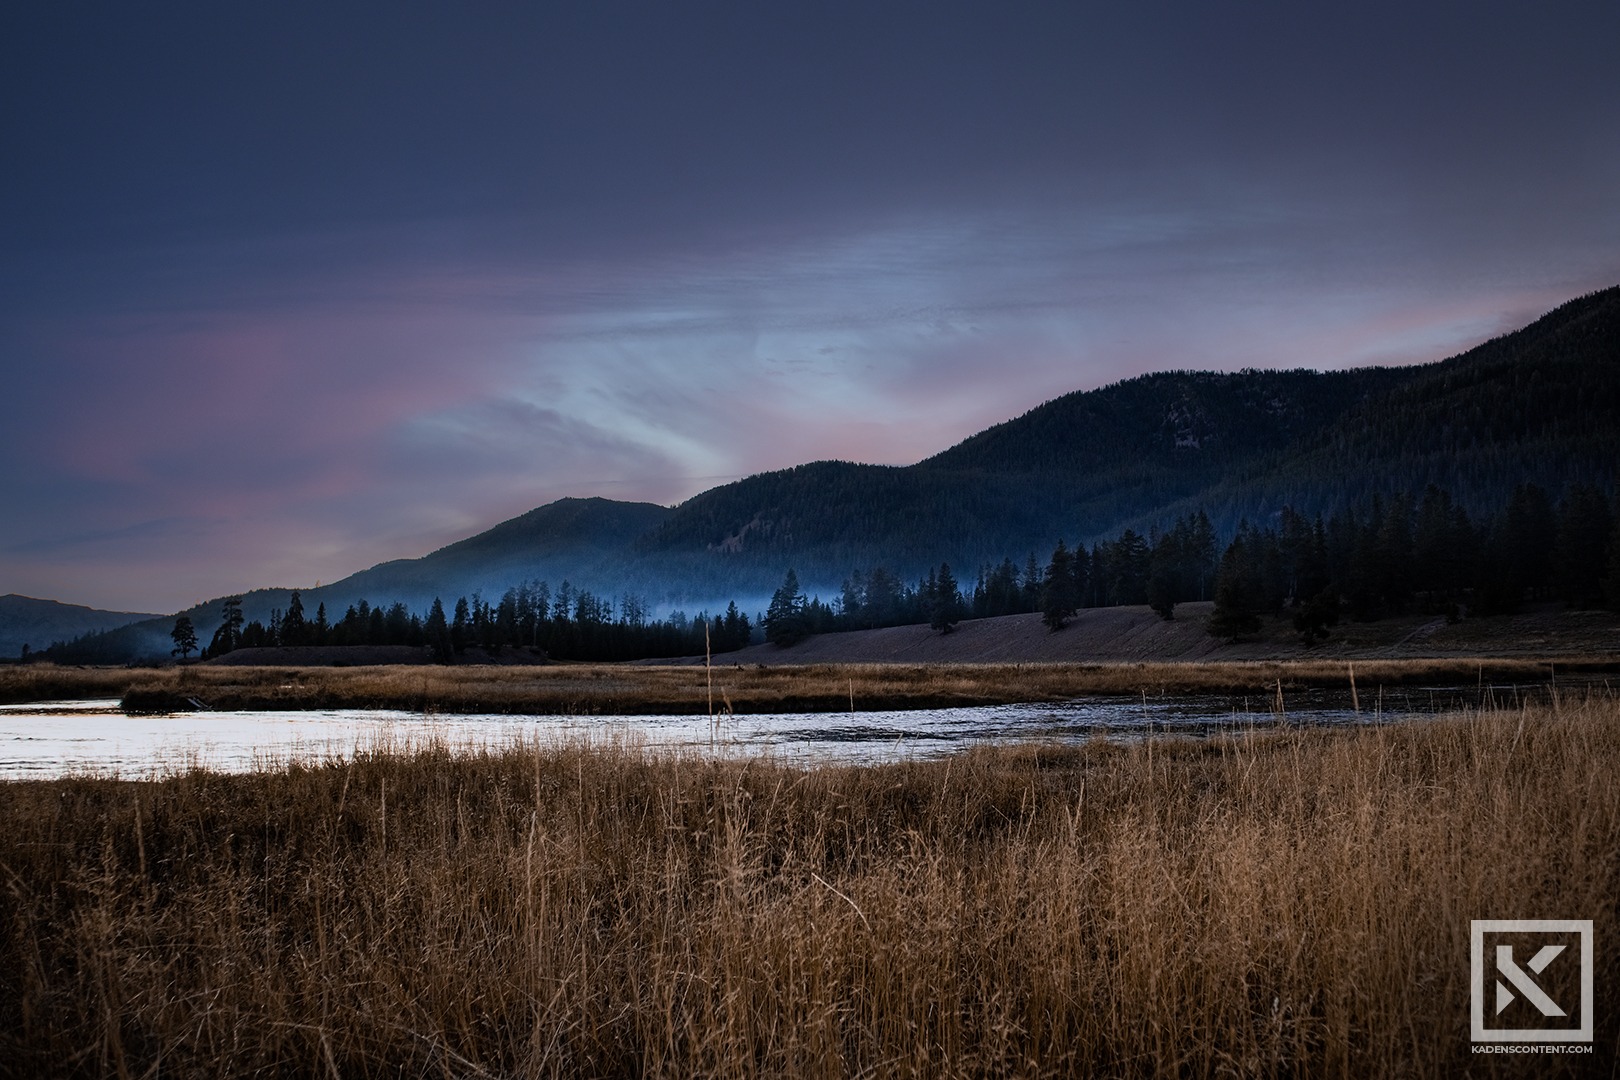
Yellowstone National Park is filled with so much amazing scenery that can help you boost your photography skills. One key thing to apply to your photography travels is good timing. Our group had to head out to locations early before sunrise and we ended up staying out well-passed sunset. During these times of golden hour and blue hour are when outdoor lighting is best.
CAPTURING AMAZING YELLOWSTONE PHOTOGRAPHY
Some of my favorite shots were captured during sunrise and sunset. At these hours, I would go out with my tripod and find the angles that I wanted for my landscape shots. The sky would look amazing, so I would try my best to include it in the composition of my shot. Next comes the importance of camera settings.
It was vital to get your camera settings correct for the early morning and late night photography shoots at Yellowstone. The settings I would go to for the shots I got were a low ISO and a high aperture. I would set my ISO to 100. If I could go lower in my camera settings, I would. Next, I would set the aperture to F16-22. This would give me the largest focus of the entire landscape shot.
When it comes to how you set up your shutter speed, it depends on the light of the scene. Some shots might be 1/60 while others may need up to 4 seconds. Keep practicing and you will find the right balance.
Overall, the experience was amazing. I highly recommend that you go out and try Yellowstone photography for yourself.


FIND MORE
If you are looking for more amazing Yellowstone photography, check out some of the work of Tom Murphy.
You can find more of my Fine Art photography here.